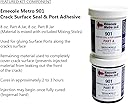
Brand | Emecole Metro |
Compatible Material | Concrete |
Water Resistance Level | Waterproof |
Item Form | Foam |
UPC | 616983547243 |
Unit Count | 1.00 Kit |
Style | Compact |
Surface Recommendation | Wall |
Manufacturer | Emecole Metro LLC |
Part Number | 02900006000 |
Is Discontinued By Manufacturer | No |
Item Package Quantity | 1 |
Batteries Included? | No |
Batteries Required? | No |
M**Y
Excellent kit. Order more than you think you need.
I have purchased this foam kit several times and used it with excellent results. The foam does the job in stopping leaks. The kit comes with 12 injection ports which cover an 8-foot length when spaced at 8-inch intervals. The two-part epoxy used to attach the ports and cover the surface of the crack becomes tacky in under 15-minutes and hardens, ready for foam injection, in less than an hour. Be sure to lather on plenty of epoxy, especially when attaching the ports, to ensure the ports do not pop off and that there are no pinhole leaks when foam is applied. Water is injected into the ports prior to the foam. A squeeze bottle is provided in the kit, but I use a garden sprayer under pressure. That serves to moisturize the entire crack, needed for foam activation, and also reveals any pinholes in the epoxy. The main difference between this kit and others, IMO, is the plastic hose which connects the foam mixing nozzle with the injection ports. The connections at both ends are solid. When one tube is emptied, it is easy to clamp off the hose, unscrew the mixing nozzle and attach a new tube to the existing nozzle. No need to prime a new mixing nozzle.Three recommendations for first-time users: 1) Use a decent heavy-duty caulking gun with a good thrust ratio. Not one of those cheapies where the handle bends easily. The foam dispenses as a thin liquid, so viscosity a not the problem, but a little pressure is needed to insure the liquid is pushed into the crack higher than the level of the port. 2) Tear off the paper around the top of the foam caulk tube. Doing this makes it easy to see the position of the plunger and determine when the tube is empty. 3) Filling the crack will require more foam than it appears. Order more than you think you need. I assume that I will need one tube per 24-inch length of crack. Better to have some left over than run out in the middle of the job.
D**D
Well engineered solution
The system seems to work very well. I had an ~8 foot crack through the wall of my basement. Bottom was hairline thickness, top was a bit bigger than 1/8". The crack would seep water on occasion and needed to be fixed prior to finishing the basement. The kit is very complete, I needed nothing outside of what was provided. For my case I had plenty of the foam material, one of my tubes went unused. I used the epoxy on both sides of the wall to keep material from overflowing outside. I left a small gap in the outside material to test if I was getting full penetration with the filler - I did, there was foam coming through on the outside.We had soaking rain on top of snow pack not long after I did the fix, there was no leakage through the repair.I highly recommend the system. The process of sealing cracks is very straightforward. Looks like the patch is holding. The videos explain the process well.
N**.
This product works well and is fairly easy to use
This product works well and is fairly easy to use. I needed to repair an 8-foot tall crack in my concrete basement, and this kit got me nearly the entire way there. A few observations/suggestions:First, the big one: the crack needs to be sealed on both sides to keep the urethane inside the wall to foam up and cure. Obvious, I know. The part where I messed up is that I thought that the crack was completely under ground level on the outside of the house - turns out that there was ~4-6" above ground. This meant that when I injected near the top of the crack, the urethane simply flowed outside. The crack is sealed to my satisfaction, but if I'd checked the outside more thoroughly, I'd've sealed up the outside of the crack and made sure that the urethane reached all the way to the top. As it is, I have about 4" open crack at the very top, and a small pile of cured urethane on the outside of the house. There's plenty of epoxy to have sealed the outside of the house, but even just piling some dirt and tamping it down should work, since it's a very low pressure injection.Now the minor notes:1. As others have said, mix the sealing epoxy in very small batches. I did like ~2 tablespoons of each part, mix, apply, repeat.2. I had nearly 1/2 the epoxy left over - don't worry about over-using it.3. Seriously, be very, very thorough when applying the outer seal. Small leaks are annoying, large ones could be a serious problem.4. Wear clothes you don't care about, and wear the gloves. Having extra gloves around is always a good idea.5. Relying entirely on the included drop cloth is...unwise. Urethane WILL flow out of the ports, and you'll probably get epoxy on your (gloved) hands.
Trustpilot
1 month ago
1 week ago