🎞️ Capture the Past, Enhance the Future!
The Plustek OpticFilm 8200i SE is a high-performance 35mm film and slide scanner that delivers exceptional 7200 dpi resolution and 48-bit color depth. With integrated infrared dust and scratch removal, it ensures your images are pristine without the need for manual retouching. Compatible with both Mac and PC, this scanner comes bundled with powerful software, making it the perfect tool for preserving and enhancing your cherished memories.
Item Weight | 1600 Grams |
Item Dimensions D x W x H | 4.72"D x 10.71"W x 4.69"H |
Minimum System Requirements | Windows 7 |
Color Depth | 48 Bits |
Connection Type | USB |
Resolution | 7200 |
Supported Media Type | Negatives, Slide, Photo |
Scanner Type | Photo |
K**H
Excellent for the money, though a bit slow to scan
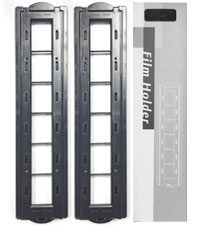
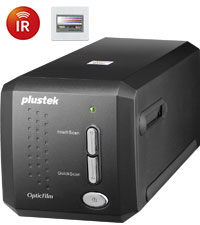
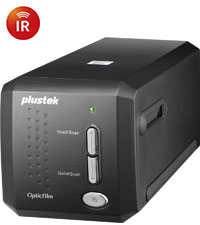
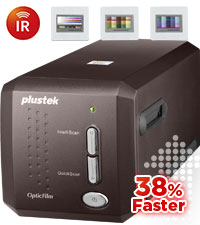
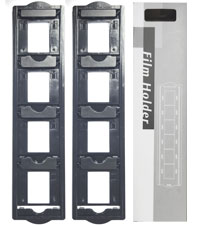
I've done a few hundred slides and negatives with this unit and the quality of the scans and the ease of use are really great. The SilverFast software is a nice bonus, but needs simpler documentation to use. First, there is no need to use most of these features if you have a photo editing software you like better, like Photoshop. The editing you can do in post (once scanned) should probably be some in some other software. Just use SilverFast to get the quality scan and do the rest elsewhere, IMO of course.1 - Set the scan dimensions you want, name (SilverFast automatically increments the name, it will not overwrite), ppi, etc. The Format is a bit odd as it sometimes looks like it is giving you less resolution at a larger size, but it really isn't. My suggestion is to start at 3600ppi, unless you know you will need higher or lower resolution. Of course the speed changes a lot when you change the ppi. You also choose the file format here. I would have liked to see PNG format, but the JPEG quality options make this better than it would normally be. The other options (TIFF, etc) will make very large files, which is ok for a few scans, otherwise it would just be too much data.2 - Set the proper Transparency/Negative options for what you are scanning. I would suggest setting the Frame to fullscreen. You can crop later.3 - Turn iSRD and SRDx on, but turn off the 1:1 (Exact Preview). If you want to verify your SRDx settings, you can turn on the 1:1 after Prescan, or leave 1:1 on if you really want to adjust the SRDx settings for each scan. But normally a good setting can be found for all scans ( I set the detection to 1 and Tile Size to 3) and save this step. Also, "Bright Defects" is normally used for negatives and "Dark Defects" is normally set for slides. If you can get rid of 90% of defects without harming the image, consider it close enough. I leave iSRD set to Automatic, and it does a really great job in most cases. NOTE: iSRD can't seem to be used for B&W negatives or crazy things can happen.4 - Turn all the other options (Densitometer, Picture Settings, NegaFix, and Unsharp Masking) to Auto.5 - Put the film or slide in the middle position in the scanner, and Push Prescan at the top and wait for the prescan image to show up (30 seconds or so) If this part takes longer than 30 seconds, the magnifying glass is likely set to 100%, which is useful for some things but generally not necessary for the Prescan. Push the magnifying glass to change to full view or turn off 1:1 display on SRDx or iSRD.6 - Picture Settings and NegaFix can be useful, but *only* in the cases where part of the image is overblown in a spotlight or some area is too bright or too dark. In these cases you can adjust the Midtone, Contrast, Exposure, and Tolerance. This can normally not be fixed afterward, which is why you'd want to do it prior to scanning. Generally SilverFast does a good job with auto brightness and I have only used these other options on a few occasions.7 - Push the Scan button to do the final scan. If iSRD and SRDx functions are being used, the scan will take about 3 minutes. Otherwise it will take only 30 seconds, but the results will almost always be worse.It may seem like a lot but once you get going, you see that very few options need changing. It's mostly just the Prescan button, the Scan button, and sometimes the iSRD and SRDx buttons for dust/scratches. The results have been really impressive for both transparencies and negatives.Note: There is also a Multi-Exposure button that is either on or off. The idea is that it does a second scan (adding to the overall scan time) to get some details that could be lost in the darker background. However, I have seen little to no effect, at least on what I am scanning. YMMV.UPDATE REGARDING HDR:SilverFast includes the ability to do some sort of HDR or High Dynamic Range. The idea being, it takes multiple scans in different ways (multiple passes at different brightness levels, hard to explain) to get all available light information and store it all in 1 file. SilverFast calls this HDR RAW or HDRi RAW.An example would be a dark stage with a spotlight. Without HDR, there would simply be no way to get all the details in the spotlight, and also the details in the dark. If scanning time and disk space are not a concern, this is going to capture the most information from the scan, with 500MB per file.I'm not really sure the advantage or difference between HDR and HDRi, or why they have both options, maybe to save time/filesize. If you're going the HDR route, I would suggest the 64bit HDRi for color and 32bit HDRi for B&W, which are the maximums. You will then have a file with all information capturable by this scanner.Then the RAW TIFF files can be taken into Photoshop, and with the HDR Toning feature, you can literally extract the details from both the bright and dark areas, it is really amazing.However, the other thing you may notice as a downside (other than filesize and scanning time) is that iSRD and SRDx functions are off. Meaning you get all available information from the scans, but that includes the scratches and imperfections as well. These will have to be manually cleaned after scanning, which is not too hard to do with the Photoshop "Healing" tool.So if the original is in good shape, or has challenging lighting, and time/filesize are not issues, go with HDRi. If the original has lots of challenging damage, or you don't want to spend as much time scanning/cleaning after, go with the 7 steps above.
J**Z
Best bang for the buck for most users.
Setup was easy, I suggest downloading the driver from the Plustek site. The driver installation window didn't close or even say it was finished, but it was installed correctly. I opted for the SE package (rather than the AI) because I don't have a need for the additional calibration. I believe the hardware is the same for either bundle, so you're not sacrificing any specs by going with the SE. :)Most reviews say that the included SilverFast software is hard to use and may have installation problems. VueScan is one of the user-recommended programs, and I gave it a trial first. It's easy to use and as powerful as you'd like in terms of image adjustments when scanning (and will work with your other installed scanners.) I explored SilverFast further via its instruction booklet and online help videos, and while it's very capable, it's also very daunting. If you're scanning a few negatives and want to do a lot of fine-tuning up-front, it may be okay. But my intention is to capture 300+ rolls of film with a minimum of manipulation, and worry about retouching later as needed (knowing that only a small percentage would actually require revisiting.) So VueScan it is, and while it costs $90-100 on top of the scanner, it saves a lot of time and I feel is worth the investment.The Plustek's infrared dust/scratch removal is very helpful, but not perfect. It only gets you about 75% there (see photo comparison) but the little extra scanning time up-front will save a LOT of time (and frusration) retouching later. If you're not an absolute perfectionist, you will find the existing removal suitable, especially for the web or printing at home (home printer ink 'blurs' just a little bit and will disguise most remaining blems.) But if you're a perfectionist like I am, it's easy enough to spend an few minutes later to make each image 100%. :)Speed depends on the quality you demand. I am scanning color film with full 7200dpi resolution, using two "passes" and "heavy" infrared cleaning, and a strip of four frames takes just over 27 minutes from start (loading the negative strip into the carrier and scanning the frames) to finish (removing strip from carrier.) So it's easy to budget my time: a roll of 24 frames takes 2 hrs 45 min, and a roll of 36 frames takes about 4 hours. You can save a few minutes per frame by doing only one pass, and skipping the infrared cleaning, but I highly recommend the latter. When it comes to retouching them, you'll wish you'd spent that extra minute up-front. B&W film (one pass and no infrared cleaning available) scans considerably faster.Some reviews said the scanner is noisy or loud, but it's no louder than my Epson flatbed (which is quietish.) Other reviews suggested that the scanner sometimes crashes with full 7200dpi scanning, but with almost 20 rolls under my belt it hasn't happened yet using VueScan.The carrier was reoprted to break in a few cases, and it did start out hard to open and close, but it got a little easier over several rolls and no problems... yet. It might be smart to order an extra carrier or two, which covers you if one does break, and also improves your workflow as you load the next set of negs while the other set is in the scanner. I also saw a report of the frames always being skewed, and there's a little 'play' in the carrier, so it can happen. Easy to fix if needed, simply shift the strip. Same with the frame dividing slats that don't always match with the spacing on the film. That's a camera issue, and easily fixed by nudging the strip as needed.This scanner is manual feed - you advance each frame by sliding the carrier with click-stops, so there's no guesswork about lining-up the frames. I don't mind going frame-by-frame, since there's usually some adjustment that needs to be made to each frame anyway (density, crop, etc.)None of the scanners I compared in a wide price range got perfect reviews. The 8200i had the fewest objections, and I'm happy with it. It's not super-crisp... the film grain is a little soft without sharpening, but it can be sharpened afterwards and the grain 'pops' better. I would recommend it to 99% of the people who want to preserve their memories.
T**N
Great experience save for one thing
So far, so good. It reminds me of the Polaroid scanner I had years ago.1. It was very easy to connect--but I had to use a Blu-Ray/DVD player I bought several years ago to install the software.2. The resolution on this thing is good enough for anything I could ever do with it.3. Scan times are not so bad... even one at a time.4 It works.One star short on this review because of the DVD
G**N
Don’t waste your time and money if you already have Silverfast AI or above
Received this today and installation has been a complete nightmare. I already owned Silverfast Ai but for some reason it forced me to use the downgraded se version to even recognize the scanner. At first I thought no big deal. Bit of a pain but I’ll do that and then just enter my serial number for my Ai version and everything will be fine. No such luck. I’ve tried everything and no matter what I do it won’t upgrade back to my Ai version which I already paid $300 for and the only way it’ll do it is if I pay again. No I don’t think I will. This has rendered this scanner useless to me and I will be sending it back and using Vuescan insteadUpdate : I tried contacting plustek without success. I was able to contact Silverfast and explained to them I’m not longer using my old scanner because I upgraded to this one and asked them to transfer my AI version to this scanner. They flat out refused. Said I’d have to purchase again. Keep in mind I paid them $300 only a month ago. Customer service for both companies I have found to be non existent. Would never do business with either of them or recommend them
Trustpilot
2 months ago
2 months ago