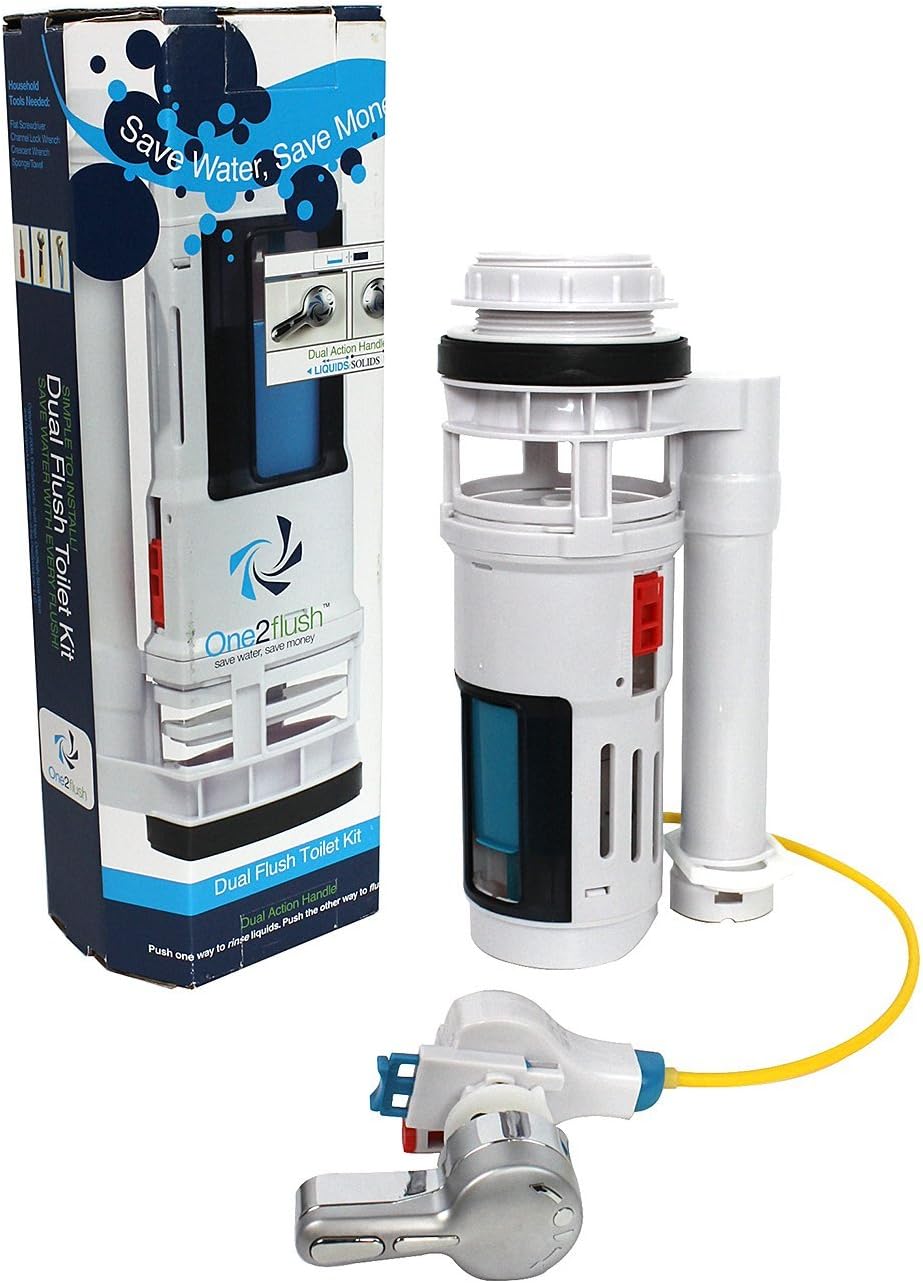

High Efficiency Toilet Kit - One2Flush Conversion Kit Reduces Water Usage By 40% With Unique Dual Flush System
Product ID: 9163971
💧40% water savings
🚽Dual flush system
🏊♂️Pool equivalent savings
🚽 Flush smarter, not harder!
| Manufacturer | One2Flush |
| Part Number | ODFBP-L |
| Item Weight | 1.2 pounds |
| Package Dimensions | 13.4 x 4.9 x 4.1 inches |
| Item Package Quantity | 1 |
T**R
Save water, save money, easy install
A little background - I'm a single woman and a home owner. I purchased the ONE2FLUSH conversion kit to save water and money (my water is metered). The price was good as were the reviews. Initially I planned to ask my stepdad or brother for help installing this, but eventually decided that as a home owner I should learn how to deal with toilets.So I installed the entire conversion kit by myself - no help from anyone during any part of the installation. And it works properly :) I mention that because it seems some people have some difficulty with installing this kit and I want to make clear that you don't have to be a plumber or DIY god to properly install this.The installation did take a little longer than 30 minutes for me. Like others have noted, after removing the tank a couple of the old plastic nuts were frozen. The supply nut came off with a wrench after a few minutes of coaxing. The flush valve nut was a different story. I eventually used a hack saw to gently cut through the plastic down to the porcelain a few times (like I was slicing pie). The nut was still frozen, so I used pliers to gently loosen the plastic until chucks started coming off and the nut finally gave way. This was by far the longest step in the process, but obviously no the fault of Being Water. If it wasn't 10:30 pm on a Saturday night, I would have gone to a big box store and bought a plumbers wrench, but that's the price I pay for taking my toilet tank off at 10 pm. You may want to have a wrench that can handle a 3" plastic nut before beginning your own installation. You can always return it if you don't use it.Once the old components were off, installation was a snap. I had watched the installation videos on Being Water's website, so I knew what to expect. I took some extra time to make sure I seated the tank correctly - I'm still a little paranoid that I didn't, but no leaks so I think I'm good. I also took extra time and flushes to correctly calibrate the system for my tank. I was able to set the full flush to use the lowest amount of water and the half flush uses just under the "half" setting. As a bonus, I've got the fill valve set very low because the bowl naturally refills on the flush.I do plan on getting another kit for the other toilet in my house and I expect installation will go quite a bit faster. I'm very happy with this purchase - the quality of the product, the shipping, the online instructions and videos, and the output of the product.Here are my tips if you're planning on buying and installing one of Being Water's half flush kits: *Read the instructions and watch the videos online before installation. 98% of the questions I had were answered by resources provided by Being Water. *Read some reviews on Amazon. There's a number of really helpful reviews that answered the other 2% of questions that I had about installation. *Get a plumbers wrench that can handle the old flush valve nut. You can always return it if you don't need to use it. Having it while installing is a much better option than having to run out to the store, or busting out the hack saw. *Lay out plenty of old towels around your toilet before you begin. There will be some water, there will be some rust, there may be some mildew and other substances you can't identify. Better to have that on a towel than all over you and various fixtures in your bathroom. *If you're having issues with the installation or calibration, read the instructions again or look for a review on Amazon where the other user had the same issue. Seriously. I'm not kidding when I say that solved 100% of the issues/questions I had. If you still can't find the answer, try contacting the company - other reviews have said they have very good phone support (although I didn't need it).
P**S
Gasket failed in 1.5 years, manufacturer out of business
The plunger that slides down from the cylindrical main body of the unit and seals water into the tank has an overly-complicated design where two gaskets must make water-proof seals with 3 different rings. This design is much more prone to failure than a typical flap that only seals against one ring, and mine started leaking after 1.5 years. One of the two gaskets is positioned where it is bound to fail early and the need for that gasket could have been eliminated with a single-piece plunger with only one seal and a hook at the top to pull it up, so I believe the manufacturer intends One2Flush to fail within 2 years and hopes people will keep buying new ones. I guess that idea backfired because the maker of One2Flush, known as One2Products, is now out of business.I contacted Being Water, the company that originally sold me One2Flush and whose name and phone is all over the installation instructions. After waiting a few days and emailing them twice, their response was "We haven't marketed the One2flush since the end of 2012. We kept spare parts on hand til the end of 2013. One2flush questions should be directed towards One2products." I found no mention of One2Products in any of the documentation I had, so I looked up One2products and found their web site domain was gone and there wasn't even an Internet Archive version of it which usually means it wasn't up for long or had very limited traffic. Better Business Bureau had no rating for the company and said they believed One2Products was out of business. They had a phone number listed, (616) 502-4928, which I called and spoke to someone who said they were indeed out of business and this new person is just using their office space. He spent a couple minutes looking for possible contact info for the guy that originally ran One2products but couldn't find anything. So if you buy this, don't expect to ever find parts or support from the manufacturer, cause they're gone.The next few paragraphs describe how I tried to fix One2Flush but feel free to skip if you don't care. Bottom line is I don't think it's possible to fix permanently and one of its gaskets will fail every year or two, wasting a lot of water until you notice it's failed and replace it.The One2Flush currently pictured on Amazon looks very different from the one I bought 1.5 years ago, so maybe it's got an improved design? I wouldn't count on it, but who knows. On my version, the plunger has a hard central rod that penetrates two hard plastic discs with a soft white gasket between them. There are 6 clips on one of the plastic discs that hold it to the end of the rod and the gasket can't be removed without removing those 6 clips. Not wanting to risk breaking these clips, I tried smearing Oatey's plumber's grease from Home Depot in 3 different places - every place I could reach - but if anything the leak only got worse. The Oatey tube doesn't have any warnings but the online info says not to use it on rubber or synthetic gaskets. I'm not sure what the gaskets are made of in One2Flush so I'm not sure if this grease is safe for long term contact. To prove the leak was between the plunger and the drain, I bought a 2.5" diameter drain stopper at Home Depot. This appears to be the same stopper. It says it's 1.5" because that's the size of drain it's meant to plug, but its outer edge is 2.5" diameter and fits perfectly in the drain ring for the One2Flush. You can't use a stopper over about 2.75" because of the framework around the drain ring that holds the main body of One2Flush. Anyway, with this stopper carefully centered and held down with a finger until the water level was high enough to hold it in place, I saw no measurable drop in water level in 2 hours so I knew the leak was in the One2Flush plunger.So I had to risk breaking the clips on the plunger rod. I was able to twist the clips open with a small flathead screwdriver one at a time, wedging a thin piece of sheet metal between rod end and clip to keep the clip open until I had the sheet metal bent into a cylinder and holding every clip open. The plastic discs and gasket can then be pulled off the rod. The rod and one of the discs should have been formed together as a single piece, or they should have been glued together (many other parts of the body are glued together, including the pipe that sits parallel to the main body, and those seals must remain waterproof as well). Instead of glue, the central rod has a thin black plastic ring gasket that seals it in the hole of one of the hard plastic discs. The disc has another raised edge that presses against the white plastic gasket to form another seal. Neither of these points of contact can be inspected or repaired without unclipping and removing the discs. I lightly coated everything with plumber's grease and snapped it all back together and it didn't seem to leak for the first day, but now I keep seeing the water level drop slightly every few hours.I took it apart again and painstakingly cleaned all the plumber's grease off by wiping it and then soaping the residue since I couldn't verify with the company if it was going to degrade the seals. Then I had to buy $8 underwater epoxy at a local hardware store (normal slow cure epoxy should also work but I wanted it to have the best chance of sealing permanently). I removed the black plastic gasket, then layered epoxy thickly between the top plastic disc and the plunger rod (I did NOT epoxy the lower plastic disc that normally seals to the black gasket because that would prevent taking it apart to replace the white gasket someday). With the epoxy still soft, I snapped the main body back into the toilet so it could rest the white gasket where it needs to seal and the epoxy would dry with the disc at the correct angle and position. 24 hours later I filled the tank with water and it leaked like a sieve. I belatedly realized that when the top disc is loose, water pressure squeezes it down against the white gasket, which squeezes down against the bottom plastic disc, which presses against the clips that hold it. By gluing the top plastic disc to the rod, it couldn't press down against the white gasket which remained loose between the two plastic discs. I was afraid something like that would happen but I had to try.So, the plunger is just a terrible design and I see no way of fixing it permanently. Instead, I cut off the epoxy I'd added (and found it cracked off the plastic fairly easily so I'm not sure how long it would have lasted anyway), then went to the local Ace hardware store and bought a 30 cent black ring gasket. They had a large selection of similar black gaskets but I couldn't find one exactly the same size as the old one, so I got one that was almost imperceptibly larger. The lower plastic disc fits around the gasket firmly instead of feeling loose as it did with the old gasket, so the leak is fixed for now. But since I don't want to be wasting water for who knows how long before I notice when it inevitably fails again, I still consider this a temporary solution. I may set an alarm to replace the 30c gasket each year but I'm not sure how many times I can bend open the six clips before they break or deform too much to hold correctly. They're already looking fairly mangled from four openings.I also found you can get a replacement white gasket from a UK company called Toiletspares with product ID TS452. I have a feeling there's a US version of the gasket somewhere but haven't kept searching since I don't think it will need to be replaced for awhile.There is absolutely no reason they couldn't have designed the plunger as a single unit with a thin gasket around the edge (I've seen single-flush canister units with that design) and a hook at the top for the rod to pull on. The black gasket is always going to fail early because water pressure is pushing against the gasket directly instead of pushing against the large surface of a hard plastic disc that squishes the white gasket down to tighten its seals. They likely intended the black gasket to fail sooner rather than later and made it difficult to replace without breaking things so most people would replace the whole unit every couple years instead of replacing the gasket, and I loathe companies that do that. You'll also be wasting water as long as this plunger is leaking, and the soft sound of water refilling the tank periodically is your only clue there's a problem - something that is likely to take a long time to notice. If the leak is slow enough, I have a feeling the sound of refilling will happen rarely and I didn't notice our leak till the water was dropping about a half inch an hour.Other than the failure-prone gaskets, the flusher works reasonably well. It's been awhile since I installed it but I don't remember anything too traumatic. One thing that was a problem is the little nozzle that shoots down into the pipe that fills the toilet bowl. The instructions call this the "bowl fill valve" and suggested that if it spatters, you can add some hose to the end of the nozzle so it shoots deeper into the pipe. I think the real problem I had was the hose kept coming unclipped from the pipe and spraying water into the tank instead of the bowl-fill pipe. So I added that length of hose and it stopped coming unclipped, but after about four months I heard soft dripping and found water was endlessly dripping from this hose after flushing. Testing showed the drip might or might not happen after each flush, and could end up being a slow drip to a slow trickle - all random. The sound of it is so soft it could have been going on and wasting water the whole four months. I contacted Being Water, and they said it could be caused by a siphon effect and that I should remove the small hose on the end of the nozzle. I did so and never noticed the siphon problem again. I also never had the hose come unclipped from the pipe again, for whatever reason. But it's very annoying that they suggest adding that hose in the instructions and then it causes a leak that wastes water and is hard to notice.The seal they give you that goes between the toilet and the tank was significantly thicker than the old seal (I think American Standard toilets often use the thicker seal) but it worked. It does cause my tank to rock a bit if you pull on the tank, but normally the tank just leans back against the wall and doesn't shift when you lean back on it, although I had to add a wedge of wood between the tank lid and the wall to accomplish that. You can buy thinner tank seals at a hardware store as well. The wedge of wood also keeps the tank lid from sliding back far enough to let the toilet seal crush the flush handle. The flush handle on One2Flush is significantly wider at the base than the handle that comes with most toilets and a lot of reviewers mention the toilet seat hits the handle.Be careful when tightening the two screws that hold the tank to the base of the toilet. I read one person over tightened the screws and cracked the tank - a mistake that can't be repaired other than replacing the tank or the toilet. Actually, I did read one person say they managed to repair a tank crack using underwater epoxy laid on saran wrap and pressed down firmly on the crack.Overall, I recommend replacing your whole toilet with a low flow model or a composting toilet instead of trying to work around One2Flush's unreliability. One2Flush does not save nearly as much water as switching to a low-flow model saves. When I made the flush a lot smaller than normal it would fail to clear all water from the bowl. Standard toilets just aren't designed to flush correctly with much less water than normal, so the One2Flush can't reduce your water use all that much in most cases. There also aren't enough adjustments - you need to shoot too much water down the bowl-fill pipe during a full flush so that water is wasted going down the drain or else you don't get enough water in the bowl during a half flush. If they provided a way to adjust the amount of water going into the bowl to different amounts for the half and full flush, you could adjust it to waste less water.
Trustpilot
2 months ago
1 week ago