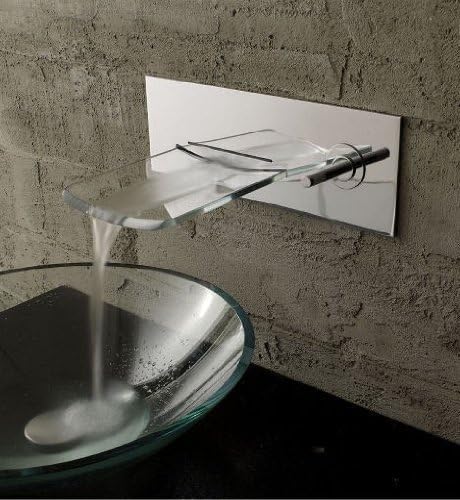
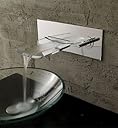
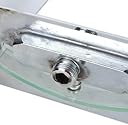
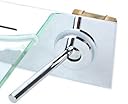
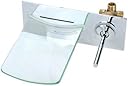
link to my pic (minus having the male to male connectors to attach the braided house line to. I am also going to make the hot and cold lines sticking down 2 feet longer to pop out of the wall inside of the cabinet, so no braided lines will be in the wall: http://i1238.photobucket.com/albums/ff483/stewfish1818/2014-07-25213950_zpsb345f7b1.jpgNote: 1/2" FNPT = The pipe thread on the 4 connections for this unit. It's what the braided faucet lines attach to.Pex will require a $20 pex tool, roughly 12-ish inches of 1/2" pex pipe any color, 8 each 1/2" ring connectors that you will crimp, and connectors listed below. This will make a solid unit with no failure points between the handle and faucet ports, and replaces the 6"-ish braided line that comes with it and has a tendency to kink a little. It also gives you a couple anchor points to mount to studs if you can open the back side of the wall up or cover above the unit with a border, to set the screws. I chose this option and left 1" of tile above the unit and was able to use a drill to set the new mount into a modified wooden bracket support system. I then covered it with Wonderboard, a decorative tile border, and then a custom mirror above the tile. Understand that this is not a "body" that you can mount in the wall, then tile over (with a hole in the tile) and then screw the valve into the body as would be the case with all shower type valves/parts for example.You have three options:1.) mount the braided faucet lines from your wall valves up to this unit and then screw the unit into the wall. There is one anchor hole in the front under the waterfall. Which I think would be okay as a single mounting plate given the thickness of the faceplate.2.) You could drill 4 holes in all 4 corners as well.Either choice I would be using lag bolt screw caps to cover over the hardware and have a polished stainless cover over the lag screws. Google screw cap covers for examples, some are very professional looking and not just the old style flattened dome.3a.) Mount the unit with between two tiles that slide in from the side. ( I had to choose this based on the fact that the tiles where smaller than necessary to cover the whole unit when centered.3b.)Mount the tile with the body slid through it and place everything at once with thinset on the tile then put a screw in from above which I did using a 4 inch extension as mentioned above. slide the unit in and secure it from the back side or from above reaching down to screw in using the drop ear connector screw holes to studs/ supports.copper for this may not work :( if you heat up the faucet on accident when sweating the pipe together and there is a slightly wierd angle between the waterfall and fuacet ports - see the picCPVC would work if you prefer that, which I do not for various reasons and personal opinion (see plumbing forums/ google for comparisons).ListCrimp tool if you do not have one. I prefer the copper compression rings versus the other crimp stainless style. I prefer the long orange handled tool vs the one used with vise grips, but both will work if you have a good set of vice grips. mine = http://www.amazon.com/SharkBite-23251-Crimp-2-Inch-4-Inch/dp/B007AGMM1W/ref=sr_1_sc_2?ie=UTF8&qid=1406343694&sr=8-2-spell&keywords=pex+crip+tool8 crimp 1/2" rings = like this - http://www.amazon.com/Watts-WP14C-08PB-2-Inch-Copper-10-Pack/dp/B005G2ET9A/ref=pd_sim_hi_1?ie=UTF8&refRID=0G1CNXJP159HPCEX3JXP7 to 12" of 1/2" pex pipe (5 feet give or trake if you don't want braided line in your wall at all) - any brand or color. Home depot sells short sections3 EACH = At home depot - Sharkbite's pex 1/2" x 1/2" FNPT straight connector = 1/2"pex to 1/2" FEMALE NATIONAL PIPE THREAD = http://www.amazon.com/PEX-Pipe-Adapter-Lead-Brass/dp/B0080L0NCG/ref=sr_1_fkmr0_2?ie=UTF8&qid=1406343387&sr=8-2-fkmr0&keywords=pex+1%2F2%22+x+1%2F2%22+fnpt+straight+connector3 EACH = Sharkbite's pex 1/2" x 1/2" FNPT drop ear elbow = 90 deg. 1/2" pex to 1/2" FNPT = similar to - http://www.amazon.com/SharkBite-UC334LFA-Drop-Elbow-2-Inch/dp/B007AHGKSW/ref=sr_1_2?ie=UTF8&qid=1406343479&sr=8-2&keywords=pex+1%2F2%22+x+1%2F2%22+fnpt+drop+ear2 male/ male 1/2" FNPT connectors 1" to 1.5" long = like this but brass - http://www.amazon.com/Nipple-Male-Stainless-Steel-Fitting/dp/B005RTSYPCalso they usually have a light angle to the threads like galavinzed pipe, so wrap it 6+ times in pipe tape.A full role of plumbers tape was usedDirections to get the unit finished in the picture:Update: I added about 2 feet of extra pex hanging down from the hot and cold that pop out of the wall in the cabinet vs the inch or two seen i the pic.First start with the single port on the waterfall side.put atleast a dozen wraps of pipe tape on itput the 90 deg drop ear connector on angle the pex side towards the top port of the "on/off" valveput tape and drop ear on middle port sticking up turn and line up closely in line with the waterfall port drop ear. Note do not tighten one fully leave it almost inline with the other pex side.put two rings on each end of the pex pipe to crimp laterslide a piece of pex that will be long enough, on to one of the connectors, turn the second connector towards the pex pipe the whole unit will flex a little along with turning the second connector int the pex pipe. line them up good and crimpouter on/off portput on tapeput on drop earthis is a perfect option for screwing the unit to a side studget the straight connectors and a piece of pex and connect them to the drop earput tape on the male to male to male connector - braided screws onto thisinside on/off porttape portstraight connectorpex90 deg elbow pex to pex connectorpexstraight connectormale to male for the braided to attach toconnect braided lines and mount seal up the wallI will update on quality after a few monthsit had good flow the on/off valve was niceWith these changes I am happy so farThe company could build what I did for less than $10 thus avoiding customers having to buy tools and figure out the directions above. I would never trust that 6" braided line that comes with it! especially behind my walls. I felt bad enough running the 30" braided hoses from my house on/off valves up to it before I made the hot and cold pex lines 2 feet longer. You have to make the holes anyway, so don't create a easy leak/mold hazard. Use cpvc or pvc if you don't want to deal with pex.