🎉 Elevate your grad party with DIY charm and sweet surprises!
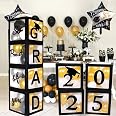
Konsait Graduation Decorations offers a set of 30 high-quality, 6x6x6cm paper grad cap boxes designed for DIY assembly. Perfect for holding candies or small gifts, these boxes add a personalized touch to any graduation party, ensuring your celebration is both stylish and unforgettable.
F**E
Makes Great Grad Favors!
Assembly was easy and they looked great! Plenty of room to fill with treats too!Would buy these again!
A**R
Good value and cute
Although there are no instructions included, they are easy to put together.The interior size - the box can hold three Lindt chocolate balls with a little room to spare.The box can be used without the mortar board/cap. And the cap (without the box) can be used on poster boards or banners too.
S**N
Super cute, perfect for Grad parties/favors!
Purchased these for Graduation Treats for a Kindergarten class. They would be great for any graduation party however. Little bit of a hassle to put together but the end result is very cute and worth it! They held 3-4 snack size treat packets such as Skittles/M&Ms/Fun size candy bars, etc... They are a bit hard to reopen after folding closed so I would try to get all your items in the first time. All in all, great product!
M**T
Very cute!
Super cute! Be sure you know what size they are when you order them. I originally wanted to use for a candy bar, but they will be too small. However, they are going to make great thank you gifts once filled with candy and placed at each seat. The had does not stay on as flat as I would like and the bottom is going to need clues to stay firm once Candy is added. However, I will be buying more so I have enough for all guests.
J**H
Cute graduation favor
This product is made out of a nice weighted card stock. The edges of the mortar board and of the box are all precisely dye cut. No sloppy edges. Every piece, every tassel was in perfect condition.When constructing, fold the u-shape bottom flap in first, then the 2 side flaps. Lastly fold the tab flap in. I used a small piece of scotch tape on the inside to make it extra secure as I filled the favors with M&Ms.When attaching the mortar board with the included plastic pegs, make sure the "chad" from the precut holes are removed as they will make it so it requires more effort to snap the plastic tab pieces together.Do NOT shut the boxes until after they are filled. The lid flap catches securely and you might damage it a little if you are shutting and opening the boxes.Well worth the money. Sturdy enough to fill with M&Ms.
M**I
EXCELLENT choice; requires some intuitive "set-up"
Am poised to order more (& I am NOT a 'push over' buyer!!). The crowd ogled these (each place setting, filled with generous volume of peanut M&Ms). What's more -- folks whom I'd wagered would readily eat from them, then leave behind for me to "recycle" for future event >>> squirreled away their empty box and pridefully took it WITH them.TWO CONSIDERATIONS: (a) just to hedge my bets, I chose to apply small strip of scotch tape on outside bottom & inside bottom of the box -- thus providing a 100% reliable container for heavier contents & shuffling on my tables, & transport to party. (b) there are ZERO INSTRUCTIONS included, which for anyone accustomed to transforming a flat 2-dimentional container into a 3-D "no prob", but please know IT IS VERY SIMPLE to assemble!HERE IS A STEP BY STEP: When looking at the 4 flaps which ultimately form the BOTTOM > flip down the one with the large open rectangular space; THEN fold toward each other (& atop the one you first folded...) the two which have an identical shape; FINALLY slip the remaining flap which has the protruding rectangle, into/through the narrow "line"/space remaining from that original flap that you folded into place.TO FINISH IT OFF , Giving it the Mortar Board TOP: the plastic "rivets" come in two shapes, you need one of each per box. Use the protruding white plastic to gently poke simultaneously through the petite "hole" (that may not have been completely punched open, but is easy to "open") on both the FLAT square and the LID of the box itself. BEFORE ATTACHING the other half of the rivet, slide the loop of the tassel under the flat 'button' portion of this piece. (once you squeeze it into its plastic 'mate', this button becomes the holder of the tassel & it firmly keeps it in place perfectly.FINALLY >> use the other shaped plastic 'rivet' and feed it onto the protruding part of the one you have pushed through the box's lid. PUSH and you will feel it lock into place.OPTIONAL: if you have this bottom rivet with its smooth side pointing down into your box -- it is pretty much there permanently; if instead, you have that smooth side up & facing the lid of the box -- I found it to be QUITE secure, but I can dis-assemble and store them more readily for a recycled future use.
R**A
Perfect & cute!
These were the perfect size for a sweet Thank You treat. They were easy to assemble & sturdy. The tassels are shiny and neat. All our guests were delighted.
M**N
Update to My Original Review
30 pieces translated to 30 boxes, 5 mortarboard squares, 30 tassels, 30 pins, but the pins won't stay secured once they've been put in. I can't use 30 boxes without the missing 25 black square tops. i had to resort to knotting the tassel after threading it through 2 holes with just barely enough cord to do it.A waste of money and time....and not worth returning. It's going into the trash tonight.UPDATE:I found the missing mortarboard squares so I'm changing my rating from 1 Star to 3 Stars. I had imagined the boxes to be shorter than they were; they are not suitable for candy or nuts, but would work as cupcake boxes. They are still hard to put together due to the useless white pins; customer will need to knot the tassels to keep them secure, and the tassel cords are very short for this purpose.OPINION: Not a total waste, but not the cute favor I had hoped for.
Trustpilot
1 month ago
1 day ago