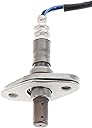
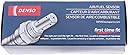
Description
⛽ Upgrade your drive with precision fuel sensing — because every drop counts!
- BUILT TO LAST - Constructed with zirconium and stainless steel for unmatched durability under extreme conditions.
- MAXIMIZE YOUR MPG - Engineered to optimize air/fuel ratios for superior fuel economy and reduced consumption.
- TRUSTED PERFORMANCE - Backed by Denso’s rigorous testing and a 4.6-star rating from over 700 satisfied users.
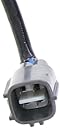
- PLUG PLAY PRECISION - Exact OE replacement ensures hassle-free installation and perfect first-time fit.
- CLEANER RIDE CLEANER PLANET - Maintains optimal combustion to lower harmful emissions and extend catalytic converter life.
The Denso 234-9002 Air Fuel Ratio Sensor is a high-accuracy, OE-standard replacement part designed for 1999-2002 Toyota 4Runner and 2000-2004 Toyota Tacoma models. Crafted from durable zirconium and stainless steel, it ensures optimal air/fuel mixture for enhanced engine performance, improved fuel efficiency, and reduced emissions. With easy installation and a robust temperature rating up to 1200°C, this sensor delivers reliable, long-lasting operation backed by strong customer satisfaction.