


Door Bar Pro Model 32 AIO Steel Door Security Bar for 32 Inch Wide Inswing Doors
Product ID: 18578059
C**S
Easy Installation
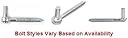
It was not complicated to install. My husband and I held the bar up to the door & marked the doorframe on each side with a pencil to line up the holes in the bar where we wanted the bar to be. Then my husband just took the part with the pins that hold the bar and twisted and screwed each holder part into the wood on each side of the doorframe. The we set the bar on top of the pins in the holders on each side. Sometimes, I have to twist or screw the holder parts a little to get the bar to fit on the pin, which is easy enough to do.My husband didn't need to use any tools to install this. To prevent anyone from kicking the door and the door itself breaking, we put 2 bars up. One above the doorknob a ways and one below the doorknob about knee level. We also ordered another 2 for the kitchen door that leads into the garage. They installed just as easily.I don't know why the instructions say to use a wrench. We went through a lot of trouble trying to find this wrench, finally went to Home Depot and just bought one. Then we didn't need it. Oh well.
S**.
Heavy duty, well made, and easy to install!
I purchased the Door Bar Pro Model 32 Steel Door Security Bar to secure my outside garage door. The instructions provided were detailed and installation only took about 15 minutes. It was a little difficult to install the large mounting screws because I didn't have a suitable wrench. Instead, I used a pair of vice grips and padded the hardware with some foam from the packaging so it didn't damage the screws.Although the instructions provided are good, they left out one critical piece of information. If you install both screws at the same height, the bar will NOT be level. Unfortunately that's what I ended up doing and only noticed it when it was too late. I used a small rubber washer to correct some of the difference, so it looks good, but it's still slightly off.Follow these instructions to ensure level installation:1) Install the left screw and place the security bar on top of it. Extend it to the desired width.2) Use a level and level out the security bar, marking the placement for the next screw. Keep in mind that you'll need to account for the offset because the left side of the security bar is thicker than the right side. The difference between the two bars is less than 1/4 inch I think. I'd level out the bars and then mark the top and bottom of the right side bar.3) After leveling and marking the right side, measure the distance between the top and bottom mark and drill the pilot hole in the center of the two marks. This should make everything nice and level.4) Install the right screw and place the security bar across both screws.Overall I'm impressed by the quality of the security bar, it is sturdy and well made from high-quality materials. I was concerned it might look cheap against my new door, but it actually looks really good.
R**I
Love this lock
Love this lock! The holes that were drilled were huge but I feel safe. The bar itself can be used for self defense if needed.
G**.
Five Stars
Yup
N**5
Great feeling of security
High Quality product! I have installed two and nobody is coming in unless they have a battering ram!! Great feeling of security.
A**K
Maybe an overpriced solution
I built my own for an inward-swing garage service door with a pair of zinc plated open bar holders (~$12) and a piece of scrap 2x4 wood. Each bar holder is secured with 3 wood screws which I believe securer this this product.Also, I'd like make a note that, when my next-door neighbor got burglarized, their garage service door was kicked to break. So, I installed mine at a half height of the door knob with 2 adjacent dead bolts in order to distribute breaking force.I would also recommend installing two dead bolts and dead bolt hole reinforcement bar on the jam.
Trustpilot
1 month ago
2 weeks ago