

Buy anything from 5,000+ international stores. One checkout price. No surprise fees. Join 2M+ shoppers on Desertcart.
Desertcart purchases this item on your behalf and handles shipping, customs, and support to Vanuatu.
🚗 Elevate your ride’s style and protection—because your Odyssey deserves the best!
The KBH Door Panel Armrest Cover Replacement is a custom-fit, premium vinyl leather upgrade for Honda Odyssey models 2011-2017. Featuring French double seam stitching for enhanced durability and a scratchproof, waterproof surface, this pair of armrest covers offers a sleek, OEM-quality look. Easy to install with included instructions, it protects your car’s interior from everyday wear while adding a touch of sophisticated style.


| ASIN | B08DKZDR47 |
| Best Sellers Rank | #15,850 in Automotive ( See Top 100 in Automotive ) #43 in Automotive Armrests |
| Brand | KBH |
| Customer Reviews | 4.4 4.4 out of 5 stars (492) |
| Date First Available | July 27, 2020 |
| Item Weight | 3.2 ounces |
| Item model number | SKU |
| Manufacturer | KBH |
| Manufacturer Part Number | SKU |
| Model | as-161-bk |
| Product Dimensions | 17.13 x 10.63 x 2.36 inches |
| Special Features | Scratchproof, Waterproof |
C**D
Good replacement material
Overall this is a good product. It takes some patience to wrap the panel nicely, but the finished product looks almost factory. The vinyl is stretchable and easy to work with. The color match isn't perfect, but good enough. Buy some good spray adhesive to make the wrapping easier.
A**E
Amazed how good it looks
Honestly, I’m amazed at how well this turned out. It took me about an hour to do both doors. The glue was the hardest part, I bought 3m spray glue at Walmart. With that glue you have to let it set up for a few minutes before sticking everything together, once I figure that out it really went well. I also used the old one I pulled off to trace an outline on the new one, then cut along the line. It really looks brand new. My only complaint is the color is slightly off. If you do both nobody will notice though.
H**D
Not a perfect match but good fix for a common Honda problem
There are two things that keep this item from being perfect. First it has contrast stitching so you need to replace them in pairs or they will be different. I initially intended to replace only the drivers side since it takes all the abuse and was falling apart. The second thing is that the factory cover has a plastic piece at the stitching and it helps you line up the panel with the plastic door piece it attaches to. If that piece was included it would have taken away the need to eyeball the cover and make sure you have it lined up correctly. It is simple to put the seam in the plastic groove but the tabs help line it up left and right if that makes sense. Overall seems like it will be a good product. Just installed it so no idea how it will wear but it seems solid. I bought the can of Permatex headliner adhesive that others recommended and it seemed perfect for this job. Check the Youtube videos for detailed instructions on door/panel removal. There are great videos that show where the 4 screws are located on the door.
W**H
Good
Fits an works well. Do get yourself a good spray adhesive. This is quality. Seams were def. Strong.
D**S
A challenging job, but it can be done.
I thought the quality and color match of this was very good - good value. I have four installation pointers: (1) I removed the plastic guide strip from the OEM pad to aid initial alignment. Just remove stitches and glue to the replacement along the seam. (2) Contact cement doesn't work ... I thought that is what they were using in the installation video. Regardless, I found 3M Super 77 spray adhesive to work perfectly - it holds the fabric, and is easy to pull back if a mistake is made. (3) The curve in the middle is a struggle to get adhesion with smoothness (OEM uses a vacuum system), but I found that by using a 1-1/2" rigid foam cylinder worked great to press into that curve. (4) The plastic tool that is included is useless. Stretching the fabric is all that is needed to remove creases and get an OEM look. Along the edge, I used pliers to pull, and then press with my fingers on the back side.
M**E
Did they job unless you are looking for perfection
Did the job for price ($2500 at Honda shop if you want to pay), but make sure you have all the correct supplies (i.e something to clamp down that doesn't leave marks) and tools (don't forget the glue they suggest in comments) to apply before you begin because you don't want to start the work and then deal with a tear. Which happened but could be user error.
A**Y
$40 + 1Hour = new door rest
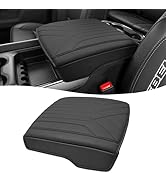
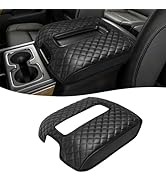
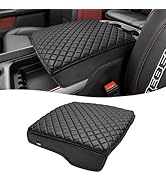
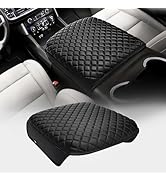
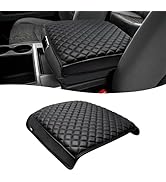
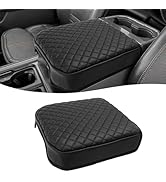
Taking the door panel off was scary (thank you you tube for some amazing videos), but the process as a whole was pretty simple. It took 45 minutes from start to finish, and this included the 15 minutes I waited for the contact cement I used to set. The material looks very close to the original to the point where unless you point it out, no one will ever notice. I used contact cement as the adhesive (adhesive not included) because I like the bonding power, and the control in application. I was able to take the door panel off myself with a small flat head screw driver (to pry things) and a Philips bit on a drill (could have used a manual screw driver but I had a drill on hand). The panel isn’t heavy but there is a point where you need to disconnect some things behind the panel while holding it- watch a few videos before so you know what to look for/ how the connectors disconnect. I was grossed out by the amount of debris that was inside the door panel BTW- totally cleaned that out while contact cement was setting. With the armrest piece: I ripped off the old covering and cleared it of as much old foam as I could. Next- rough fit the new covering. Make sure you see where the new covering needs to sit (the stitching on the covering lines up with a channel in the plastic armrest piece). It looks like you could trim the covering but don’t- you can trim once you wrap (you’ll be happy you have a little extra if you don’t center the covering perfectly). Have a sharp pair of scissors that you can throw out ready). I covered the entire back of the new covering with contact cement (really ‘got it into’ the foam backing. I then covered the plastic armrest piece with contact cement, being extra sure that I got all of the edges AND about a 1/2” over on the backside (where the covering will wrap around). I almost used the full can. Let this sit for the full 15 minutes- the covering soaks a lot of the contact cement in. You want to make sure that it is all ready to go. Once the 15 minutes is up, you’ll want to start with the stitching line- line that up along the channel on the armrest piece. Press firmly and work up towards the top, smoothing and pressing as you go. Contact cement is not forgiving so work slowly. With contact cement you don’t have to stretch as aggressively as you might need to with a spray adhesive because the contact cement gets into the foam- doesn’t sit on top. If you are lined up well, cover each piece well, and press the covering firmly to the plastic, it will work great. As the title said- for $40 in materials and an hour of my time, totally worth it!!
G**E
Great restore. Difficult install.
Not an easy installation but once it was done, made the interior of the car look much better.
S**I
اللون مختلف
Trustpilot
1 month ago
2 weeks ago