


The Barnett Crossbow string dampener is super easy to mount. See list for crossbows that are compatible with the 17180 dampener. 78129 BC DROPTINE XT , 78136 BLACKSPUR ,78138 BC DROPTINE XT REALTREE ,78140 WHITETAIL HUNTER II , 78142 RAPTOR FX3 PRO MOBR, 78144 WHITETAIL HP BLK , 78145 RAPTOR FX3 PRO, 78148 RPTR FX3 PRO- RTXT , 78128 WHITETAIL HUNTER II , 78113 WHITETAIL HUNTER PRO, 78124 LADY WHITETAIL HUNTER, 78127 RAPTOR FX3 PRO, 78128 WHITETAIL HUNTER II, 78131,WILDCAT C7, 78132 RAPTOR FX3, 78135 BLACKSPUR TT, 78143 TERRAIN CXB , 78146 TERRAIN XT, 78125 RECRUIT TERRAIN, 78125 RECRUIT TERRAIN ,78134 RECRUIT TACTICAL
S**Y
Not Perfect But You Can Make It Work on a Whitetail Hunter II
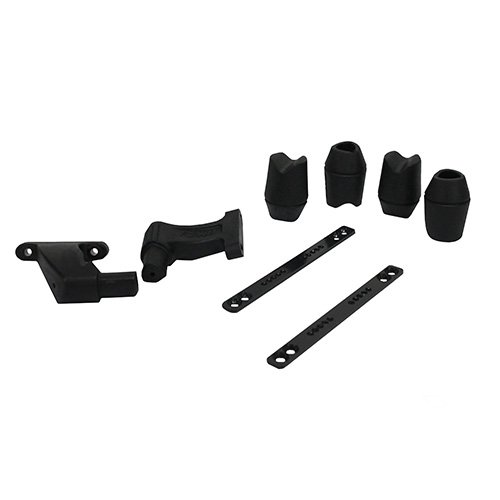
Initial Impressions:Photo 1 - Packaging was plain and contained no instructions.Photo 2 - Extra rubber bumpers were included, but the 4-40 screws to attach the rails seemed to be missing 4 screws.Assembly:Photos 3 to 6 - While many here decided to use #4 sheet metal screws, I decided to use a 4-40NC tap to thread the factory holes on my Barnett Whitetail Hunter II. There are two sets of three holes on either side of the crossbow rail. I tapped the two outer holes on each set to match the countersunk holes on each bar. I measured the width of the rail and made sure to put some tape on the tap so that I did not screw through the rail and into the channel. I then used thread locker to install everything nice and secure. Note that the rubber bumper is supposed to "kiss" the string (mine is about a credit card thickness away).Post-Install:Photos 7 to 9: While I did purchase some sheet metal screws as insurance, I went back to Lowe's the next day and bought some countersunk flat-head 4-40 x 1/2" machine screws to put in the four empty holes. Since they were longer than the original screws (but not too long for the rail thickness), they seemed to secure the rail much better than the shorter factory screws. If I were to do it all over again from the start I would ditch the factory screws in favor of the longer half-inch 4-40 machine screws. While you can also use the sheet metal screws, I like that these machine screws are countersunk and flat head. Should they ever fail I can come back later and use the #4 coarse thread countersunk pan-head sheet metal screws. I finished it up with some black touch up marker from Birchwood Casey.
S**L
Works fine, just be patient with the installation
Installed these on a Raptor FX3. Installation is really pretty simple and there is really no need to tap the holes.1.) Line up the holes in the metal brackets to the holes in the side of the rail.2.) Eyeball the placement of the plastic arms and attach to the brackets with the allen head screws.3.) Remove the limb from your bow (if you do not do this, installation will be nearly impossible).4.) Lay the stock on its side on a bench and attach brackets with phillips head screws (you will need a good screwdriver and be able to apply moderate to heavy downward force to keep from stripping the heads out)5.) Reattach your limb to the stock and tighten securelyNote: I installed mine so the rubber bumpers are almost touching the string. I did not notice a significant reduction in noise but no change in accuracy. The kit probably should have come with instructions and probably 8 screws instead of 4. I will probably purchase some more for a more secure installation.
A**R
Mock up, get some sheet metal screws, and put her together!
After reading some of the reviews I was a bit weary of this item as well. However, it was actually a pretty straightforward assembly process on our Barnett recruit compound crossbow. The first step is to mark up for the arm needs to go on the bracket. We use toothpicks to do this. We then screwed the arm into the bracket and removed the riser from the bowl. We went to the hardware store to get the recommended sheet metal screws and the bracket and arms went on perfectly. A little flat black paint on the screwheads and it looks as though it would have come out of the The first step is to Mark where the arm needs to go on the bracket. We use toothpicks to do this. We then screwed the arm into the bracket and removed the riser from the bow. We went to the hardware store to get the recommended sheet metal screws and the bracket and arms went on perfectly. A little flat black paint on the screwheads and it looks as though it would have come out of the factory Like this! Very happy with the outcome of this ad on!
M**E
Not bad but needs some modifying
I purchased this kit for the whitetail hunter 2The kit comes in a plastic bag with no instructions (which isnt the end of the world because its pretty basic) so now the screws that come with it are junk and only come with 4 instead of 8. They are flat machine screws and cheap metal. The crossbow doesnt have threaded holes meant for them so screws snapped while trying to screw them into it with hardly any force. So had to get better screws After having to drill out the broken ones. So basically dont waste your time with the screws in kit andTake the trip to home depot and buy #4 metal screws. 3/8 or 1/2. Also i picked up a black oil based sharpie to color screw heads and looks just as good as regular kit.Throw a little blue Loctite on the other screws in kit as well so they dont loosen up.Other than that it seems like a decent setup.
J**N
Fit was good
I didn't use the screws that came with the kit, I didn't feel the screws was very good. I went and bought more from the hardware store ( sheet metal screws, NOT self tapping ones ) . I used two different sizes ( diameter ). I used the screws that came with kit for reference on length. The ones I bought was just MAYBE a 32nd longer. Works well and I noticed the difference after install. Happy with the purchase of dampers. I wouldn't use the screws that came with the kit though.
A**R
Revised review...good product if has all the parts
Missing parts, no instructions! I spent an hour trying to figure out how to mount these before realizing that the mounting rail brackets and some mounting screws were missing! If it came with instructions or at least a parts list, but nothing but a bag of parts! Hard to figure out it was missing parts until I looked at the Amazon picture again... I requested a replacement and it arrived within 3 days and it had all the parts and I looked up online of pictures to figure out how to install it...it is a good product for the money if all the parts are there, but would get a 5 star if it had installation instructions, or at minimum, a parts list. Amazon quick replacement made it easier to give this 4 stars from the original 1 star rating.
J**.
Straightforward Install.
Arrived today and within 20 minutes I had them I stalled. Directions would have been nice but it's a pretty straightforward install. Mock everything up first without screwing anything together, I used toothpicks. Then take the bow off so it's not in your way. Use a small screwdriver and take your time starting the screws and there will be no stripped head issues. Install the base plate first then the arms and take your time.
M**E
Looks good, but you may need to tap the mounting holes on the flight track.
First off. My Whitetail Hunter II has pilot holes drilled for the bracket, but they are not tapped. You will need to tap them with a 4-40 to bolt the dampener bracket to the flight track.I installed the dampener kit before I attached the limb section (new crossbow) but I'm sure it's possible after it's assembled.After it is tapped, everything bolts up fine. The metal brackets have 4 points that are tapered for screws on each side of the composite track. Only 2 screws per side are included tho. If it was screwed into metal 2 is probably fine, but these are tiny screws attaching to composite, so I added 2 more screws from the hardware store. I put a small dab of blue thread locker on these screws to keep them from coming loose.I can't compare the sound difference to firing without the dampeners, but I suspect it will be quieter. The Pro version of the Whitetail Hunter has these installed from the factory.
T**Y
Barnett cutting corners
after sending two of these back I give up first one had mounts both for same side second one was missing parts also it was listed as a fit for Raptor FX3 while the holes were there they were not threaded, after an hour and a half I managed to gat one screw in very poor work on Barnetts part not impressed
A**R
tap the rail holes
the holes on the rails are not theaded, you have to buy a 4-40 tap. then there is only 4 screws to hold the 2 rails on. it is a good idea to purchase a few more screws to hold the rails on. with only 2 screws per side the rails may tear out the screws and bend or break from the force off the string.
C**S
Installation was easy!
Installation was easy!Fit like it should. No hole taping required. I don't know why other's had problems. You do not need extra screws. 4 per side is enough.
G**C
Decu
Ne correspond pas pour mon Arbalete Barnett Droptine et il n'y a pas d'autre chose!
Trustpilot
1 month ago
2 months ago