


Buy anything from 5,000+ international stores. One checkout price. No surprise fees. Join 2M+ shoppers on Desertcart.
Desertcart purchases this item on your behalf and handles shipping, customs, and support to Vanuatu.
🪟 Reflect your style, block the glare, own your privacy.
WochiTV One Way Window Film offers daytime privacy with a sleek reflective mirror finish, blocks 82% of infrared heat and 90% of UV rays to reduce energy costs and protect interiors, and features a non-adhesive static cling design for easy, residue-free installation and removal. Perfect for enhancing privacy and comfort in any room while adding a modern, professional touch to your home.


| ASIN | B08Y6NHDM1 |
| Best Sellers Rank | #388,831 in Home & Kitchen ( See Top 100 in Home & Kitchen ) #376 in Window Films |
| Brand | WochiTV |
| Brand Name | WochiTV |
| Color | Black-silver |
| Customer Reviews | 4.1 out of 5 stars 5,346 Reviews |
| Installation Type | Static Cling |
| Item Dimensions L x W | 70.87"L x 17.5"W |
| Item Type Name | One Way Mirror Window Film |
| Manufacturer | WochiTV |
| Manufacturer Part Number | 1 |
| Material | Vinyl |
| Material Type | Vinyl |
| Model Number | One Way Mirror Window Film |
| Number of Items | 1 |
| Product Dimensions | 70.87"L x 17.5"W |
| Size | 17.5 Inch x 6.0 Feet |
| Ultraviolet Light Protection | UV Protection |
| Unit Count | 8.76 Square Feet |
B**Y
Enough for entire sliding glass door
Ordered the blue tint for our sliding glass doors. There is enough to cover both sides with an inch or two excess on all sides. Installation was tricky and is best done with 2 persons. The hardest part was cutting to dimensions as you need a large flat surface and the protective plastic film on the reflective side is thick and wants to re-roll. (Ruler markings on the protective plastic side would have been helpful). The reflective side goes on the glass. We had to spray the glass with water, place the film in position while pulling off the protective film all at the same time. (Be liberal with the water). Use a wet squeegee or rag for bubbles. (Don't sweat the tiny bubbles!) The film can be removed anytime with no damage to the glass. The film adheres well, even at the corners. The blue tint has a cooling effect indoors. The reflective side provides privacy, protection against indirect radiant energy, and reduces glare. We love this product and the effort to install it was worth it.
E**C
Quick and Easy Install
This works very well. From the outside all they see is a mirror. NOTE: at night if your lights are on, it losses its mirror effect and you can see in (never found one that didn't). EASY EASY to install. You do not need all that extra stuff to install. I installed it by myself. To clean the glass: I used a solution of 1/4 cup vinegar and 1 cup water in a spray bottle and paper towels or newspaper to wipe clean. Do NOT use ammonia based cleaners. For the "Application solution" I used a spray bottle with soapy water. (about 1 tsp dish soap to 1 cup water and shake well). Tip: Measure the glass in the window, measure and measure again before cutting the film. Add 1/4-1/2 inch overlap at bottom and side. Use a razor blade to cut off any excess after set in place. Tip: This is a vinyl film. No adhesive needed. It static sticks and you can easily unpeel and reapply to line it up just right. I suggest peeling the backing about 1/4 down from the top. With both hands line up starting a one top corner and top edge and work your way downward. The soapy water allows it to stick yet slide a little as needed. I worked the bubbles out with my hand. Definitely recommend.
E**R
Easy to use
Worked great. Edge was damaged but that was to be cut off for the size of the windows I was doing. Good reflection.
A**N
like putting on a giant screen protector
i bought this tint for the sliding glass doors in my bedroom to keep the afternoon sun from turning it into a sauna. like most during this heat wave, my ac seems to have been running nonstop in order to keep the house at a bearable temperature for my 13 year old dog. like most, i am flinching at the mere thought of my electricity bill. also like some, i don’t have a whole lot of loose change to spend on anything besides food and gasoline. i chose this item because the quantity and discount offered seemed to be the most economical. please note, the pictures are taken at 2:30 in the afternoon with no inside lights on. we have almost achieve cave status without blackout curtains. let’s dive into application, shall we. i did this solo because i wanted to see if it could be done. i’m sure, like most things, if you had multiple sets of hands, it would go a lot faster. one side of my sliding glass door took about an hour or so. handmaids tale was playing so i’m using that as a guesstimate. i didn’t have the energy to procure a squeegee so i used a plastic ruler instead. the ruler allowed for the same type of edge as a credit card or small hard card would but with more surface area. there were a few mishaps with fur getting between the sheet and the window surface but if you’re quick enough, you might be able to fish it out. i matched up the factory cut side as well as i could with the corner and left side and used some painters tape to hold the sheet in place up top while i started peeling the tint from the backing. spraying your widow down with the soapy water mix will allow for manipulation during the initial placement. there will be A LOT of bubbles so be patient working them out. i used an arcing motion to gather bubbles together and press them towards the edges. that technique seemed to work best. it’s very much like putting a screen protector on your phone. you’re going to get pissed at least once. i chose to leave the backing on and pulling it down one section at a time to attempt to keep animal hair finding it’s way between. that worked for the most part, although, my cat did decide to hang out right next to the window the entire time so there’s that. as i mentioned before, don’t have a bunch of money to spare on “be prepared to screw up on the first attempt” so i was determined to keep the mistakes to a “i can live with that” level. all of that being said, if you aren’t a “do it yourself with the help of 8 youtube videos before you break down and call for help” person, then you might need additional hands. if you’re determined, cheap, with a ragtag set of skills like me, this could work for you. good luck to you all and stay cool my friends.
S**Y
Works, but a pain to install
I've installed window film on three rooms so far in my home. I have to say that this product is one of the worse products I've had the displeasure of installing. The instructions are bare but there are youtube videos online and it's fairly obvious what you have to do. However, there's no clear marking on which side is the window side and which side is the room side, Minor annoyance 1. There's a transparent cover that covers the window side of the film that's easy to take off. However, the cover on the other side is almost impossible to take off and makes the entire process of putting the film on the window a challenge in itself, Major annoyance 1. Finally when you're ready to put the film on the window and have sprayed the film and window with your soapy water. You'll put the film on the window and it will need to be adjusted. However and maybe a positive to this film, it sticks to the window and will not adjust easily. So you'll have to constantly take it off and reapply it until you're squared or you've given up and decide to cut off excess, Minor annoyance 2. So once you've attached the film and adjusted it to your liking, you'll squeegee the film to remove air bubbles and water. Easy enough, than you'll remove the back cover which doesn't want to come off and you'll waste your time since it will inevitably peel the film off the window once again, Major annoyance 2. Once that is off, it's time to trim the film to the window frame. NEVER have I ran into a film that will not cut like this film. I've done three rooms with this one being my 3rd. I've used a different product for my other two rooms and this film is by far the worse to cut through. Every cut either drags the blade leaving pocks and bumps in the film or it goes through and leaves cracks in the film. I couldn't even explain why that happens. So what is left is a badly trimmed film that has gashes and bumps around the side of the window frame. This is by far the most egregious annoyance and why this product cannot be more than 3 stars to me. The only positive thing I can say about this product is that it works stupendously and provides the privacy and shade that is written on the product page. I can feel the difference from before and after I've installed this product. tl;dr - This product works great, but is one of the worse films to install.
D**D
After 3 months-Do Not Recommend
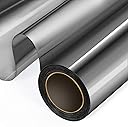
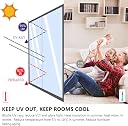
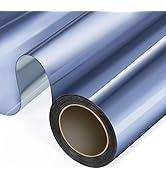
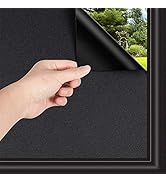
3 month Update... A) By the end of the first 3 weeks, the film has started to peel back significantly from each of the windows. After reapplying in places where it peeled back, product continued to pull away from window. B) At the end of the 1st month the product from all my windows fell completely off. C) Once again I reapplied product, this time using a blow dryer on cool and then on mild heat settings to try to seal product to window. End result was the same, product peeled back over time. D) Lastly, I purchased double sided 3M window tape to outline the whole window frame prior to reapplying product to window. This time I did not use any liquid as it would have diminished the tackiness of the double sided tape. It turned out "just okay". Not as professional looking as manufacturer originally intended as there was no way to avoid any type of air pockets and it did not provide a smooth look. CONCLUSION: This product is way to thick to remain adhered to window by "cling" alone. It needs to have one side fully tacky, like contact paper, in order to look professional and bonded to window. As a result, there are other products out there that have the "stickiness" on one side which makes them successful over time. Until this product is corrected, I no longer recommend this product. Prior to the end of the 3 weeks, I purchased 2 more giant rolls to complete all the windows in my house. And with the missing the return window, I am stuck with a very inferior product. Again, I do not recommend this product. Consumers...look for a window application that has one side tacky like contact paper. DO NOT RELY ON CLING ALONE! --------- Original headline: "Application helpful tips!" Great product, does as claimed. As a 1st time user of this item here is what I have learned. You will need scissors & Exato Knife, tape measurer, yard stick, gentle window cleaner, water bottle, microfiber towel, squeegee (dollar store kind just fine), sharpee marker. 1) Tape measure window. 2) using permanent marker, mark & draw a cutting line with yard stick on the thick plastic backing of the window cling. Cut to measure. 3) Clean window with cleaner & microfiber cloth. Microfiber cloth will not leave streak and removes lint. 4) Now gently pull off the thick clear plastic from the cling, discard plastic. 5) Mist window & cling with a mild window spray or water.. I used a homemade window cleaner solution. 6) apply to clean window. Use squeegee to remove air bubbles, and excess moisture. Use microfiber cloth to soak up liquid dripping from applied cling. At this time use exacto knife to trim excess cling from window. 7) Re apply mist to window and re-squeegee as needed to promote a good adhesion. Key learning. Once cling applied I found that the corners would start to unpeeled. I suspect this is because the product has been rolled up and packaged like a poster. Consider cutting pieces days in advance and put something heavy on corners to encourage product time to stretch out.. thus reducing chance of corners pulling back from windows once applied.
M**Y
Works well for limiting temperature rise in a garage.
I don't think the "privacy" aspect of this film is very useful. The only time it works is during the day, when outside is much brighter than inside, and under those conditions you can't see inside a house anyway (try it!) BUT that doesn't mean it's useless; it's second function, cutting out IR and UV, works really well. If you live in a sunny state you probably know that if your garage has glass windows, then it turns into a furnace during the day, with the greenhouse effect ensuring that it can get 10 to 15 degrees hotter than outside. My experience is that with this film applied to the garage windows it only gets the same temperature as outside. So, OK, it can't work magic -- but keeping the garage 10 to 15 degrees cooler than it would otherwise be ain't nothing! For a mere twenty dollars or so, that is, IMHO money well spent! Some hints for easy application: Get film slightly wider than your window panes. Make sure you have all the tools necessary and right on hand (a squeeze bottle of water, a squeegee, a credit card, a boxcutter). Don't try to cut the film to the right size with scissors; rather get it up onto the window (if necessary tape up a corner or two where the edge part extends past the window pane). Squeegee flat, then flatten the last few bumps with the credit card. Then cut off the excess by going around the window pane edge with the boxcutter. Make sure your boxcutter blade is new and sharp -- an old blade WILL skip and not cut the film nicely. With a box cutter it's fairly easy to trim the edges and create a job that looks reasonably good! My first attempt I tried using scissors to cut the film to the window size and that worked much less well.
A**.
Great if you need to reduce strain on your ac in this hot hot summer and save on your electric bill
Just installed it on a single-pane western-facing window underneath large bubble wrap, that gets a LOT of heat coming through in the late afternoon/evening here in the south. You could easily have broken a sweat in front of that window previously even with the AC running. It's still warm but very comfortable now standing there at peak heat time, and no sweating involved! I intend to also put this on my southern and east-facing windows as well in order to further reduce strain on my AC with the extreme heat we have had this summer. I will try to remember to come back to edit this post once my next electric bill arrives that has had this film in the windows for a full billing cycle. I can tell there will be a difference already because my AC barely kicks on even in the heat of the day, and everyone I know says their AC is not shutting off at all. That is not 100 % from this film, however. I had a home energy audit a year ago that gave me better seals around my doors, I added large-bubble wrap to my windows (which is not visible with this film installed under it from the outside), and new blown-in attic insulation which all contribute to that impact as well. Not everyone is gung-ho enough to do the bubble wrap, but this alone makes a significant impact and you can see through it in the day, it just looks like a light window tint from the inside. At night the mirror flips and you cannot see outside but outside can see in. One last benefit to this film is that it is only installed with water, so you can remove it in the winter to let the warmth of the sun in and then reinstall it when it gets warm again. Also, it does not impede the function of the windows if you live where you might want to open them. Pics are inside with bubble wrap on top, and from the outside in the day.
R**E
It works as advertized
The product works without any adhesive, which is fantastic, cleaning the surface well will help and most importantly: since it comes rolled up, you first need to do some "unrolling" to flatten then sheen, otherwise the sheet will bed away from the glass and end up falling due to gravity. In my case 99% of the sheet adhered to the glass perfectly, and for the flaring edges I aplied a small tape to secure them
A**N
Very good quality
It takes some practice to apply to the windows especially large ones but totally doable. We have add it to all our west facing windows to reduce the afternoon glare. It stays in place securely and does a very good job keeping the strong light out while letting us look outside. Like other similar products, it turns into a mirror in the night so you can not see outside but people outside can see you. Priced in line with similar products.
J**P
It does the job - but you will have bubbles on your windows
So it has definitely kept the morning sun out of 1 room, but it looks pretty lousy with bubbles - I think these are unavoidable. Its easy to fit once you cut it. Instructions are fairly idiot proof .
T**Y
Top notch daytime privacy film but instructions could be better.
Got this to stop a very nosey neighbour from looking into my bedroom whilst I take a nap during the day. Very effective and look great from the outside. Instructions are scarce and it takes patience. Some tips. 1. Don’t worry too much about the size to cut. Just make sure the film is larger that the window you are going to fit it onto. It’s very easy to trim any excess film after it’s fitted to the window. 2. Use a table to measure and cut. Trying to do this on a floor will attract a lot of dust particles etc. 3. Make sure the window is very clean before applying the film. 4. Maybe use distilled water to moisten the window rather than tap water if you live in a limescale area. Also don’t use a sponge to apply the water, use a spray bottle for even water distribution. 5. Use a squeegee to squeeze out the water after fitting but wrap the squeegees rubber blade in a soft cloth to stop the squeegee rubber blade from scratching the surface of the film. 6. Yes, if you make a mistake it can be removed and reapplied. 7. After about a week, the film becomes more clear and less cloudy on the windows giving a nice look from inside also. I’m now looking for other places to use this film. Just love the way it looks on my windows.
D**E
Reflective Tint / Film
Found this easy to apply but keeping it free from airborne particles before getting it on difficult no matter how careful one is...
Trustpilot
1 month ago
4 days ago