


Buy anything from 5,000+ international stores. One checkout price. No surprise fees. Join 2M+ shoppers on Desertcart.
Desertcart purchases this item on your behalf and handles shipping, customs, and support to Vanuatu.
๐ฟ Upgrade your outdoor water gameโfreeze-proof, leak-proof, and effortlessly stylish!
The Aquor House Hydrant V2+ is a frost-free, 12-inch outdoor faucet engineered with 7x better freeze protection and a quick-connect system for seamless hose attachment. Made from lead-free, corrosion-resistant 316L stainless steel and military-grade polymer, it offers durability and a sleek slate gray finish. Certified for backflow prevention and backed by a limited lifetime warranty, this professional-grade hydrant combines functionality with modern design for hassle-free year-round outdoor watering.


| ASIN | B07W7KXQC7 |
| ASIN | B07W7KXQC7 |
| Additional Features | Lead Free |
| Brand Name | Aquor |
| Certificate Type | ASSE 1019-A, meets IAPMO/cUPC |
| Color | Slate Gray |
| Customer Reviews | 4.7 4.7 out of 5 stars (639) |
| Customer reviews | 4.7 4.7 out of 5 stars (639) |
| Date First Available | 25 August 2019 |
| Finish Types | Brushed, Matte |
| Flow Rate | 6.8 Gallons Per Minute |
| Handle Lever Placement | Center |
| Handle Material | Polymer |
| Handle Type | Lever |
| Hole Count | 1 |
| Hose Length | 12 Inches |
| Included Components | Stainless Steel Hydrant, Debris Cover, Straight Hose Connector, 4x Mounting Screws |
| Installation Method | Single Hole |
| Is Electric | No |
| Item Weight | 2.7 Pounds |
| Item model number | VBHP012 |
| Manufacturer | Aquor |
| Manufacturer | Aquor |
| Material Type | Stainless Steel |
| Model Name | VBHP012 |
| Model Number | VBHP012 |
| Mounting Type | Flush Mount |
| Number Of Handles | 1 |
| Number of Pieces | 7 |
| Product Dimensions | 34.29 x 7.95 x 11.91 cm; 1.22 kg |
| Recommended Uses For Product | Garden |
| Series ID | VBHP012 |
| Spout Design | High-Arc Traditional |
| Spout Height | 4.69 Inches |
| Spout Reach | 13.5 Inches |
| Style Name | Contemporary |
| UPC | 850007299064 |
| Valve Type | Cartridge Valve |
O**E
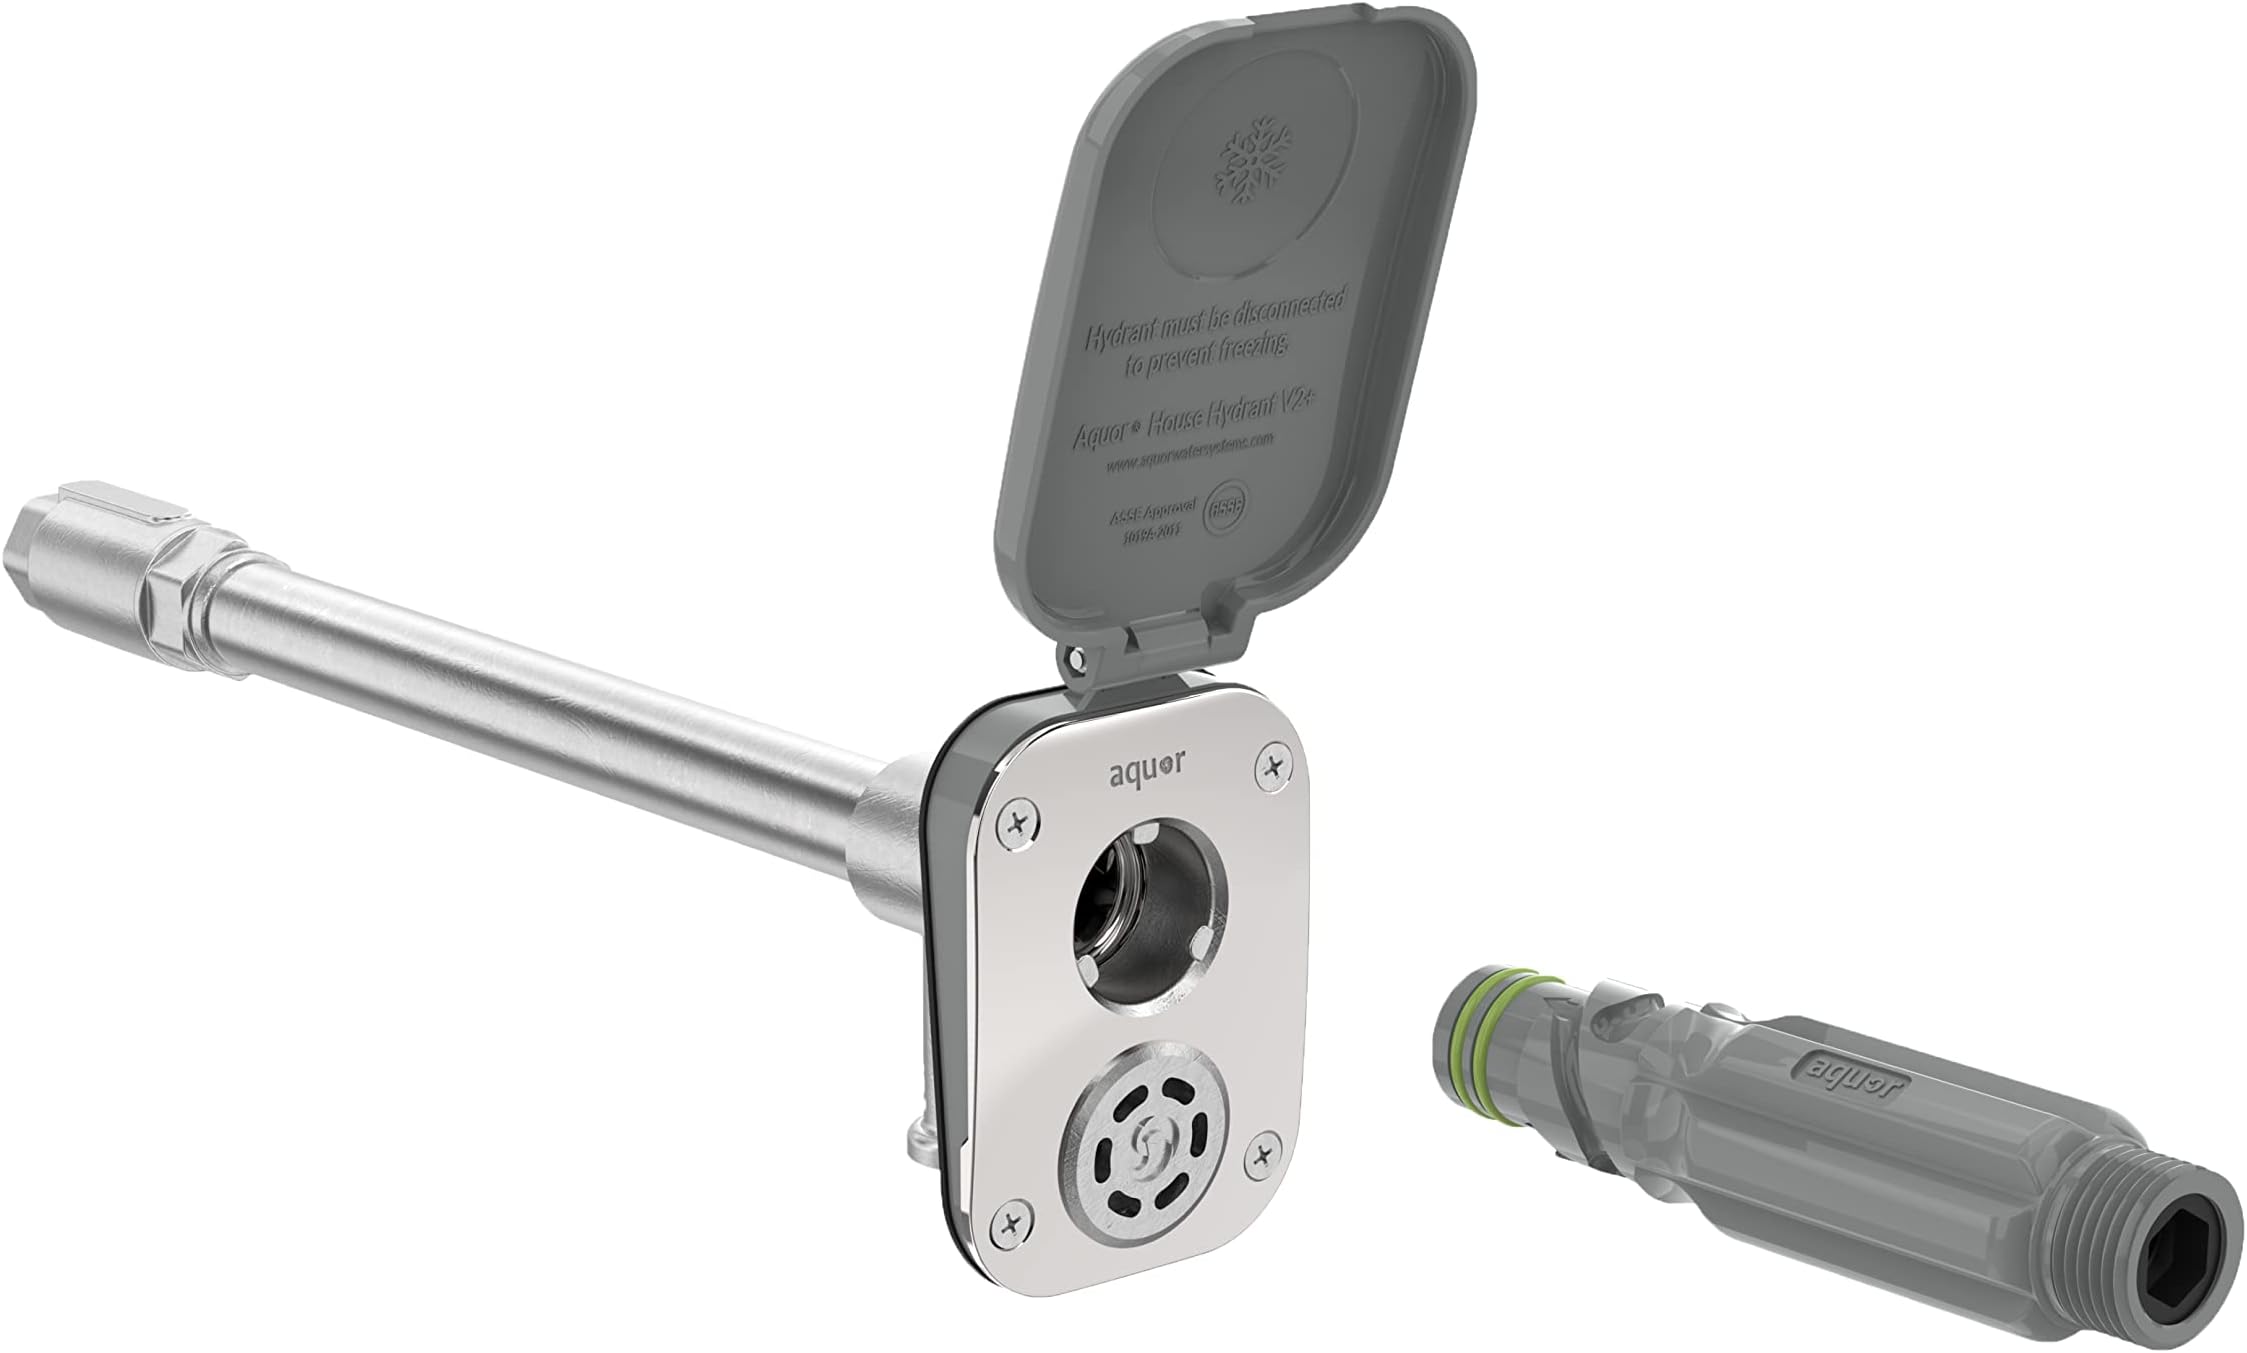
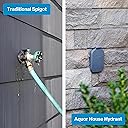
I have had this Aquor Wall Hydrant V2+ installed for about a month now and it has been fantastic. First, once the hose is connected there is no leak/drip at the hydrant. In the pictures you can see how the slow drip from where the hose connected to the old bibb started to create a drip stain on the siding (which needs to be painted, but that is not because of the Aquor). Second, because this faces the street, the improved appearance of the stainless cover makes a huge difference. It is one of those small things that will make you smile every time you see it. Something that I will need to do in the future, probably when I re-paint the siding, is add a block or one of Aquor's stainless blocks so that when the hose is disconnected from the drain it avoids getting any drips on the siding. Some things to consider to decide if the Aquor is right for you: 1. The flow is entirely controlled by connecting one of the Aquor connectors and it is either on full blast or not connected. For me this is no problem, I can easily regulate the flow at the other end of the hose with a nozzle and to be able to shut off water to the hose without disconnecting it I plan to buy Aquor's 45 degree connecter with a 1/4 turn valve. 2. Installation is pretty easy if you are decently comfortable handling a drill. Any connectors that you may need can easily be purchased from any hardware store (e.g. push-to-connect fittings and pex pipe). You really don't require any special tools beyond a 1 1/2 inch hole saw and maybe a jab saw. Then depending on what you're connecting to you may need something to cut the supply pipe. The rest can be done with push connect fittings and a wrench. 3. To retrofit it (like I did) you will need access to the hose supply pipe. For me installation was easy, the wall where the supply line is in the garage is very easy to access so I only needed to use the included drill template sticker and a hole saw to enlarge the hose bibb penetration (very clear instructions on how to do this are included). Then just cut the supply pipe, used a 90 degree elbow, some pex and 1 more threaded connector to connect to the Wall Hydrant V2+ and I was done. In total it only took me about 45 minutes to install after a 5 minute trip to the big orange store. TLDR; looks great, works great, easy to install if you have any DIY ability whatsoever.
A**T
We finally fitted this before winter and it works really well it's so easy to connect and easy to use, it took a bit of time drilling holes in wall, but once connected looks great
S**G
This is a fantastic product for a nice clean look. It does come with everything needed to set it up but i would recommend an experienced plumber to install it as it does have to go through the wall and will require an additional cutout for the extra vent below. Like any custom product, it does require you to use their proprietary click lock hose attachment, but it comes with the main one that you will require. So far, it has weathered the winter nicely.
B**D
Extremely well made brilliant product
C**E
While we had some walls open for some renovation work I decided to also replace an older leaky brass hose bib while I had easy access to the pipe. After looking around a bit I came across the Aquor Wall Hydrant and was very excited to give it a go! This product is awesome in many ways.... 1) The hose bib on the front of the house is right next to the front door so having a MUCH more aesthetically pleasing faucet, one that is virtually invisible, was a very worth upgrade over an old brass faucet. 2) We live in Colorado so having to put a cover over the hose bib every winter just looks like crap on the front of the house and is annoying to have to take off and on when wanting to use a hose. Not having to winterize the hose bib every year will be a joy. 3) Being of a higher build quality I'm looking forward to not having to ever fix or replace the unit (hopefully). At least for a very very long time. Much longer then a standard brass hose bib. Installation was relatively easy. Even though we were doing a retrofit we did decide to go with the V2 versus the V1 in order to have the vacuum breaker built in. Since the facade of the house was brick we did have to do some chiselling out of the hole in order to get the unit to fit but it really wasn't too big of a deal. Because of needing to chisel the brick out more we did run into the screw holes on the unit being mighty close to the opening and being in brick it was risky to try and use anchors (too close to opening and risked making the hole too big and not being able to screw in at all). Since we were just doing screws right into the brick and the brick being a little crumbly we did find that once fastened that the unit wasn't as secure and tight as I would have liked it. After our initial install I did see that they sell plates (stainless steel or wood) that you can use as backers either for brick or stucco. I would strongly encourage using the backer if attaching it to brick or stucco. We went with the stainless steel backer plate and it both looks great and allowed us to use anchors and move the screw holes a little further away from the main hole opening for the unit. Overall a very worthy investment.
Trustpilot
1 month ago
1 month ago