🚽 Flush Away Your Worries with Ease!
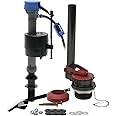
The Fluidmaster 400AKRP10 Complete Toilet Tank Repair Kit is a comprehensive solution designed to restore your toilet's functionality. Featuring easy installation with simple instructions, this universal kit fits most toilet models and is specifically designed for 2" flush valve toilets. The adjustable fill valve accommodates heights from 9" to 14", ensuring a perfect fit for your needs.
| Item Weight | 0.5 Pounds |
| Capacity | 3.5 Gallons |
| Fuel Type | Gasoline |
| Product Grade | Replacement Part |
| Global Trade Identification Number | 00039961014009, 00039961341365 |
| UPC | 735090087302 100077395334 039961014009 039961007568 039961341365 717029394644 |
| Manufacturer | Fluidmaster |
| Part Number | 400AKR |
| Item Weight | 8 ounces |
| Product Dimensions | 4.3 x 7.4 x 13.9 inches |
| Country of Origin | China |
| Item model number | 400AKRP10 |
| Is Discontinued By Manufacturer | No |
| Size | 2 inches |
| Color | Easy Install |
| Style | Repair Kit |
| Finish | Polished |
| Installation Method | Standard |
| Item Package Quantity | 1 |
| Batteries Included? | No |
| Batteries Required? | No |
| Warranty Description | 5 Year |
W**H
brass screws are small but great price BEST BANG FOR THE BUCK. PERIOD.
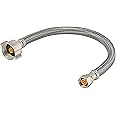
well the brass screws that hold the tank to the top of the bowl are really too small.. only about 3/8 of a screw head versus almost 3/4 of and inch screw head on my old brass screws which completely COVERED the rubber gasket almost beneath it . the brass screws in these kits almost fall through my old american standard tolilet . IF there was not a rubber gasket they would fall through ........... that being said this kit GETS the JOB done. MAKE SURE you buy yourself a 12 inch lead in pipe lead with it .......... 3/8 to whatever the bottom of the tank filler thing is . The instructions on this kit are pretty much NOT TELLING you all of what you need to do . YOU have to figure out the most of it on your OWN . ie wing it . try to find something on you tubie or the video which I saw after I had installed my units . I just did TWO OLD RUSTY TEN YEAR OLD TOILETS I HAD TO ALMOST HACKSAW OFF THE SCREWS ON AND THE BUST APART THE GASKET FLANGE HOLDER MEGA BOLT ON THE BOTTOM AND SO ON . NOW TO INSTALLTHE HEAD OF THE FILLER IS SUPPOSED TO BE three inches above the overlow/filll pipe . now this is NOT possible in my tank and still have any space to have water fill . cut about an inch off the overlow fill pipe . now this is what is filling up your bowl underneath . you need to adjust your float to get al much water as possible and still leave a bit of room to adjust it . about six screws up ( fings on the fioating thing ) bring that to about even to the notch on the back or about two inches below the tank top. the floater head is supposed to be at least an inch above the overflow fill pipe with the flapper valve . leave as much of that pipe as possible so your water level in the tank is full and you still have that flapper valve pipe an inch above the water so you do not the headache of water flowing into your toilet all the time which used to take bending the old stopcock ball downward a bit so the water level did not rise as much . now on that flapper valve thing when you install it . TIGHTEN IT THREE TIMES AS HARD AS YOU CAN AT THREE DIFFERENT INTERVALS TO REALLY SEAT IT GOOD. you see it is curved more or less and after the gasket on it seats a bit you find ten minutes later using all fingers on both hands to push it around some more YOU CAN. . put it in first then do one of the tank screws. then tighten again . do the other tank screw then tighten again . etc. on the tank screws . thank them for giving you a gasket below the tank. it is screw , gasket, tank, under tank gasket , washer and nut and then the unit is all in one piece . tighten those gaskets to the MOST TENSION you think they can take , then do again ten minutes later. you would be surprised. the gaskets flatten out and become loose until you do them each about three times as far as you can go . there is a nut above the tank and bowl but not to worry if you seat it right it fits PERFECT. now when you put the whole thing on the bowl . move it around , square it up and PUSH DOWN ON IT . MOVE IT AROUND AND PUSH IT DOWN SO YOU CAN FILL THE TANK HIT THE BOWL . THIS IS THE WAY IT WORKS. . TIGHTEN THE BRASS SCREWS HOLDING THE TANK TO THE BOWL . AS YOU DO IT PUSH DOWN ON THE TANK SO YOU KNOW IT IS HITTING THE TANK TO THE BOWL. PLENTY OF ROOM FOR THAT BOLT BETWEEN . THIS SEALS THE FLANGE GASKET REALLY GOOD AND PROPER. THEN TIGHTEN THE BRASS SCREWS DOWN. THEY WILL MAKE THE TANK HIT THE BOWL AND BE SOLID AS A ROCK. WHEN GET TO THIS NO WOBBLE OF THE TANK SOLID AS A ROCK YOU HAVE MANAGED TO REALLY SEAT THE TANK THE WAY IT IS SUPPOSED TO FIT OR AT LESS A WAY THAT REALLY REALLY WORKS GOOD. THE BRASS SCREWS ARE SMALL BUT AT LEAST THEY HAVE AN EXTRA GASKET UNDER THE TANK TO DOUBLE GASKET THAT SCREW ABOVE AND BELOW THE TANK. ONCE YOU MAKE IT SOLID . THIS UNIT WORKS FINE AND DANDY . IT APPEARS NOT TO BE A UNIT THAT WILL LAST MORE THAN ONE TO THREE YEARS BUT THAT IS UP TO WHAT THE OLD VALVES WERE DOING . YOU COULD PLAY WITH THE BALL AND MOVE THEM WHILE THEY WERE LEAKING TO MAKE THEM LAST LONGER BUT EVERYONE KNEW THE TOILET WAS DRIPPING AND FILLING THE BOWL ETC. NOW I HAVE FORTY AND FIFTY BUCK VALVE GREAT BEST VALVE YOU CAN BUY THING AND WELL THEY DO NOT LAST MORE THAN A YEAR OR TWO EITHER . IE IF YOU DO NOT HAVE A WATER SOFT UNIT ON YOUR HOUSE AND YOU HAVE HARD WATER . IE CALCIUM AND JUNK WHICH REALLY KILLS THOSE FANCY VALVES IN VERY LITTLE TIME . SIX MONTHS MAYBE . FOR MY USE . SELLING MY HOUSE AND NOT PUTTING IN A WATER SOFT UNIT . THESE WORK GREAT . MAKE THE BOWL HIT THE TANK AND YOU HAVE A ROCK SOLID UNIT . ALSO BUY THE FEEDER LINE THAT BRINGS THE WATER TO THE BOTTOM OF THE TANK. TRUST ME YOU NEED THEM. DO NOT TAKE ANYTHING IN PLUMBING FOR GRANTED. BETTER TO HAVE IT ALL AND TAKE BACK WHAT YOU DO NOT NEED ........... THAN TO FIND OUT THE LINE IS LEAKING SINCE THE RUBBER IN IT HAS BEEN MASHED DOWN AGAIN AND AGAIN OVER YEARS. SO AFTER TENS YEARS OF TWO LEAKING TOILETS I JUST FIXED MINE FOR A REALLY REALLY LOW PRICE ON THESE THINGS AND THEY REALLY DO THE JOB. A NEW LING AND PUT ALL OF THIS IN AND GET YOURSELF NO MORE THAN A TWENTY BUCK SEAT THAT IS WOOD AND NOT PLASTIC ( AT WAL MARTIE THEY HAVE EM BUT SELL OUT THEM QUICKLY THE GOOD HARD ONES ) NOT PLASTIC . GOT ONE MORE TOILET TO GO BUT WILL HAVE THEM ALL FIXED AND THEN WILL REPLACE FOUR FAUCETS IN THE THREE BATHROOMS AND FOR VERY VERY LITTLE I GOT MY TOILETS FIXED . THESE KITS REALLY PACK IT IN . THE TWO INCH GASKET UNDER IT , THE FLAPPER VALVE AND ALL . DID NOT MESS WITH DOING THE HANDLES THE OLD HANDLES WERE FINE . BUT BOY . THESE KITS DO THE JOB A BARGAIN . NO NEED TO BUY A FIFTY BUCK VALVE AND THEN BUY ALL THE OTHER PARTS ......... JUST BUY THIS KIT AND MAKE IT TIGHT . AND SOLID AND YOU GOT AS GOOD AS YOU ARE GOING TO GET. NO IT WILL NOT LAST TEN YEARS . LUCKY IF IT WILL LAST TWO YEARS . BUT THAT IS ALL ANYTHING OUT THERE IS GOING TO LAST THESE DAYS. AND OH YES BELIEVE ME THAT FLANGE GASKET BELOW THE FLAPPER VALVE . YEAH IT WAS TOAST . BLEEDING BLACK RUBBER. SO WAS THE GASKET UNDER THE OLD VALVE I HAD . YOU SEE THE RUBBER GASKETS JUST DO NOT LAST. AND EH HARD WATER MESSES UP ANY VALVE SO GO WITH THIS KIT . I GIVE A GREAT REVIEW OVERALL EXCEPT FOR HAVING SMALL BRASS SCREW HEADS THAT HOLD THE TANK TO THE BOWL . BUT BOY THIS KIT FOR THE BUCK IS A STEAL. SEEN THE SAME KIT PRICED AT THIRTY BUCKS EVEN IN HARDWARE STORES , ETC. . CHEAPER ON AMAZON AS ARE A LOT OF THINGS BUT NOT ALL THINGS . YOU HAVE TO WATCH THE MARKET ON ANYTHING YOU BUY THESE DAYS AND CHECK OUT AT LEAST FIVE DIFFERENT PLACES ETC. THIS TIME AMAZON AND THIS KIT IS A BARGAIN AND DOES THE JOB ............. EH FOR MAYBE TWO YEARS ANYWAY . BUT I HAVE HAD FANCY VALVES GO OUT IN SIX MONTHS SO YOU JUST ROLL THE DICE AND HOPE THINGS HOLD . SO FAR I AM BACKING THESE KITS AS THE BEST BANG FOR THE BUCK GOING.
M**K
this was bought for in-laws who have a 1980s john
This was bought for in-laws who have a 1980s john and sadly was the wrong part for their odd-ball toilet. They managed to use some of these parts to get that old thing going instead of buying a new toilet like we suggested, so I guess it was a gift and all good. I've used the parts kit to replace and repair parts before and these work well as long as you have the same parts or similar toilet parts. Good luck if your ordering parts on the internet for a toilet, just take your time and don't over tighten your lines. Thanks for reading my review and have a good day!
T**S
Time saving tip - you may need a third 5/16 bolt and washer set
This kit worked fine for my Mansfield toilet (dated 2004). Their were numerous other numbers on the toilet so I'm not sure of the model.Best tips- #1 If your tank has 3 bolts connecting the tank to the basin, you will need to purchase another bolt because the kit comes with only 2. Do NOT reuse your existing bolt if it has the washer/rubber attached to it. I would just run down to L's and get another bolt. A photo of what I bought is attached. It's a 5/16 bolt to match what is in the kit. HD did not have any bolts in stock.#2 tip - You'll need the large wrench in my photo to remove the existing large white nut (also in photo). I had to soak my tank in a tub of hot water for 30 minutes to help loosen it. The wrench only needs to catch a corner of the nut to make it work. I spent too long trying to actually grab it. This is the step that will make you think you can't do it. Play with wrench position, remembering that in my opinion, it is not supposed to actually wrap around the nut. It just needs to catch a corner of it long enough to make a couple of turns to loosen it.#3 I used the green rubber shelf liner to help grab several parts.#4 You will probably need to cut the fill tank down to ONE inch below the fill line (which you can see inside the tank). Easy to do with any saw, but just do it before you reattach the tank.I'm a 61 year old female with no plumbing skills and I was able to replace all my tank parts and eventually tighten the bolts without any leaks all by myself. It's not technically difficult but takes some strength, tools, patience and a good youtube video. Hopefully my tips will help someone else complete the task in just a couple of hours instead of the 5 it took me.possible model numbers were Mansfield 63, 160, 135, 171, 272
D**G
It's all you need, almost
It took me almost 2 hours to finish the installation so I think I should write down what I think about this kit.Background:My house is 16 years old now and there are 3 Mansfield toilets, model #160. All of their rubber gaskets fall off and sometimes it will block the flush valve opening so water keeps leaking to the toilet bowl. I was just going to replace the flush valve but I saw this kit and I think why not.The good:1. Good qualityThis kit comes in a great packaging, and is easy to open. It comes with detailed instruction and all the parts you need. Most importantly, they are well built.2. Great engineering designI am pretty impressed by some of its designs. For example, you can adjust the height of fill valve by simply twisting the lower shank. You can also adjust the tank water level by simply turning the adjustment screw. Oh you can even adjust the flush performance by turning the rubber on the flapper!The "bad“:Don't get me wrong. I rated 5 stars for this product. I think it's well worth the price. But I do think there are some rooms for improvement.1. Instruction too detailedI just found the instruction contains everything you need to know to install the kit, but it's a little bit too much and it could be overwhelming for beginners. There is just so much you need to carefully read through, to ensure you don't install things wrong.2. Parts not well labeledThe instruction does list all parts in the kit, but I think it would be better if there are some numbers or letters on the parts so that you can easily identify which part is which. For example, the flush valve comes with a thick red rubber gasket. On part 3 of the instruction, the picture shows the rubber gasket needs to be installed as the last layer in the tank. But then it also shows you need to put "tank to bowl gasket" on the bottom of flush valve. It actually took me half an hour to figure out that the red rubber gasket is actually the "tank to bowl gasket". The rubber gasket mentioned earlier was actually already installed on the flush valve pipe.3. Cut overflow pipeThe overflow pipe that comes with the kit is 9.75" long. You will most likely need to cut it because the instruction said the top of overflow pipe must be 1" below bottom of the tank level hole. I couldn't find my hand saw so I had to use something else to cut it short. It would be cool if they design the overflow pipe just like the fill valve, where you can just turn to make it longer or shorter.4. Bend tank levelThe new lever is straight. The instruction said you would need to bend it. Why not just design it as a bended lever? I had to bend and hold it for at least 5 minutes to see the result.5. Only comes with 2 tank boltsThe kit only comes with 2 tank bolts, but my Mansfield toilet has 3 bolt holes. The kit actually includes extra rubber washers for 3 bolt toilets. The instruction said you would have to reuse one of your existing bolt sets along with the new rubber. I actually bought "Mansfield 630-0204 2" SmartFasten Tank to Bowl Kit" and used that instead.The bottom line:This is a great kit and could be everything you need to completely replace your old fill and flush valve. It's well worth the money.
**O
Easy install
Less then a hour after it was delivered it was installed. Great product would recommend to anyone looking to get it will buy if needed again
Trustpilot
5 days ago
1 week ago