


⏳ Time’s ticking—own every second with precision and style!
This 3-pack of femst digital kitchen timers features dual 24-hour count up/down modes, a loud 60-second alarm, and a large LCD display for easy reading. Designed for ultimate flexibility, each timer includes a magnetic back, retractable stand, clip, and hook for versatile placement. Compact and user-friendly, these timers are perfect for cooking, workouts, study sessions, and more, helping busy professionals stay on top of every task with confidence.
| ASIN | B06WD55BWF |
| Best Sellers Rank | #401,083 in Kitchen & Dining ( See Top 100 in Kitchen & Dining ) #1,836 in Timers |
| Brand | femst |
| Color | 3 Black |
| Customer Reviews | 3.7 3.7 out of 5 stars (651) |
| Date First Available | February 13, 2017 |
| Is Discontinued By Manufacturer | No |
| Item Weight | 7 ounces |
| Item model number | 8541986973 |
| Manufacturer | femst |
| Material | Plastic |
| Number of settings | 2 |
| Product Dimensions | 3.3"D x 3.3"W x 1.2"H |
| Screen Size | 3.3 Inches |
| UPC | 780330093605 |
C**R
2nd Update: Dual Timers - This feature is available. My mistake. Buy these!
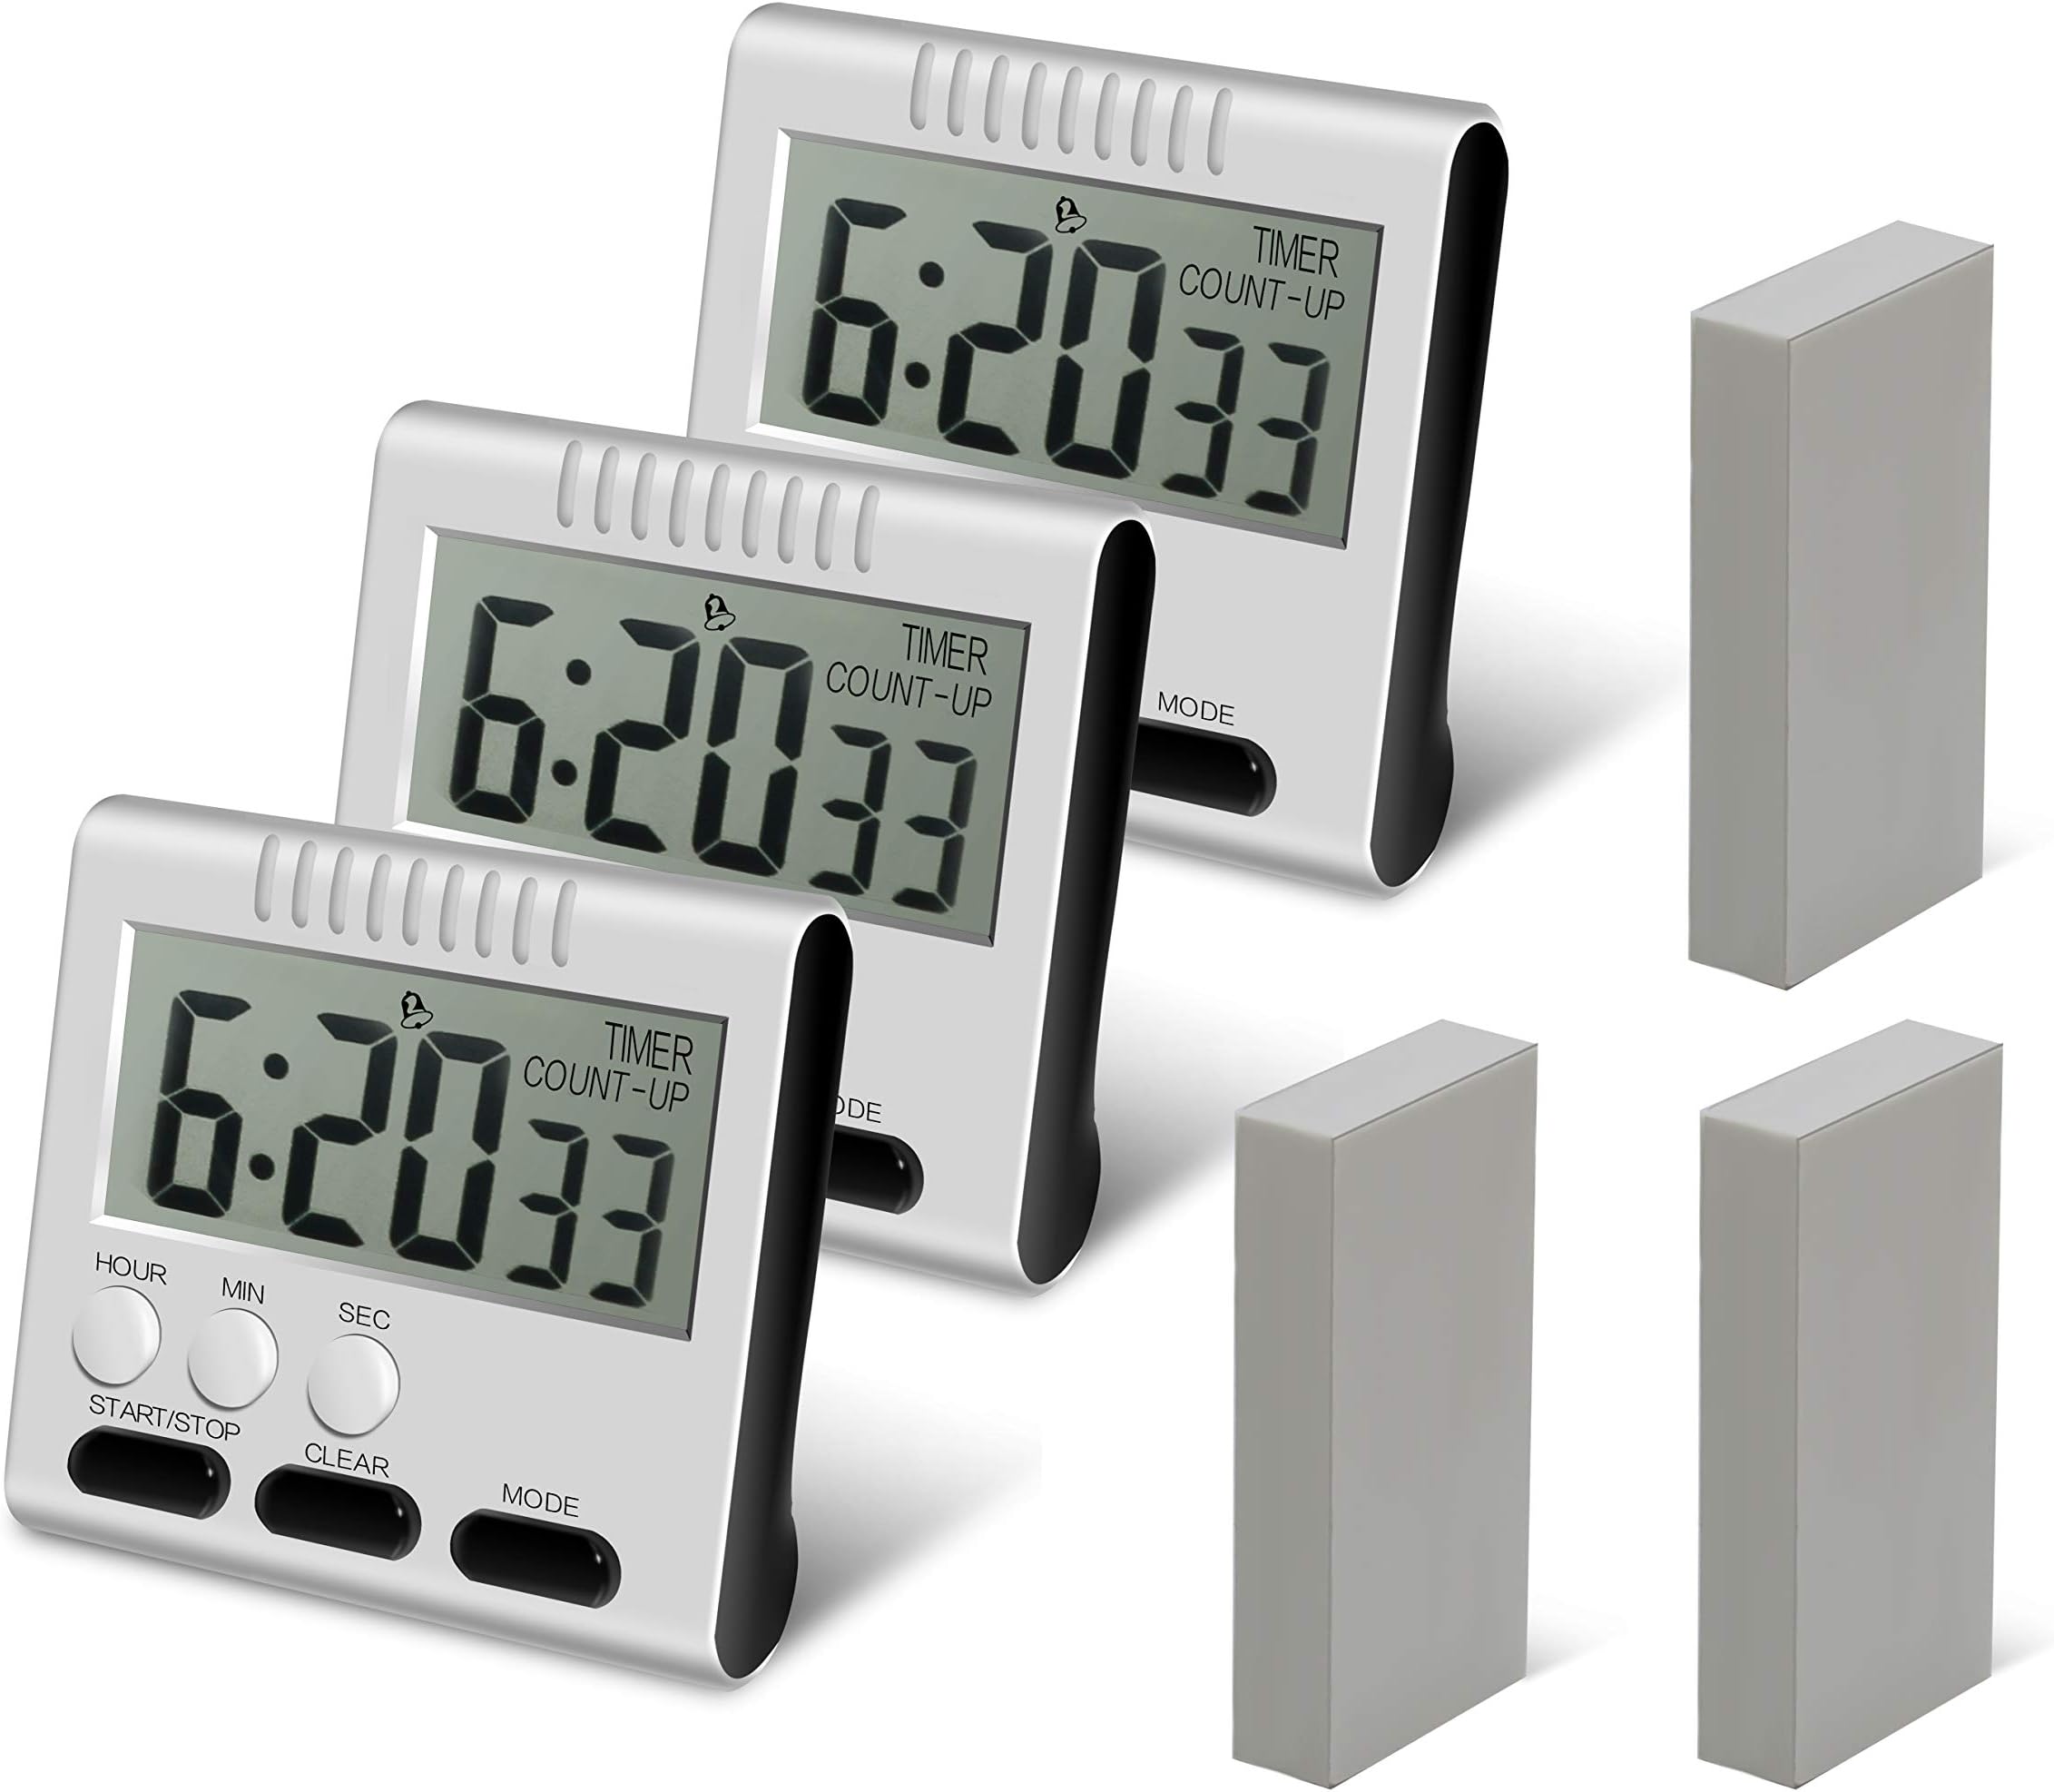
2nd UPDATE: Changed to 5 stars. The timers do feature the ability two set two alarms. For example, set alarm #1 to alert after 5 minutes, and add a second alarm #2 to sound after after 10 minutes. This works great when you figure out that to cycle between the two timer modes. The secret? When in timer mode, pressing the "hour" button cycles between the two timers. This is not documented anywhwere. Also not documented -- to set time in hours, you must press the "minute" button first. You can then set hours with the "hour" button. Confusing? Quirky? Yes. But once you figure this stuff out, these are very good kitchen timers. Take off one-half or one full star if this is an issue for you. But for me, I'll stick to 4 stars as these are easy to read, easy to set, and loud--perfect IF you want to time only one event on one timer. That's what I expected--one timer for one function, so I'm happy. Good luck with your purchase of these. Original review: These timers are easy to use, easy to see, and have an alarm that's easy to hear. Three for three on the important features needed in a timer. The description describes these as black in color, but this is incorrect. They are white with black buttons, exactly as pictured. As others have said, they are loud, which I take as a good feature--easy to hear over an exhaust fan or a running dishwasher, a loud TV football game, or whatever else may make you miss an alarm and ruin your souffle. I've knocked off one star for the clock function, as it displays 24 hour military time only. Not a big deal, but some folks may want to know that 3:00 o'clock pm is displayed as 15:00 before hitting the "buy" button. FYI, the three rectangular things displayed in the picture are soft foam double-stick adhesive blocks if you want to permanently mount these on a non-magnetic surface. Also, you should know that these do not come with the AAA battery needed to make these the essential part of your kitchen. Four stars from me and well worth the bargain pricing.
K**M
Turn ON the speaker with the switch on the back of the timer.
When I first tried these timers I could barely hear them. Then I discovered the speaker switch on the back of the timers. They really are loud! I will use these timers in the Kitchen, as well as for timing my exercise rides on my recumbent bike. Update 20210124: There are FIVE (5) steps to setup this Timer: FIRST: Clock setting Press the MODE key until the screen displays the word CLOCK. Press the START/STOP key for 3 seconds to stop the colon from blinking. Press the HOUR button briefly to set the hour (24 hour time: 1500 = 3PM). Press the MIN button to set the minutes. Press the SEC button to set the seconds. Hold down the HOUR/MIN/SEC button to quickly increment numbers. After setting the clock, press the START/STOP key. The colon blinks and the clock starts to work. After 15 seconds, the HOUR/MIN/SEC key is automatically locked. When locked, pressing the HOUR/MIN/SEC key has no effect. SECOND: Timer settings (4 steps) Press the MODE key until the screen displays TIMER. All the numbers should be set to zero to set the timing: 00:00 00. 1. Positive timing setting: Press the START/STOP key to begin the positive timing. COUNT-UP is displayed on the screen above the seconds numbers. The positive timing starts. Press the START/STOP key to stop the timing. Press the START/STOP key again to continue the timing. Press the START/STOP key, then the CLEAR key to return to zero. 2. Count Down timer settings: Press the MODE key until the screen displays TIMER. All the numbers should be set to zero to set the timing: 00:00 00. Press the HOUR/MIN/SEC keys to set the required countdown time. Press the START/STOP key to start the countdown. The alarm will sound when zero is reached. (Switch the alarm ON with the switch in the back.) Press the START/STOP key to stop the alarm. The alarm will automatically stop after 60 seconds. 3. Press the START/STOP key before the specified time is reached and the countdown will stop at the current time. Press the START/STOP key again to continue the unfinished countdown. When the countdown is complete, the alarm will sound. 4. After the countdown is completed, press the START/STOP key to stop the alarm. Press the CLEAR key to return to the last countdown time. THIRD: Alarm settings (2 steps) 1. Press the MODE key to the alarm mode. The display shows an alarm clock symbol. 2. Press the HOUR/MIN/SEC keys to set the alarm time. Press the START/STOP key to activate the alarm mode. The colon will start blinking when the alarm time is set. The alarm will sound when the set time is reached. Press the START/STOP key to stop the alarm. The alarm will automatically stop after 60 seconds. Press the START/STOP key again to deactivate the set alarm time. The colon will stop blinking. Press the CLEAR key to return to zero. FOURTH: Quick time Press and hold any HOUR/MIN/SEC key for more than 2 seconds to quickly adjust the time. There is no sound when quickly adjusting the numbers. FIFTH: Changing the battery Replace the AAA battery when the display is unclear, or the sound is weak.
Trustpilot
2 days ago
3 weeks ago