

Buy anything from 5,000+ international stores. One checkout price. No surprise fees. Join 2M+ shoppers on Desertcart.
Desertcart purchases this item on your behalf and handles shipping, customs, and support to Vanuatu.
๐ฅ Elevate your kitchen game with the pan chefs swear by ๐ซ๐ท
The de Buyer MINERAL B 8-inch Carbon Steel Fry Pan is a professional-grade, naturally non-stick skillet crafted in France since 1830. Made from high-quality carbon steel, it offers superior heat responsiveness and durability, perfect for searing, sautรฉing, and reheating. This pan requires seasoning to develop its chemical-free non-stick surface and is compatible with all stovetops including induction. Oven safe up to 400ยฐF and backed by a lifetime warranty, itโs designed for the discerning cook who values tradition, performance, and longevity.


| ASIN | B00462QP0C |
| Additional Features | Induction Stovetop Compatible |
| Best Sellers Rank | #13,245 in Kitchen & Dining ( See Top 100 in Kitchen & Dining ) #21 in Woks & Stir-Fry Pans |
| Brand | de Buyer |
| Brand Name | de Buyer |
| Capacity | 0.4 Liters |
| Coating Description | Natural Non-Stick, Seasoned |
| Color | Silver-Grey |
| Compatible Devices | Smooth Surface Induction |
| Customer Reviews | 4.5 out of 5 stars 15,677 Reviews |
| Global Trade Identification Number | 03011245610203 |
| Handle Material | Carbon Steel,Stainless Steel |
| Has Nonstick Coating | Yes |
| Included Components | Frypan |
| Is Oven Safe | Yes |
| Is the item dishwasher safe? | No |
| Item Type Name | de Buyer Carbon Steel Fry Pan |
| Item Weight | 0.9 Kilograms |
| Manufacturer | de Buyer |
| Manufacturer Part Number | 5610.20 |
| Manufacturer Warranty Description | Life time warranty |
| Material | Carbon Steel |
| Material Type | Carbon Steel |
| Maximum Temperature | 400 Degrees Fahrenheit |
| Metal Type | Carbon Steel |
| Model Name | Mineral B 8-Inch |
| Model Number | 5610.20 |
| Product Care Instructions | Hand Wash Only |
| Recommended Uses For Product | Searing, Sauteing, Reheating, Cooking Eggs |
| Shape | Round |
| Special Feature | Induction Stovetop Compatible |
| Specific Uses For Product | Searing, Sautรฉing, Reheating, Cooking Eggs |
| Unit Count | 1.0 Count |
S**N
Read carefully, great pan, but you have to know how to use it!
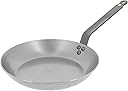
So, I rarely write reviews, but I have to with this. Bottom line so far, this is a great pan, IF YOU USE IT RIGHT. Did you all read that? use...it...right. For all your international readers, I'm American AND a man, so that's two strikes against me. Anyway, lets get to it: 1. I read nightmares for some reason about what coating came on it, and thought it was encased in some sort of concrete or magic substance that ruined the pan and the purchasers life as well. I have no idea what they were speaking of, because I followed the directions (for once) and ran it under scalding hot faucet water for 5 minutes and scrubbed off the light coating of beeswax off that it comes with. I assumed it was there, I didn't really notice anything, but I took their word for it and did it anyway. 2. I seasoned it like they instructed, by filling it with a plain tasting (canola or vegetable) oil using 1-2 mm (again, I'm American so I guessed what that is, because we feel that the metric system isn't any good) and heating it until it smoked...about 5-10 minutes. WATCH THE PAN, it happens fast; I think this is probably where everyone else went wrong, leaving them with a burnt mess that ruined the pan. I turned the burner off, let it sit for an hour, and cleaned as instructed in #3 below. 3. After cooking, wash it with hot water and a plastic scrubby, never use anything else or soap. NOT the stainless chain mail for cast iron, NOT soap, use a plastic scrubby. If it gets anything particularly chunky on it, use the plastic scrubby and kosher salt as an abrasive. Dry it with a paper towel then over a flame for a minute or two..again, don't burn the pan doing this, it will ruin the seasoning.. Put a DAB or oil....not a tablespoon, or a dash, or anything in between....just a dab on a paper towel and rub it into the bottom and sides of the cooking surface and you're done. You should really feel almost nothing if done correctly. 4. This is a carbon steel pan, not your mothers indestructible old Teflon or even Sliverstone. You have to know how to season it, take care of it, and most importantly cook on it. Again, being American and a man, we tend to cook everything on atomic blast for maximum effect and doneness. Go USA. Not so with these types of pans. medium or medium high should always be the rule at best, and usually low to medium suffices. I cooked 2 sunny side up eggs this morning starting out on medium high heat for 60 seconds (covered), then down to low heat for a few minutes until the top was just finished and no longer runny. Yes...they SLID RIGHT OUT after freeing up one sticky corner. Trust me, not one was more shocked...and pleased... than me. 5. The pan will look caramel brown at first, then eventually dark brown...that's supposed to happen. The more colorful it gets the more non stick it gets. That's a beautiful pan right there to use when it looks like that. -The only cons so far, if they can be one, is that it is HEAVY...but it is supposed to be if you know anything about pans. This is a 9.5 inch, and if I get the 12 inch I can only imagine the weight....but for the quality it's worth it. -Secondly, although it is billed as a "10" pan" the sides are sloped up from the bottom sooner than most other pans...this gives you a bit less cooking area for things such as burgers, etc. Not a big issue, just noticeable when you use it. But again, worth it. -Lastly, since it is very susceptible to heat, this is NOT a pan to cook delicate things in such as crepes (this is the wrong pan anyway), or things that need high heat for long periods of time (it would tend to get away from you) but you get my point; this is a pan that will take getting used to, but again, well worth it. Overall, a solid pan that so far I love.
T**X
Amazing, Great, and Fantastic!
I've been using French enameled cast-iron frying pans for many decades, but I recently decided to try a De Buyer steel skillet after an old Le Creuset started to pit and spall on its cooking surface. I am so glad that I did! I got the smallest 7.9" model as a cheap test. It totally passed! The instructions say to first rinse it in hot water to get rid of any excess beeswax residue. Then you must season the skillet with oil before you use it. I seasoned it once with some flax seed oil to a light brown color, and then I fried my first egg. I was anticipating that the skillet would require several seasonings to build up a non-stick surface, but no! It cooked a perfect over-medium fried egg for me the first time. I have since fried eggs and sausage patties in it, and the seasoning is a nice dark brown now. Compared to my old favorite Le Creuset, this de Buyer Mineral B pan seasoned quicker and weighs much less. It heats up faster and requires less heat than the cast iron to cook the same thing. The quality of its non-stickiness is at least equal to my old favorite, which is to say, about perfect. Cleanup is just as fast and easy, and the price is right, especially compared to French enameled cast iron. The only drawback of this pan is its relatively small size, but I knew that when I bought it. The next size larger would be more practical and useful for most people. Still, for the mornings when I cook breakfast just for myself, this is the pan I use. I still have and love my old 28 cm Staub cast iron pan, but my smaller frying pans are now this one and a 24 cm/9.5" De Buyer Carbone Plus model that I just ordered. These pans ought to last a lifetime or two if properly cared for. If I had the past forty years to do over, I would ditch the cast iron and go with steel skillets like this one. DeBuyer Mineral B Element Iron Frypan, 7.9-Inch Round
D**L
Quite possibly the worlds most perfect pan...
I had been in the hunt for a healthier alternative to my Teflon coated non-stick pans when I ran into these here on Amazon. I was rather skeptical of the non stick ability many claimed possible with the De Buyer Mineral B pans. Reading the existing reviews, it seemed that all stressed proper seasoning and in between use care. Instead of jumping on the Green Earth or Bialetti pan bandwagon, which seemed to be plagued with poor quality, I decided to read up a bit on the seasoning process. I visited a few forums, watched a few you tube videos and placed my first iron pan order. Though not directly recommended by De Buyer for this particular pan, I followed instructions to boil potato skins for 15-20 minutes before starting the seasoning process. I usually would follow the manufacturers specific instructions but the information for pre-seasoning with the potato skins came from a very respected chef on a popular forum who also fancies the De Buyer product. After the boil process I seasoned my new De Buyer pan with peanut oil using the method dictated on the De Buyer website. The process was completely painless and the pans are better than expected. It has now been several weeks since my first Mineral B fry pan purchase, the 10.2" model. I was so infatuated with the original pan that I have now purchase nearly the entire set of the Mineral B line. They are truly non-stick when seasoned properly. They cook like a dream. They heat up so quickly and when I change the heat setting on my stove they seem to adopt the new temperature much quicker than my previous pans. I had a little trouble getting used to not using soap to wash these; instead rinsing with very hot water and wiping/lightly scrubbing out as necessary. The process is just so different than what I was used to but after doing it for a while I find it easier. If you are the type of person that needs a pan to look perfectly clean and spotless, these are not for you. I say this as the interiors darken with age and they blue a bit on the outside. This keeps them from looking brand new for very long (though I think they look even better as they get more use). If you have trouble following directions or would prefer a "maintenance free" pan, this pan more than likely isn't for you either. They do require a simplified method of maintenance but require salt purifying from time to time and should be oiled after each use (again, painless but a tiny bit more work that the average Teflon pan). Also, these pans and the entire line as a whole are rather heavy. If weight is a concern, these pans are probably out of the question. If however you are looking for a healthier alternative to other non stick pans with durability to boot and don't mind a bit more time in the kitchen, these high quality pans are right up your alley. On another note, I have found my favorite amongst the Mineral B line-up. They are the De Buyer Mineral B Country Chef pans. I bought both the 9.4" ( De Buyer Mineral B Element Country Chef, 9.4" ) and the 12.6" ( De Buyer Mineral B Element Country Chef, 12.6" )versions and they are by far my most used pans of the set. They are similar to a deep wall skillet but with the volume and practicality of a saute. The smaller version works very well in place of a saucepan and the larger is perfect for stir fry dishes and meals for larger groups. Well worth looking into. Enjoy!
A**R
Solid pan, but wish the handle were uncoated.
Pros: -nice and heavy. Sears meat beautifully and holds a lot of heat so that food browns well. -solid construction. Rivets are very secure, and pan will stand up to heavy use. Does not warp even when subjected to aggressive heating. -gets better as you cook with it. Cons: -handle has some sort of silicone coating that chipped off after being in the oven at 450 F for an hour. At high temperatures (around 380 F), this coating gets soft and scrapes off easily. -though the weight makes it great for heat retention, it does make it harder to maneuver. -Because of the smooth finish, seasoning does come off more easily, especially with acidic liquids. However, re-seasoning is as simple as rubbing oil on the surfaces and heating it up until it stops smoking. Tips: 1. For the initial seasoning, don't bother boiling or washing the manufacturer's beeswax coating off. Simply heat it up stovetop until the wax liquefies, and then use a kitchen towel to thoroughly soak up the excess on the inside and outside of the pan. Once you've wiped off all the excess, just leave it on the heat until the entire pay turns a dark grayish blue (first two photos show the result after seasoning with just the manufacturer's beeswax). That'll give you a good foundation for building up more layers of seasoning. 2. After you've done step 1, sautรฉ potato peels, kosher salt, and oil or lard on high heat. Move the mixture around constantly to contact all the inner surfaces. Keep doing this until the peels are blackened (see last two photos). 3. If you also would rather not have the handle coating, before doing any seasoning, remove the silicone button on the handle and put the whole thing through an oven clean cycle. The coating will flake off and turn to ash.
M**G
Itโs a good skillet
I have carbon steel woks.Many. Dipped into carbon steel skillets with an inexpensive 8 inch Chinese manufactured Merton and Storck and it worked out fine. That made me want to get a larger skillet in carbon steel . Did some research and decided on Debuyer mineral b. Bought this skillet. To me it feels just a little lighter than my standard Lodge 10 inch cast iron skillet. My 10 inch tri-ply stainless is a feather compared to it. I canโt complain as I opted for the thicker gauge of the mineral b and was expecting it to have some weight. But it is heavier in hand than I had expected. So donโt expect substantially noticeable weight savings compared to similar size cast iron. Itโs still somewhat heavy. Seasoned easily on gas stovetop. Itโs a substantial pan and so far so good. ๐ Edit: Liked this skillet and contemplated buying another if it came on sale. Since this review I bought a mineral b pro 11 inch as it had dropped drastically in price. It was almost what I paid for the standard mineral b which also had been discounted when I purchased. My advice: If in your budget get the pro instead of the regular mineral b. Just the way it feels in hand, better balance. The stainless steel handle that stays cooler when stovetop cooking. The added versatility of using in the oven make it a better choice if you can afford it. BUT: The blue carbon Debuyer of the same size but with 2mm thickness is noticeably lighter, oven safe also and usually much lower priced. EDIT: caught the 9.5 inch on sale. It might now be my favorite. Found the 12 inch on sale also. Yeah I bought it too. Bottom lineโฆI havenโt been disappointed in my Debuyer purchases.
A**Y
Great quality for the price
After getting this pan I think I'll never go back to cast iron. This is a fantastic, high quality piece. It heats up faster than my cast iron yet also seems to retain heat for longer. It has a smooth finish yet holds seasoning super well. The handle also disperses heat better than short cast iron handles so cooking with it is easier. The handle takes a long time to get hot so in typical day-to-day use i don't need a hot pad at all. There's a ton of info on seasoning these things but let me explain how I do it. Note, this pan has an epoxy handle on it so oven seasoning is not recommended. Although honestly this method is much much faster anyway. Also, note, I find deBuyer's method doesn't really work very well. 1. After thoroughly cleaning the beeswax off, set the pan on a burner set on high. Just leave it there, no oil or anything. Watch as the pan color goes to brown then to blue and then back to gray. This could take 20 minutes or more depending on your burner output. Once this is done you have put a layer of oxide on the pan and it will never rust. This is typically how carbon steel woks are first heat treated. Pan will be VERY hot after you do that, so let it cool down for a while. 3. Once cooled a bit, put a few drops of canola oil in it, spread the oil around and buff it out with a paper towel. This should be a very light coat with barely any sheen at all on the pan. You want to nearly wipe it all out. 4. Put the pan on medium-high heat and let it start smoking. If you see beads of oil on the pan wipe them with the paper towel. Be very careful at this point as the pan is very hot. You might want tongs to hold the paper towel and you'll want a hot pad for the handle. 5. Once the pan stops smoking and looks dry, repeat the process. A few drops of oil and a thorough wipe. The pan will start smoking as soon as the fresh oil hits it. Keep wiping oil beads, and each time the pan gets dry and stops smoking, let it sit a bit on the flame and then add a tiny bit more oil. Each time you do this you'll notice the pan gets darker. That's the seasoning building up. 6. You are probably good after repeating this 3-4 times, but it's so quick that I like to repeat the steps 10-15 times. The pan gets very dark very fast. If you spend on hour on this your pan will be very nearly black. After the final coat I like to let the pan just sit there on the burner for a bit and make sure it really sets that seasoning in and dries out. 7. Once done let it cool off for a while. If you did it right the seasoning will be super smooth, dry and not sticky or oily in any way. Couple of notes: 1. I find that my "big" burner can get too hot and I know this is happening when the paper towel starts flaking and getting nearly charred right away in the hot pan. You'll need to find the right temp but it's pretty easy to gauge based on what the paper towel is doing. 2. I think the main problem with people not getting seasoning right is not getting the pan hot enough. You'll get great results with VERY light coats of oil, and waiting until the smoking stops to add more. 3. This method results in a very durable seasoning that can handle whatever you throw at it. Dish soap is not gonna phase it in any way. Just don't take steel wool or abrasive cleaners to it, and make sure you dry it on a burner if you get it wet. I like to do one round of very light oil and heating on a burner until it stops smoking (just like in the initial seasoning) every time I wash a pan like this.
N**K
deBuyer Mineral B: the best steel pan I've ever owned
It's an awesome pan; even heat distribution, seasons easily, food slides right out when done, it doesn't warp under normal use, it's lighter than cast iron, and the handle helps with the weight / makes it easy to maneuver when flipping eggs, etc. I bought a Lodge silicone handle for it and used grape seed oil to season it. For extra precise heat distribution and temperature control, I use an aluminum heating plate (one could also use an induction or electric range). Copper is even better, but I couldn't find copper plates on Amazon. A word to the wise: when cooking with garlic, be sure to move the cloves around and don't let them sit because they'll quickly strip the seasoning from the pan. It's also best to avoid most acidic foods and sauces with any seasonable steel pans. The only downside is that the epoxy coating on the handle won't stand up to seasoning it the quick way, in the oven. At the same time, it's likely their to avoid rust and provide some heat resistance so one doesn't burn their hand. I recommend taking your time seasoning this type of pan so layers can cure and build up and lessen the risk of being stripped with normal use. I seasoned it once per day, every day, over the course of a week before using it. A small amount of oil on a lint free towel once the pan is heated up to about 200* F works well. Be sure to remove the beeswax with very hot water and carefully wash it beforehand. Once the pan is warm, wipe the inside and outside with the lightly oiled towel (also going over the rivets), let it cook at medium to medium high heat (depending on the range and it's output) for about 10-15 minutes, wipe any remaining oil off with the other side of the towel, and allow it to cure overnight. If you see smoke during seasoning; a very light amount seems to be ok, but anything more usually means it's time to turn down the heat / remove the pan from the heat. Medium to heavy smoke and a bad scent is something to avoid during the seasoning process. When it comes to washing the pan: simply use a sponge with some soap / water, lightly scrub the pan, and then rinse thoroughly. It's a good idea to dry off the pan afterwards on the stove with medium heat for a few minutes. This prevents rust from forming in any area the seasoning might have missed. Some also choose to add a quick layer of seasoning after washing it, and some are ok with drying it and leaving it for next time. I hope this helps someone out there.
A**R
It takes some time to build up a coating, but this pan is worth the wait!
Update January 2023: this is still my favorite pan. The coating has built up so that I never need to season it. It's used so much that I just leave it on the stove top. I added a new photo to show how it looks after almost 3 years of constant use. Original review 2020: I have owned this pan for a few months. It took 3 tries to receive an undamaged item: the first 2 pans arrived with sizeable dings/scratches that would have affected performance, and they had to be returned. It looked like the pans arrived from France with these defects, not like the damage occurred during shipment from the Amazon warehouse to my home, so I included this information in my product review as a measure of initial product quality. These pans arrive from the manufacturer stapled inside a thick paper bag, so Amazon would not have been able to easily check for defects on arrival. It took at least 2 months for my pan to develop a good coating. Before use, I baked the pan a couple of times (if you're worried about the silicone piece melting--it can be popped out of the handle, btw--just wrap it with a piece of foil) for about 20 minutes at 400 degrees after coating it with a thin layer of linseed oil. Part of the coating sloughed off the pan, and the things I cooked stuck to it. I wasn't deterred: I decided to use a stovetop method instead, and the results were much better. The best way I found to develop a non-stick coating on a new Mineral B pan: 1. Use the pan for things that are less likely to leave a sticky mess until the coating has built up. Steak? Yes. Fried cornmeal mush? No. The very best food I found for building up a good coating in my pan was bacon. 2. Use a generous amount of oil in the pan, and be sure the oil is near its smoke point before you add food to the pan. Following this rule of thumb will help prevent sticking that may damage the new coating. 3. Leave the pan sitting after use until it feels warm to the touch (not burning hot, not cool). 4. Wash the pan with hot running water and a SILICONE scrubber. (Look for "silicone scrubber kitchen" or "silicone sponge;" it's not the same as a silicone scrubber meant for washing your face.) When I first started using my pan, I used a "non-scratch" sponge that didn't protect my new coating at all. Silicone is much gentler. Remember, never use soap on this pan! 5. Dry the pan with a paper towel (it will leave a residue on reusable towels). 6. Immediately coat the pan with a THIN layer of linseed oil. I usually take the paper towel I dried the pan with and apply the oil, then I gently rub the oil onto the inside of the pan. (Whenever I try to pour a little oil directly into the pan, I end up using too much.) It doesn't take much oil to properly coat the pan, probably only 1/4 tsp or so. 7. Heat the pan on the stovetop until the oil smokes. (You might want to turn on the vent fan.) When the oil is smoking, turn off the burner and leave the pan to sit until it is cool to the touch, and then store the pan for the next use. I know it seems like a lot of steps, but once the pan starts to build up a nonstick coating, it will be worth the hassle. This is a wonderful pan; it performs as well as the 90-year-old cast iron pan passed down to me from my grandmother. There is a plastic-type clear coating on the handle, which other reviewers have mentioned. I haven't had any problems with it. (If you're worried about it melting under a broiler, just wrap the handle in foil. Aluminum foil is a great insulator!) The handle stays cool on the stovetop, unlike my grandmother's cast iron pan, which was a pleasant surprise. Overall, I think this pan is an excellent value. I've paid almost this much for nonstick pans that lost their coating integrity in only a few months despite babying them in every possible way (using plastic implements only, never letting other pans touch the coating, etc). I'm very excited to have a pan that will hopefully last a lifetime with proper care. I've been thinking about buying another one. :)
Trustpilot
1 week ago
3 weeks ago