🚐 Elevate Your RV Experience with Effortless Airflow!
The RVLOVENTRV Roof Vent Fan is a powerful 12V fan designed for RVs, featuring a 14-inch diameter and 10 adjustable speeds. It offers efficient air circulation with a maximum airflow capacity of 950 CFM while using only 20 watts of power. The fan includes a remote control for convenience and automatically closes when it detects rain, ensuring your RV remains protected. Easy to install, it fits all standard 14x14 inch roof openings and comes with additional accessories for a seamless setup.
Item Weight | 13 Pounds |
Blade Length | 14 Inches |
Item Dimensions D x W x H | 8"D x 16"W x 16"H |
Collection Name | Shop |
Electric Fan Design | Exhaust Fan |
Style Name | Classic |
Color | Smoke |
Blade Material | Plastic |
Material Type | Plastic |
Voltage | 12 Volts |
Switch Type | Push Button |
Indoor Outdoor Usage | Outdoor |
Control Method | Remote |
Efficiency | High Efficiency |
Is Product Cordless | No |
Number of Power Levels | 10 |
Number of Speeds | 10 |
Wattage | 20 watts |
Number of Blades | 10 |
Air Flow Capacity | 950 Cubic Feet Per Minute |
Speed | 1E+1 Levels |
Power Source | Battery Powered |
Room Type | RV, Bathroom, Living Room |
Additional Features | remote fan rv vent |
Recommended Uses For Product | Air Circulation |
Mounting Type | Ceiling Mount |
Controller Type | Remote Control |
S**E
Great 12v rv fan!
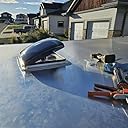
I have another of this exact fan, purchased a couple of years ago, in an offroad camper. Both perform flawlessly. This one was installed today. No instructions needed IMHO. The first noticeable difference, the new one is much quieter. The lid motor is quieter and the fan seems quieter. The offroad camper is much smaller, 5ft.x10ft. This one is in a 19 foot travel trailer. Hard to determine if the lower noise is from a lower cam, but it's pulling cool air into the trailer, from one open window, well. Seems to be the same quality build as the first. I highly recommend this fan. Full featured, all necessary screws and wiring was plenty long. Great product!
D**S
Nice Upgrade to Keystone Springdale 202QBWE
RVLovent 10 speed remote controlled bathroom fan installed on my Keystone Springdale 202QBWE travel trailer. It's a perfect fit to replace the "OEM" vent/fan, and fits right into the 14" opening. The 4" fan that came with the trailer couldn't vent a PC case, much less do anything to move air in a travel trailer. I'm not sorry to hurl the OG fan into the trash.In my test runs since installing the RVLovent fan it does pull powerfully, and it is quiet! I am surprised at how quiet it really is. The ten speeds are listed in the remote as a percentage, and the fan itself has a color LED that changes for each of the ten speeds, which I thought was cool.Can't use this with a MAXXAIR cover though - the motorized hatch will not clear the cover - it opens up wide - which is a bummer for leaving the hatch open in breezes or where debris might get in to the fan itself. As other reviewers have noted, the there isn't any way of preventing leaves, dirt, or damage to the fan or hatch while it's open, which is the one strike against it. The instruction manual is basic (par for the course, complete with translation misspellings) and the remote design is...interesting... but it works well.Installation isn't that hard, just a bit tedious but possible if you have tools, and are handy. It's totally worth the effort!TOOLS NEEDED:Nylon scraping toolWAGO connectors (2), 3 portButyl TapeWire cutter/stripperSquare bit driver (Keystone hardware requirement), preferably on a power drillPhillips screwdriverDICOR, self leveling sealant tubes (2)Caulking gun for DICORPlastic cutting implementINSTRUCTIONS:Begin inside the TT. Use square bit driver to remove four trim screws from ceiling bezel. Pull bezel and set aside. Use Phillips screwdriver to remove hatch knob, and then snap out the inner trim panel. It will hang by two wires that are connected to your 12v source. Cut off the crimped on wire nuts, and load the TT wires into your WAGO connectors. White is (-), red is (+). This will free up the inner trim panel now for removal.Access the TT roof, *usual safety lecture here* and begin scraping DICOR from the metal mounting bracket using your nylon scraping tool. CAREFUL - it's easy to gouge the EPDM. A sunny day helps, it makes the DICOR tacky. You want to expose the screws holding the OEM fan to your roof deck.Remove all 28 screws, and try not to think about all of the holes that are in your roof. Gently pull each side, using your nylon scraper to assist the DICOR in letting go. The vent fan should pull free if you are careful. Set aside old vent fan. (picture)RVLovent provides their own hardware with the fan, but I chose to reuse the Keystone square drive screws since they were previously in the roof. Unfortunately, the new fan holes don't line up with the original ones. More holes - that's great. The RVLovent uses 16 screws. I began by sinking screws at each corner, and working my way inward to ensure a flat mounting. Ensure all screws are snug.The new fan is FAR more powerful and quiet than the original. Time will tell as far as longevity but this is better than a HENGS I installed in my old Jayco, which was solid but basic and noisy. The remote is a bonus for the Mrs. who is too short to reach the ceiling mounted controls... I haven't tested the rain sensing function yet but in the limited usage of the fan so far I am very pleased with the upgrade.
J**N
Great fan, easy to install
The screws are self drilling so no need for drill bits, make sure you get a paint scraper to cleanup the area if you have one installed already and some caulking to seal it all up. Easy installation, I just wish they included something to cut the inside plastic. Other than that it works great and keeps things cool.
B**H
Easy to install, quiet fan, loud opening/closing
I have an '09 motorhome that had the original fans. They were hard to crank open and were loud and whiny. I replaced all 4 with these. You can control with the buttons on the fan or with the remote. The fan has 10 speeds, and it gets slightly louder with each speed. It's basically silent up to 40%, and a moderate fan sound at 100%. It's highest speed is still much quieter than my previous fans. The rain sensor works great, as long as you remember to turn it on. It comes with an extra screen, so now I have 4 extra screens. The white-lidded fans block out light entirely. The smoke fans are like tinted glass - you can see through and it brightens the room, but it's not super bright. I went with white on 3 fans to reflect light/heat, but I like looking through the one tinted fan way better.
M**C
Pleasantly surprised
Good quality, straightforward installation, works well
S**E
Excellent hatch/fan for high ceilings
I installed two of these in our toy hauler. With high ceilings the remote control means no more step ladder to adjust them. These work well, the fan is quiet and moves a lot of air. They look good and even came with a spare fuse.My only small gripe is that you have to remember to turn the rain sensor on. It seems like it should be on by default.
D**E
Be careful. This is not a simple DYI cut and install. Mistakes can lead to costly repairs/fixes.
This fan/vent is a great alternative to the way over priced industry standard brand names. I very much like the fact that it can be fully operated from either the vent or from the remote. The remote's features are extensive. On/Off. Up and Down (Open/Close). Rain sensing ON/Off for auto close. Multiple fan speeds starting at 10% and increasing in 10% increments up to a "HOLD ONTO YOUR WIG" 100% speed. And finally air IN or Out (fan direction). My only critique is that the Rain Sensing feature must turned on. I have know idea why it is switchable. Seems to me that the feature should be defaulted to permanent on. As with most things from Asia, they are great at copying/replicating but lack the basic knowledge of how things are used and should operate. In the dead of night, the fan can be heard even at 10% but that would also be a factor of how close your head is to the vent itself. Installation was straight forward. The interior trim ring will accommodate up to an eight inch thick roof so it should work in most RVs. As I stated in my intro, if you have an experienced level of knowledge in DC electrical wiring and RV construction methods, this project should go off without a hitch. Cutting into an area where your roof AC is ducted or installing the vent in an area of the roof/attic where there is no 12 Volt electric source are all mistakes that will create big issues for you. You will also need a couple of tubes of Dicor self-leveling sealant so plan for that. Hope this helps. Enjoy the project.
Trustpilot
1 month ago
1 week ago