

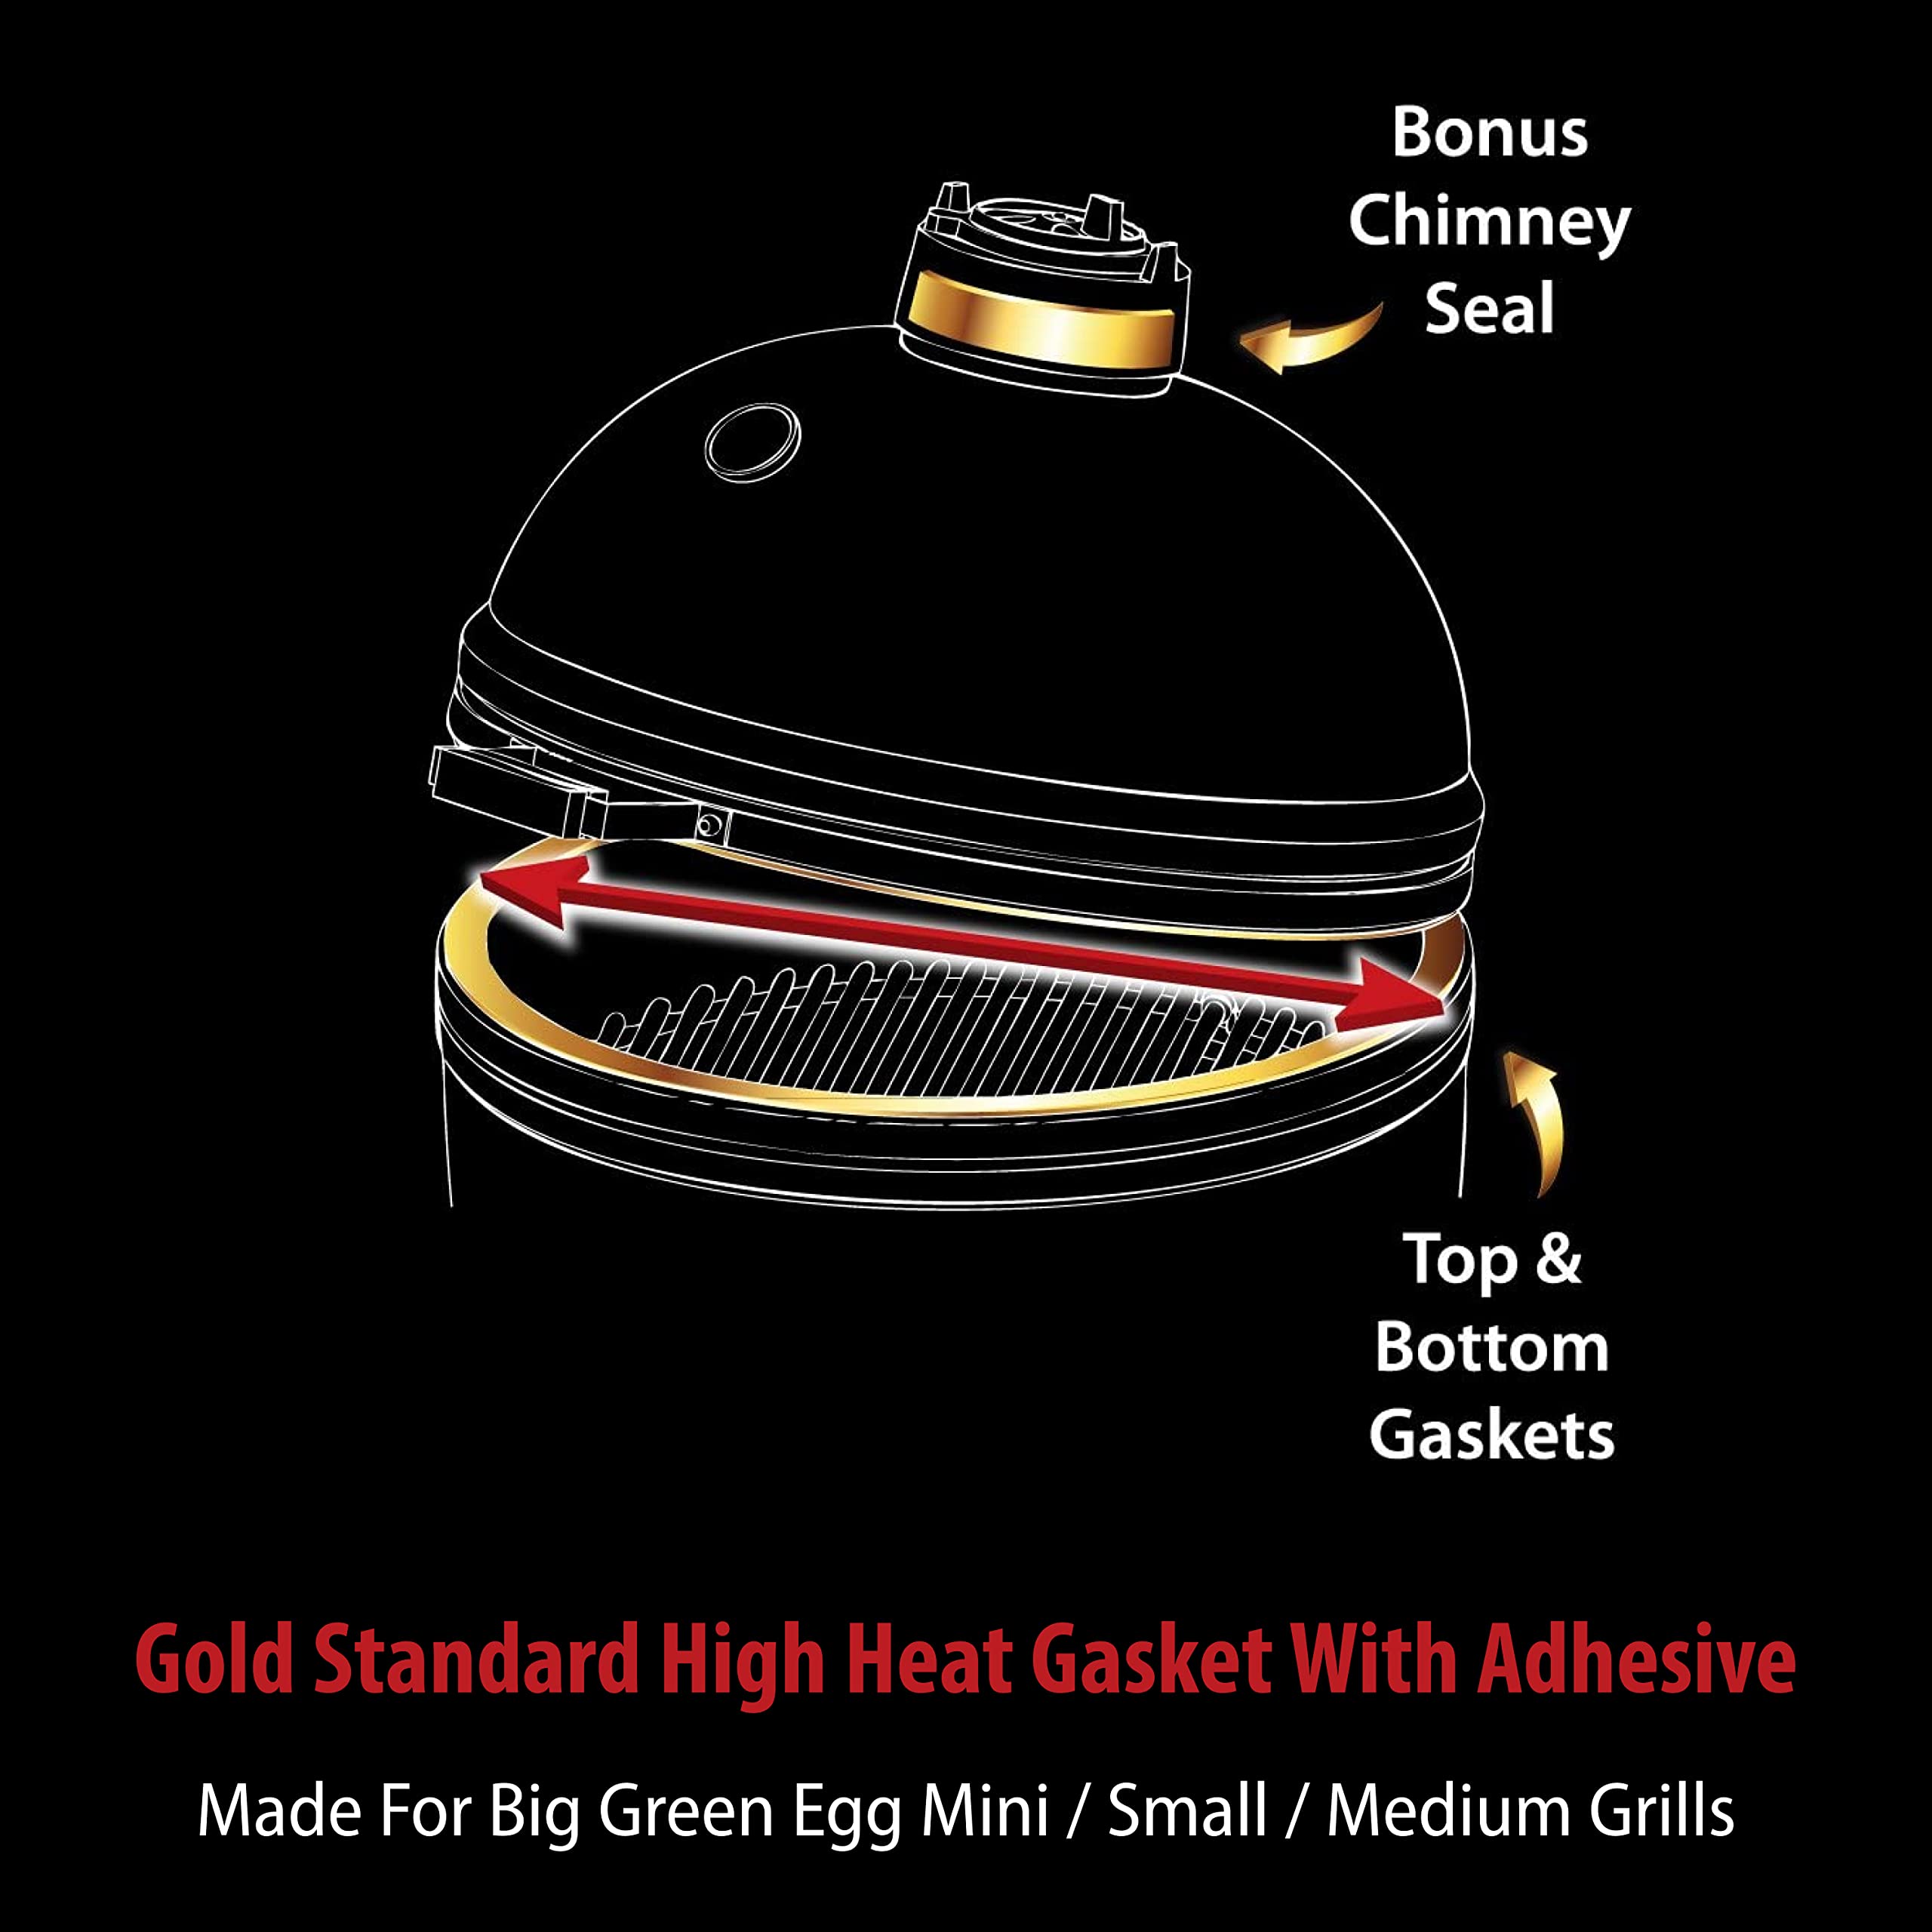


Gold Standard High Heat Gasket with Adhesive for Medium/Small / Mini Big Green Egg with Kevlar and Nomex - 2yr Warranty


| Brand | High-Que |
| Model number | HQNXBGEM |
| Item Weight | 80 g |
| Product Dimensions | 13.97 x 2.54 x 17.78 cm; 80 Grams |
| Item model number | HQNXBGEM |
| Item Height | 7 Inches |
| Item Width | 1 Inches |
| Are batteries included? | No |
B**R
Big Egg Good As New
Clear instructions and a very straightforward installation process. Only hard part was removing the old glue residue from the old gaskets. You need lots of acetone, a good scraper, and bunch of elbow grease.
J**.
Replace the gasket on a Big Green Egg
Our gasket was the original wool felt and it was old, matted down and in any case, the OEM gasket is NOT suited to high temperature grilling (Pittsburgh style steak, or pizza, or cleaning the grill inside at 650-700F.) At the price of these ceramic grills, it astounds me they don't put on a better gasket from the get-go. So before I embarked on revitalizing my old Egg, I scraped off the wool gasket and removed the adhesive residue. (I tried both isopropyl alcohol and then acetone 100%. Acetone was more effective.) After scraping off the sticky stuff with a putty knife and then rubbing with a microfiber cloth soaked in solvent, I attached this new gasket by first cutting the length in half and then peeling back the backing while sticking it down, starting at the back. When doing the top, start offset, that is, don't line up the starts top and bottom but offset the top a couple of inches. I being female was able to do this pretty well and didn't even need to have someone cheering me on by watching and shuffling their feet as I stuck down the new gasket.Then you let the adhesive cure over night or 24 hours; it will be able to be moved when you apply the gasket but 12 hours later, it will be well stuck (close the lid to put weight on it) and after 24 it's pretty well glued down.I notice that even though the manufacturer talks about this being a blend of Nomex and Kevlar, two of Dupont's specialized heat resistant materials, it doesn't exactly give a temperature range for its operation. So I assume I can run it at 700 degrees---but for how long until the adhesive fails?The original Big Green Egg gasket will not run at 650-700 so for doing high heat grills and cleaning, you need to replace the gasket and I assume this one has a lifespan as well; they give a 2 year warranty but my guess is continually running it at high heat cooks will reduce the life of this gasket. However, the cost is reasonable and the job isn't all that bad to replace it.
K**E
Superb replacement gasket for Medium Big Green Egg
This is an excellent replacement gasket for a medium Egg (top and bottom surfaces). I think there may be enough gasket material to fit a large Egg as well but I did not try this. The kit also includes an extra piece of gasket for the chimney which is a nice touch. I found this gasket extremely easy to put on in comparison to previous gaskets I have used. I don't know if this is because of the gasket material or the fact that I have now replaced so many gaskets on Eggs that it seems natural to me but I suspect the former is more likely true. It was very easy to form the gasket around the circumference of the Egg, even on the lid surface which can sometimes be a very awkward exercise. I really went nuts cleaning the ceramic surfaces before putting the gasket on (this is one of the key lessons learned from previous replacement exercises). The instructions included with the gasket are very good for letting you know how to get the surfaces good and clean before applying the new gasket. Make sure you do this!! Another key point is to make the joining seams of the gasket well away from the very back of the Egg. There is a "scrub" effect on the gasket as the lid is opened and closed that will shift the gasket tape if there is a join seam between the two ends of the tape at that point. I usually make one (top or bottom) seam about 30 degrees to the right of the back of the Egg and the other seam about 30 degrees to the left. This gets the seam out of the "scrub area" and the opposite directions from the back of the Egg ensure the top and bottom seam points do not overlap to create a smoke leak point.After three smoking sessions with this gasket installed, I am extremely pleased with it. It seems to be making a better "smoke seal" between the top and bottom portions of the Egg than my previous efforts, likely due to both the gasket itself and the nice clean installation. The gasket has enough "give" in it to allow my four temperature probes to pass through without creating a smoke leak.In summary, I couldn't be happier with this gasket. I definitely have achieved a much better seal than any of my previous gasket installations. This will be a repeat purchase for me when my other Egg is ready and I recommend it highly to anyone looking for a gasket replacement.
S**R
Looks like the best
Easy, works perfect, high quality.
A**K
Terribly disappointed. It can't take the heat.
I could not be more disappointed. Adhesive failed at 600 degrees. Completely separated from the egg!! I have been cooking on a egg for 20 plus years and I have NEVER seen this happen. I have installed new gaskets many times and this has NEVER happened.
Trustpilot
1 day ago
2 months ago