🧹 Clean smarter, not harder—vent cleaning made effortless!
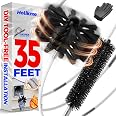
The Holikme Dryer Vent Cleaner Kit features a 35-foot extendable flexible rod system with a synthetic brush head, compatible with power drills or manual use. Designed to navigate tight spaces and corners, it effectively removes lint buildup to improve dryer efficiency and save on professional cleaning costs.


A**.
10/10, Would Recommend
The media could not be loaded. Pros:-Easy to set up-Easy to use-Worked like a charm-Quality is solidCons:-Potential to unscrew if you aren’t paying attention-Brush could be a little fuller / longer-Could be ineffective if your drill isn’t up to par / charged-No instructions (wasn’t really a problem for me personally, I included what I did below)I was really hesitant to get this based on the countless reviews talking about how cheap / poor the quality is. I completely disagree. I’m not sure what those people were expecting or if they got an older product and they’ve since updated it, but this is exactly the quality I was expecting. It needs to be flexible, so maybe people thought it was flimsy? I don’t know. Either way, it came with everything you needed, including a bit to fit into your drill. The only thing it didn’t come with were clear instructions, but that didn’t bother me because it was fairly simple, although I tend to do well with figuring these kinds of things out. The only other complaint I’d have is that I do wish the brush head was a little fuller or at least a little longer, but it seemed to do the job as is. One thing to watch out for is that this screws in to the right (righty-tighty), so you need to be VERY careful if you have a long vent like I do. There are newer versions that snap into place for a few dollars more, not sure if they’d be as solid, but I cheaped out and went with this version and decided to just be careful. I ordered the 35 foot version and it was more than enough, I didn’t end up using all of the rods. My dryer is upstairs and goes through the attic, and our house / attic is huge. I’d guess about 15-20 feet. You do absolutely need a drill for this, especially if your vent is of any significant length, i.e. 10+ feet. You can’t turn it with your hand. I included a video but it’s blurry (ugh), but here’s how I did it…1. Put the drill bit into the drill and tighten the grip on your drill. Make sure the thread end is exposed and not in your drill. Also, make sure your drill battery is charged or you’re using a corded drill. If possible, set the drill to the highest torque setting, i.e. slower but more powerful. Usually this is the “drilling” setting, mine has a picture of a drill bit.2. Test to make sure the drill is turning to the right. Make note of what that setting is.3. Attach the brush head to a rod and insert into the vent. My vent goes through the attic onto the roof, so I had to do this inside in the laundry room, but you could do it outside if your exhaust vent is more accessible. If mine were, I would have turned on the “air fluff” setting while doing this and done it from the outside. If you do that, make sure whatever setting you have it on is cool air, not warm or hot, you could burn yourself and/or melt the plastic rods/brush. You don’t need to do this, I didn’t and it worked perfectly, but it might help.3. After inserting the brush into the vent, start feeding it into the vent, gently forcing it through the vent pipe, and continue screwing in additional rods as needed. The brush may catch on curves, etc. so carefully give it a little wiggle to make sure you haven’t reached the end.4. Once you feel like you’ve reached the end or the brush won’t move forward any more, double check that your drill spins to the right, i.e. the same direction your screwed the rods into each other, then attach the bit to the end of the last rod. I did this by engaging the drill.5. At a consistent pace, slowly move the rod back out of the pipe while engaging the drill, trying your best in the initial pass to go in one direction outward. I had to do multiple runs since I was inside and had limited space, so I continued to detach the drill, remove a few rods, then reattach the drill and continue. BE VERY CAREFUL DETACHING THE DRILL TO DO THIS. I reversed the drill and just held the rods very tightly next to the bit head, but you I imagine you can do it by hand if you want to be extra cautious. Again, you don’t need to do this if you have more space, but I also found it helped the drill out to not have so many rods to turn. If you feel the rods loosen, slacking, or come apart at all, I’d recommend immediately stopping and turning the drill back to the right to attempt to screw the rods back in. I don’t know how I’d get them out with how long my vent pipe is, short of taking it apart in the attic.6. Once I had the initial run done, I reattached the rods, repeating steps 3-5 until no lint was coming out, only dust. I also followed the same steps into the back of the dryer.7. And voila, you’re done!
C**8
Fantastic tool!
Picked this up to clean out my dryer vent, I honestly don't know the last time it was cleaned. I had been noticing that some of the loads would take two cycles to dry, which I feared was due to a lint clog somewhere.I followed the instructions, which you should READ BEFORE USING. They specify which way the drill should spin, etc. Cleaned out from the vent to the dryer, and from the dryer back out to the vent. Something to consider, it's probably easier to go from the dryer back out to the vent just so you don't have to worry about hitting anything at the end. Only downside there is that you'll have to perform the cleanup inside the house as opposed to outside. That's why I did both, getting a good chunk of the lint outside before doing it the other way.All in all, performed as expected. Great product. Easy to use, no durability issues so far, and gave me no trouble even through an almost 90° bend I have at one point. Great purchase, cleaned out way more lint than I expected to. I ended up using 21 of the extensions to clear out the hose end to end.
D**A
Works Well!
It was perfect for my drier vent where it is 30ft away from the outlet. Once the drier vent was cleaned, my drier started drying cloth well. I’m very happy wuth the product.
E**S
Really works!
I was skeptical about this device but pleasantly surprised by how well it got lint out. And, it was so easy to use. It even went around corners with no extra effort. I definitely recommend it.
C**N
The BEST product I've ever used
This is the BEST and Easiest product I have ever used. We'll done
D**R
Product could have one more feature
While the product did what it was designed to do, there is one thing that would make the product better. Something to put the parts in, like a long sleeve, (e.g. kite sleeve) once you have completed your cleaning. The packaging that the item comes in is not suitable.I did not find any instructions indicating to only operate in a clockwise direction whether inserting or retrieving. That instruction is only present in the online product description. Glad I saw it as I had a 30ft run to clean and I'd have been really upset of it had come apart had I run in reverse.While safety is important, I would much rather have that storage sleeve than the chintzy pair of gloves.Overall however good value/investment
A**N
Great, easy to use.
works great, easy to use and cleared the whole duct effortlessly.
D**L
Great little lint buster device
Works exactly as advertised. I wish I would have ordered one of these a long time ago. The amount of dense lint build up in the dryer exhaust tubing was immense! This little gadget along with a power drill made quick work of the clean up. Highly recommend this!WFIW....when you attach all the segments to make a really long extension and then use a power drill the screw in connections get very tight. You'll probably need a vise grip to help you unscrew the sections.
Trustpilot
2 weeks ago
1 month ago