


Buy anything from 5,000+ international stores. One checkout price. No surprise fees. Join 2M+ shoppers on Desertcart.
Desertcart purchases this item on your behalf and handles shipping, customs, and support to Vanuatu.
✨ Transform your windows into a masterpiece of privacy and style!
This 3D Stained Glass Window Film features a sophisticated golden ironwork pattern that mimics real stained glass, offering elegant décor enhancement. Measuring 17.5 by 47.2 inches, it uses static cling for easy, adhesive-free installation and removal. The film blocks UV rays to protect interiors and improve energy efficiency, while providing privacy without sacrificing natural light. Made from durable, fade-resistant vinyl, it’s ideal for bathrooms, front doors, and any space needing stylish privacy with a modern edge.


| ASIN | B0CPSDGTLB |
| Best Sellers Rank | #40,658 in Home & Kitchen ( See Top 100 in Home & Kitchen ) #84 in Window Films |
| Brand | ADD.HERES |
| Brand Name | ADD.HERES |
| Color | Golden Ironwork |
| Customer Reviews | 4.3 out of 5 stars 683 Reviews |
| Installation Type | Static Cling |
| Item Dimensions L x W | 47.2"L x 17.5"W |
| Item Type Name | window film |
| Manufacturer | ADD.HERES |
| Manufacturer Part Number | 103071 |
| Material | Vinyl |
| Material Type | Vinyl |
| Model Number | 103071 |
| Number of Items | 100 |
| Product Dimensions | 47.2"L x 17.5"W |
| Size | 17.3inch x 47.2inch |
| Ultraviolet Light Protection | Yes |
| Unit Count | 5.69 Square Feet |
T**A
Perfect for Back Door
We are in the process of buying shutters to cover all of our windows in our living room. Shutters would be too bulky on our door and I didn’t want to use a curtain. This vinyl is beautiful!!! Love all the colors without the pattern being overwhelming. The material itself is durable but not too thick. It has a slightly raised texture and looks amazinggg in sunlight. I wanted privacy but still allowing light to come in (this doesn’t reflect any rainbows or sparkly effects inside) Regarding night, I don’t have any photos at night but it still functions nicely. I cannot see anybody outside looking in unless they are super close to the backdoor. As for installation it took around 30-40 minutes with my husband’s help. Thankfully the vinyl comes with a squeegee that is very good. For first timers like myself I would highly recommend this: 1.) Clean your window, any cleaner is fine. 2.) Get dimensions of your area but add about 1” or 2” to each side for wiggle room. Just trimming the overall edges to be smaller (realistic to what you’ll actually be working with) 3.) Cut to your dimensions with the 1” or 2” added. 4.) Can quickly hang up your cut to see if it will at-least be in ballpark of the size you need. 5.) Spray area with ton of water, basically want it dripping down. 6.) Start from the top and work your way down slowly pulling away the backing. I had my husband hold the roll while I pulled the backing down, stuck it, and then squeegee it. While using the Squeegee, massage out any air or water bubbles. 7.) Once it is all applied, I went back in with a FRESH blade on my box knife and sliced the extra sides off for a better fit. Even if you think your blade is not dull, just please get a new one, this will help tremendously. 8.) Finally go back over all the edges ensuring it’s flat. Then you’re done!! Super easy, I promise you can do it. You just need to have the time and some patience for it. TLDR: It’s gorgeous during day and night time. More ideal if you had two people for install. Set time aside and go slow.
J**N
The Best Bathroom Privacy Upgrade
Absolutely love this privacy cling! I’ve tried several options over the years — including spray paint and two different window films — to keep natural light in my bathroom while still maintaining privacy. When I moved into a place with a window directly in the shower, I knew I needed something more opaque. I definitely didn’t want the whole neighborhood getting a clear view while I was in there. This film is not only beautiful on the window, but it truly delivers on privacy. Even with the bathroom light on at night, it remains fully opaque from the outside. It does slightly darken the room since it’s more opaque than lighter films, but my bathroom gets strong direct sunlight in the mornings, so it hasn’t been an issue at all. Installation was very straightforward. I happened to have an older application kit and squeegee from a previous project that I preferred over the one included, but the process itself was simple. I measured my window and cut the film on a flat surface before applying. Luckily my windows are standard rectangles, which made it even easier. Overall, I couldn’t be happier. It’s functional, absolutely gorgeous, and gives me total peace of mind. Highly recommend!
J**E
Good quality, looks like real stained glass, stays put (see my tips here)
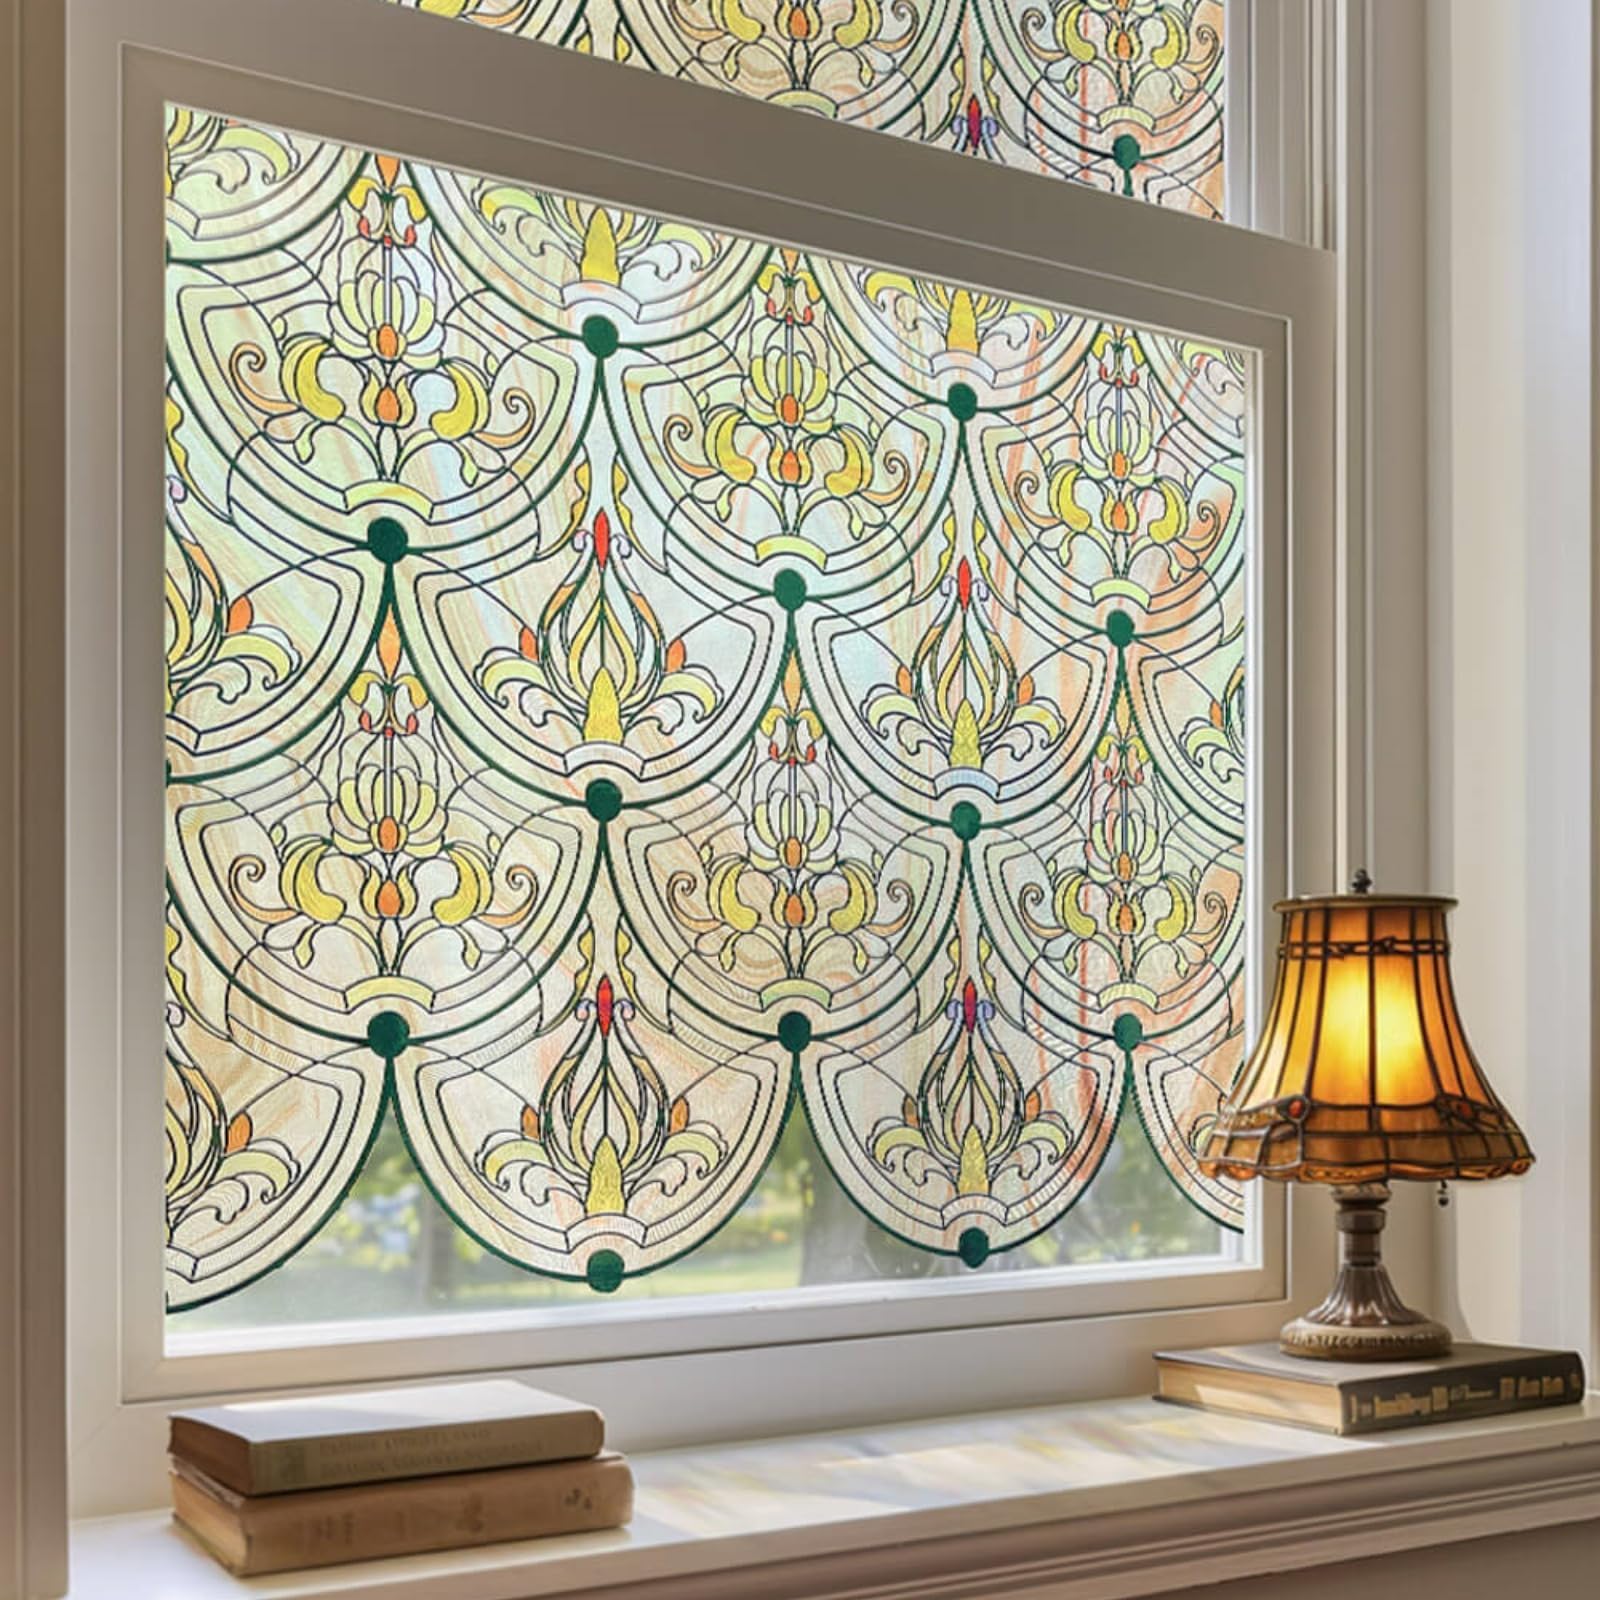
I've applied this cling in two homes now and on multiple windows including a window in a steamy shower, and this is the best window cling out there. It stays put and looks beautiful. Below are my thoughts and tips (including photos). AESTHETICS: The thickness of the material, the depth of the textures, the different STYLES of textures, the way they applied the color, and the black lines (in this style in particular) all work together to really make this look like actual stained glass. Some have complained that due to the translucency of the material the black lines are more charcoal gray. This does not ruin the effect for me, personally. I love that it provides privacy yet allows lots of light to brighten your home. Blackout curtains can be a bit depressing. CUTTING and MEASURING: -First, don't assume it will come off the roll straight. I had to trim it to square it up. -In my opinion, this pattern should be centered on your window. I think it ruins the effect when it isn't (no one would make an off-center stained glass window, right?). Unfortunately, there is no grid pattern on the back. So you need to find the center and try to follow it around to mark it on the back and then measure out your sizes from the middle. More work but worth it. -I highly suggest cutting the cling to the size you need before applying and NOT trying to trim out the cling AFTER you've installed it on the window. It's awkward, the cling slides around, it will buckle, the cuts end up being jagged, it's not successful. Trim your piece to the size you want before applying, that is my advice to you! -The cling only clings to glass. Therefore, I would create your window pieces SLIGHTLY smaller than you need so no part of the cling is touching non-glass. If you don't, you'll get curling up edges. APPLICATION: -Just like hanging wallpaper, start at the top and then remove the backing as you work your way down. You can't use too much water. You'll likely be pulling it off and repositioning it and water makes this process easy. -I like that they provide a squeegee tool with a soft fabric end to help remove all the air bubbles without damaging the material. I would suggest running your hand over the window to make sure you've got all the bubbles out, they are hard to see because of the pattern. Now enjoy lots of ooh's and aah's from friends, family and neighbors!
O**A
VERY HONEST Review!
They don't leave instructions so I will do that on here on how to apply it if you want it to stick good but are able to pull it off if need be. Buy a new spray bottle. The size of one to mist plants. Fill the container with 1and a 1/2 TBS of dish soap. I Used Ultra Palmolive pure + clear. Then fill it with warm water.( I did this in the winter) mix it good till the bubbles a fairly gone. Spray it and make sure it on MIST. Clean your windows before applying. Once fully dried spray a little on the window. DONT GO OVERBOARD. jest enough to cover the window aka mist. Then placing the paper on it. It will stick if you start with the corner and lining it up. Pulling away the white paper gentaly down. You can easily remove it if it doesn't aline. THIS TAKES TIME. DONT RUSH. It will stick more and more as you keep going. Take an exacto knife or a box cutter and cut the sides or bottoms to size. Once part of your window is done or if fully covered already take the ONE peice that comes WITH the window paper and work from top to bottom. Then left to right. Have papertowels at the ready to soaked up the soap water. If you put to much it will move the paper will move around. If you put a mist amout it shouldn't move. Hold it with one hand as you push the bubbles out. BEFORE continuing make sure all the bubbles are out before continuing or the best of you abilities. Use the soft side to push out bubbles. If you continue do the same thing over and over again. Again, this WILL stick if you appy it correctly. If you apply it directly it wo t work, let alone stick. Privacy wise I didn't realize it had the pink/yellow waves in the background. However if you look at the pictures I tagged in here it definitely doesn't overly look pink. It gives a warm cozy vibes. When the sun hits it, it's more orange/ yellow then pink. If you wanted pink, this isn't the one to grab. More yellow, orange, and green colors. If you try to get look inside my house it would be fairly difficult. So coverage is Very good. Money wise, I will say it's fairly expensive. HERE is the thing! Hear me out before purchasing. I baught the smallest size just to see what I all got. What you see in the picture is literally what I got that's on the film. A little bit extra when trimming to size but not much extra. I will be getting the larger size to see what all of it will cover but for JUST that much to cover a HALF a window...? To me that's expensive. I will write another review once I get the bigger one and write an update. Again, I love the color, I love the privacy, I love how it makes my cozy corner look more Antique but the price...definitely is giving me reservations. Any more questions you guys have I will be happy to answer!
A**R
Easy to install, very beautiful design
Love it! It looks amazing it was super easy to install. It blocks out the sun but doesn’t make the room completely dark the colors look great when the light shines through it. I would definitely buy again. My walls are painted a dark color, I love the contrast of colors
D**N
Pretty but too dark
Lovely color but much darker then pictured. The negative space is a medium dark purple. I am replacing a dark film to lighten my entry and this would not achieve my desired result.
J**E
Lovely
I absolutely love how this looks! Was slightly difficult to apply due to the shape of this window but I’m happy overall with the design and quality. Also, I didn’t apply this masterfully and it still looks good to me. Bonus: comes with a tool to smooth it out
A**S
Looks Real!
It’s so beautiful and looks real! This pattern reminds me of buttercups and I love it. It was Also super easy to use.
Trustpilot
1 month ago
2 days ago