


Buy anything from 5,000+ international stores. One checkout price. No surprise fees. Join 2M+ shoppers on Desertcart.
Desertcart purchases this item on your behalf and handles shipping, customs, and support to Vanuatu.
🪟 Privacy perfected, comfort amplified.
Coavas Window Privacy Film offers a sleek, non-adhesive static cling design that provides 80-95% daytime privacy while allowing clear outward views. It blocks 95% of UV rays and reduces heat transfer, helping regulate indoor temperature and save energy. Easy to install and remove without residue, it also cuts glare by filtering 75% of sunlight, making it ideal for home or office environments.


| ASIN | B07B2SGF98 |
| Best Sellers Rank | #116,790 in Home & Kitchen ( See Top 100 in Home & Kitchen ) #161 in Window Films |
| Brand | Coavas |
| Brand Name | Coavas |
| Color | Black-silver |
| Customer Reviews | 4.2 out of 5 stars 13,072 Reviews |
| Installation Type | Static Cling |
| Item Dimensions L x W | 78.7"L x 35.4"W |
| Item Type Name | reflective window film |
| Item Weight | 0.3 Pounds |
| Manufacturer | Beautyhalo |
| Manufacturer Part Number | 080600152GXHJDM |
| Material | Vinyl |
| Material Type | Vinyl |
| Model Number | 152GX |
| Number of Items | 1 |
| Product Dimensions | 78.7"L x 35.4"W |
| Size | 35.4 x 78.7 Inch |
| UPC | 746827162841 |
| Ultraviolet Light Protection | true |
| Unit Count | 19.48 Square Feet |
S**X
This stuff is great!
I love this stuff and have used it on several windows over the years. It is a great inexpensive way to easily change up windows. This time I got the frosted version to help provide some privacy in a bathroom and on some garage windows. Product came in perfect condition and have seen other similar products where the the tubes are bent while shipping. As I mentioned I have put this type of film and several windows of the years and the frosted film works great for privacy. Plenty of light still comes through in the daytime. I tested it at night with all the lights on in the room. While standing outside looking in and one can only see rough heavily blurred shapes through the frosted film. So it works as expected and feel completely comfortable leaving the blinds open while taking a shower with this film on the window. I have had this film on other windows for over seven years and have yet to notice any discoloration, yellowing, or fading. Hanging is relatively easy but will provide some tips on what I have found as the best way to do it. First, two people are better than one. (Have hung this film on by myself before and it just takes longer and more of a hassle.) Second clean the side of the window where you are applying the film thorougly. I use Windex and then a wet towel to remove any remaining window cleaning chemicals in case they might react with the film and finally paper towels to dry it off. (I have only put the film on the inside of my windows and have not had an issue. Have no idea what happens if this film is placed on the outside of a window exposed to the elements.) Next and why two people make it easier than one is it is best to have one person hold the film up against the window and a second person cut a rough outline. As others have mentioned when cutting the film for the first time leave about an inch over and past the edge of the window pane and plan to trim it off later. (Never try to pre-measure and cut the film to fit the glass. I did my first two windows this way and each time miscut the film as windows can be slightly irregular or the line I cut was not straight and then you end up with gaping gaps along the edge of the film. It is always easier to cut away the excess with the film on the window.) After you have a rough cut outline add the soapy water and coat the glass completely. Any dry parts on the window are much harder to work with so soak the glass until until water is running down the pane. Also excess water will not damage the film in any way so you can’t hurt it with too much water. Then remove the backing and place the side where the backing had been up against the window. (Be careful that portions of the window, particularly at the top, don’t dry out while you are trying to get the backing off the film which can tricky. If they do just add more water to the window.) If the window is wet you can then move he film around slightly to get it in the right place. This next part is the hardest. Take a really sharp box cutter or exacto blade and cut along the edges of the window to remove the excess film. This takes some practice as the film can bunch up a bit as you pull the blade through it and make the cut irregular - a fresh sharp razor blade helps to prevent this. Also cut the film on the frame and not the glass. If the film is larger than the window glass and hanging over the edge onto the frame, the film tends to lift away from the glass at the edge and cutting directly onto the glass ends up with the film being about 1/8 inch too short and not flush up against the edge of the frame. Again this takes some practice and don’t expect your first window not to have some gaps between the film and the edge of the glass and the frame. Once the film is cut to the shape of the glass, then use a squeegee to push the bubbles and excess water to the edges. Be careful not to put too much pressure on the sharp corners of the squeegee as it can gouge the film. With two people, we did (10) rectangular 23 in x 66 in window panes in about two hours. I imagine if I had done it by myself it would have taken three or more hours. Again I love this product for frosted privacy glass. The finished product looks like regular frosted glass. Have not tried the more decorative films yet but will in the future.
C**I
Installation Tips
I just installed my second of these. The first has been up for year(s) and looks like the day I put it up. It's not easy to get the film to fit right up against the frame (which is how I wanted it) but can be achieved with proper tools and some tricks. I suggest scissors, a utility knife, and a straight metal edge with a sharp corner like a putty trowel (or ruler). Here's what I've learned to do (but follow my example at your own risk): 1. Make sure you use the "original" corner on the most obvious sides. For example, I put this on one of two sliding doors. The left edge was going to be very visible while the right edge was going to be partially obscured by the other sliding door. Obviously, eye height is also near the top of the door so I made sure to use the original edge/corner on the top and left and put my cuts on the bottom and right. 2. Measure and cut the film with an inch or so extra. It's actually harder to cleanly cut away a small amount (e.g. 1/2 or 1/4"). 3. As they say, wet the door pretty heavily. This helps you avoid and remove air bubbles. I actually took the back film off a foot or so at a time. On the plus side, a little rolled back protector prevented it from trying to "grab" the entire door at once. On the downside, the backing tended to grab water off of the door so I got a worse finish at the bottom. Yon can probably get the best of both worlds by re-applying water as you peel away the backing. 4. Start with the original corner. Get it positioned and slowly work your way across the short side of the window. For example, I start in the top left and make sure the top of the window is lined up. If the film isn't flush, push the air bubbles towards the edge; this will tend to "tug" a little film with it. If it's lined up nicely, you can work the other way (this will help you later). Especially on a full door, you may need help to prevent the film from sliding (too much water can actually contribute to this). 5. Work down the second original edge. You're going to slowly work a large and larger "triangle". Actually start on the edge that's already finished and work your way diagonally towards the next few inches of the long edge. Pull the air bubbles and ridges away from the finished edge (in my case down), securing the finished edge with light pressure so you don't pull the film away. You need to get all of the bubbles and folds out so the material can stretch to the in-process edge. As you get close to the long edge, you can "pull" towards it if needed -- the film can be stretched a little bit. This can be hard at first (pulling away from the finished edge) so you may need help. If you're really close, push air bubbles (and film) towards the frame. If not, pull it back a couple inches and try again (pulling towards the edge a few inches below your working area). If you're having issues with a big gap, try working the bubbles "down" and towards the in-process edge to encourage film to go in that direction. 6. Once you've finished both original edges, at least half of the window (that triangle you've created) should be securely attached. You've probably made some progress down the other side "naturally" (I was a foot or two ahead of the unfinished side. By the time you're at the bottom of the door, you've probably pushed air out of at least half of the opposite side. 7. The hardest part of the process is cutting the two non-original edges flush. Even with a sharp utility knife, I had trouble getting a clean cut on my first attempt. The film will tend to tug and shift. I eventually realized that I needed to put pressure on the film while cutting. Ideally you want something metal like a ruler or (even better) a putty trowel. I managed to do a pretty good job the second time with a hard plastic edge, but did cut away/damage the piece of plastic. It also had a rounded corner which made for trouble cutting the last corner (below). You want to place the metal edge right up against the frame so you can cut a clean line without letting the film shift. I also found that it was better to work towards the existing cut. For example if I start at the top of the door, I actually had the most success cutting "upwards". If I cut down, it was more likely to catch and tug the plastic. So I cut the first say 6 inches. Move the tool down. Cut the next 6 inches. Each time I finish the cut, the extra plastic falls to show me that I've cut through. CAUTION: I certainly scored my frame in a couple of places, mostly working on the corner (below). If that's an issue, you may want/need some additional tooling (but I don't know what to suggest). The corners are the hardest and I never got it perfect. The first two corners are easier because you can cut "towards" the edge, the tool holding the film down helps ensure a clean finish, and the material releases once you've cut far enough (but take care not to score the frame). The last corner is the hardest. At least one of the directions, you're dealing with a lot of extra material. Consider cutting the corner off (i.e. a diagonal cut) so you have less excess material. Wait until the end so you cut the right amount. Hopefully your "ruler" has a pretty sharp corner to help. If I did it again, I might even use scissors to cut from the outside in, BUT the hardest thing to do is to remove a sliver of material so you have to be very precise. You could even cut the film a hair short and try to stretch it to the edge while removing air. Hope this helps and good luck!
R**S
An afternoon project, but not easy to install. And doesn't hold that strongly.
Great light diffusing film. The room still gets lots of light, but its not at all see through. I was able to use one 17.5 X 78.7 inch roll to do all the windows in my garage door, though I had to be very careful as I had to quarter the film to have enough, and only had just enough. It's an easy project to fit in an afternoon, but that's not to say it's an easy project to get right. I wasn't able to cut straight lines with scissors, though the scissors cut through it easily. I did a little better folding and creasing it, and then going over it with my box cutter on a gridded cutting mat, but that was far from perfect too. I couldn't start with my bladed arm paper cutter because it was too wide, but once I cut it in half lengthwise I was able to straighten the smaller edges with the paper cutter. I didn't have any trouble cutting through the film with any of these methods, just trouble getting straight edges. It didn't arrive with instructions either, so I googled that. I cleaned the windows, and used a spray bottle with soapy water to cover the glass before putting up the film, and then used a shower squeegee to squeeze out all the bubbles completely. That sort of worked, but was peeling and rolling away at the edges and falling off after a few hours. Then I discovered from the seller's posting that the film has a protective backing that you need to peel off before attaching. For the life of me, I could not peel the backing off by hand. It was so well attached that it was like it wasn't even there. But I was able to get it off by using really sticky tape (like electrical tape) on both sides of a corner and then pulling them apart, or failing that, at least having the tape hold one side while I pulled the backing off by hand. With the protective backing off, it's much more prone to creasing, so you have to be careful. But when I did everything right, it looked great. However after a day, one of my four windows still ended up peeling. I had to use glue on the corner to at least get it to stay on. But since it's not holding well, it's also now capturing particles between the film and the glass and will probably get worse over time. This stuff just doesn't hold on as strongly as some window decals.
C**P
Cool Comfort with a View
The Coavas window privacy film offers a transformative solution for homeowners seeking both privacy and comfort without compromising on natural light. This reflective window film not only ensures privacy during the day by allowing you to see out without others seeing in but also boasts significant sun blocking and UV protection capabilities that contribute to a cooler, more comfortable home environment. One of the most commendable features of this film is its user-friendly application. Measuring and cutting the film to fit various window sizes is straightforward, making it accessible for DIY enthusiasts who wish to undertake home improvement projects without professional help. The film adheres well and remains smooth and secure once applied, a testament to its high-quality adhesive properties. In terms of functionality, the film excels in enhancing indoor comfort. It effectively darkens the room and reduces heat build-up, which is especially beneficial during the warmer months. Since installing the film on most of the windows, there has been a noticeable difference in the overall temperature of the home, affirming the film’s effectiveness as a heat blocker. Moreover, the film's ability to block harmful UV rays not only protects the skin and eyes but also helps in preventing the fading of furniture and flooring, extending the life and color of your interior furnishings. In conclusion, the Coavas window privacy film is a stellar addition to any home. Its ease of installation, effective sun blocking, and privacy features make it an excellent choice for those looking to enhance their living space. Whether you're looking to reduce cooling costs, protect your privacy, or simply improve the comfort of your indoor environment, this window film delivers on all fronts, making it a highly recommended product for a wide range of household needs.
T**S
Perfect for my needs
This tint is great! It installed quickly and easily, it looks wonderful. We used it on a small powder room on the sunny rear of the house. It does a great job blocking heat and UV rays, and we still have a great view out to the beautiful desert. Best of all, it provides privacy from anyone outside looking in. We didn't want to put up a curtain, which would have blocked our view from the inside. This is a much better choice for us. We installed it ourselves, and the results look very professional. I've included pictures from the inside and outside so you can see how it provides privacy without taking away from the view. EDIT- Nearly a year later actually 50 weeks) this tint has been perfect. No peeling loose, no bubbles, no change whatsoever. I was a bit skeptical a year ago (how well can it stick without adhesive?) but it looks exactly the same as the day we applied it. Amazingly satisfied. If it performed that well in the brutal Arizona sun, it will work for you too! We’re about to buy several more rolls and do every door & window in the house. (Because I’m lazy. That’s why I haven’t done it yet. But my excuse is, I wanted to be sure it’s permanent.)
A**N
A bit too transparent for my taste when indoor lighting is on
I bought this after setting up some of the Matte White version by Rabbitgoo, I was hoping for a similar level of privacy but with a bit more light because you really can't even make out what color the sky is with the Rabbitgoo. Unfortunately when there is a light source indoors this film shows too much from the outside. I wish the seller used picture #2 instead of #1 as the main picture because picture #1 is misleading. The woman is completely blocked out by the film and you can barely see inside. But in fact anything closer than 1m and the form and colors will be visible so #2 is more accurate. A monitor or tv will show through the film although not clearly enough to make out more than large sections of color. Furniture, people, and light sources can all be made out when indoor lighting is on. In my opinion that is not opaque enough for bedrooms, bathrooms, and other situations where you do not want people outside to have any visibility inside. This is a matter of personal taste of course, but I feel the seller should provide some actual images of the film in action with lights on so people can judge for themselves. It's better than the privacy films you would find at the local hardware store but not as private as the Matte White by Rabbitgoo or the frosted window spray by 3M, which completely block the view inside and out. The product itself was fine. It was easy to set up and stick. As long as picture #2 is what you want, then this will work fine for you.
J**2
UPDATED - First product was defective, but great customer service and great product second go!
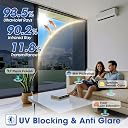
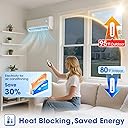
I nothing thought reviews had such a profound impact on customers, but apparently they do – or at least they have a profound effect on the company’s interns – as ever since I related this product low, I’ve had an eager person emailing me - at an almost psychopathic frequency - asking how they can make it up to me that I got a bad product. At first it started with just an email saying something like “hey, sorry you didn’t like our product, yada yada, let us give you a free one.” And my initial reaction was, its just window film, who gives a ****, but nice they tried. I had already moved on. However, like an estranged ex-lover, more letters and eventually gifts started to come from a very determined intern – or so they say they were – all in attempt to win me back. The emails I moved to spam because I get too many. But I couldn’t ignore the random packages showing up at my door. Random **** often comes to my house in that iconic cardboard box with that goofy and somewhat sinister arrow smile – I imagine that is Alexa’s “I’m listening to you” smile – and I’ve come accustom to opening them and finding another care product my wife needs. But I started getting abnormal random ****, **** that I couldn’t understand why my wife would need it; a window squeegee – maybe our showing really is gross I thought – and then a random window privacy film – maybe wife ordered some since I never got them installed cause they sucked. But after finding a letter in the third – and I think final – box that had shipped another window privacy film, I finally realized what was happening. The letter was the typical Amazon print off, like what you get from items gifted to you, but it was the giver’s name that caught my attention. I recognized the name but couldn’t remember from where. I kept repeating it over and over in my head, lying awake some nights tormented by my brains constant searching as it roamed through all its neurons hoping to find a connection to some dark corner of my cortex. And then one morning while parading around the house in my underwear it finally hit me, my brain had made its connection, I remembered so clearly where I had seen that name. Our house came with a very nice front door; solid with a nice 4-foot-tall window built in to let the southern sunlight brighten our foyer. The window on door is great, except that we live in a town home, and I parade around in my underwear, a lot! I don’t mind that every neighbor, postal worker, campaigner, and Jehovah’s Witness can see me in my skivvy’s when they come to or walk past our door. But my wife understandably is not as enthusiastic about witness shocked expressions. So I had tried this window privacy film but the product I got was defective and wouldn’t cling despite following the instructions. Being someone who roams the house in the underwear, I waste my time reviewing products on Amazon, but only when I either really love them, or really hate them. I had reviewed this product as really hated it. That was then, but now I redact that original rating and am giving full stars – I love it. I love it because of the persistent efforts of an intern who would stop at nothing to win back my heart by emailing me and sending me replacements, even though I never replied – let alone read – to almost all of their emails. But on that day I remembered that name, I went back and looked in my spam folder and found all the lost letters that intern had sent. I have no idea if their story is legit, or their just great at marketing, but I realized I owed it to them to help mend their broken heart by coming back on here and re-rating my review. And since they went to such great lengths to try and satisfy a customer, I am returning the favor by going to great lengths to write this review: "The window cling is great, the first one I order didn't have the smoother backing (likely a small manufacturing hiccup), but the seller went to great lengths to replace it and the new one worked as described – 5 stars." To Skye, thank you for your customer service. If this company doesn’t give you a permanent career, then they don’t deserve you. Your due diligence to close is some of the finest I’ve ever seen in sales (I’ve worked in the sales community for several years). I am sorry I didn’t respond sooner, I was too busy parading around in my underwear.
S**S
Feels like good quality, shockingly easy to install.
I read a ton of reviews before buying this product, and I already have a similar but different brand on my back door at home. I bought this to install on the plate glass walls of my office at work so that I could pump breastmilk in my office. I was a little skeptical of the water application because the one I have at home does not use water, but it turns out that it makes it much easier to install! I install this on extremely high windows and I was shocked how easy it was. The air bubbles are definitely time consuming to get out, but it’s not really difficult to get them out, it just takes a little bit of time. As the water dries a lot of the air bubble seem to disappear on their own. It’s a nice thick film, not flimsy or cheap and it’s easy to separate from the backing because there’s a little pulltab just for that purpose. I really only have one complaint and that is when I used a very sharp new box cutter razor type thing to trim the edges the film kind of tugs and pools and thus it does not make a perfectly straight line. It’s a little jagged where I cut it. For my purposes it completely does not matter. I cut it after it was on the windows and I think that if you could trim it very nearly to the exact size before you hung up then this would not be an issue, although it seems like it might be pretty difficult to get perfectly straight lines because there’s no ruler grid. That’s why I decided to trim it after it was hanging. I just put this up yesterday so I don’t know how long it will last but so far I’m very pleased with the quality and with the ease of installation. Definitely gives sufficient privacy to be half naked in the office!
F**R
Great product
Good quality, just what I needed
A**X
Decremento de temperatura notable y buena calidad
Vivo en departamento al sur de la CDMX y tengo una ventana enorme en la estancia, el calor era muy intenso dentro de la estancia por las mañanas (30 grados) ya que le da directo el sol a las ventanas, desde que instalé estos y en conjunto con mis cortinas blackout (que gracias a esta película ya no se van a decolorar más por cierto) la temperatura es muy agradable (20-22) y puedo abrir las cortinas en el día sin que me vean de afuera para adentro, incluso en las noches es mucho más difícil de ver aún con las luces encendidas de afuera hacia adentro, se ven las sombras. La luz natural entra muy bien aún y refleja mucho menos en la TV. Para instalarlas necesitas limpiar muy bien antes tus ventanas o donde las vayas a colocar, algo con que medir, mucha agua en las ventanas, recomiendo que utilices un atomizador, en mi caso no utilicé jabón solo agua, un limpiador de ventanas (tipo mini jalador para retirar burbujas y que no se note la película instalada), un trapo para secar el exceso de agua después de colocarlas, un cutter o tijeras para hacer los cortes necesarios (corta exacto al tamaño de tu ventana o medio cm más en cada lado y cualquier exceso es fácil cortarlo ya que lo colocaste con el cutter) y no retires el plástico protector antes de cortar, una superficie limpia y grande para hacer los cortes así como algo un poco pesado (qué no las maltrate obviamente) solo para que no se te muevan las películas cuando estés cortándolas ya que esté es el paso más complicado de todo el proceso; Para colocarlas después de cortar necesitarás las ayuda de otra persona para retirar el plástico que las protege y no maltratar la película con dobleces innecesarios y también hace más rápida la instalación para que no se seque el agua que coloques en las ventanas justo antes de instalarlas. Recomiendo que las instales cuando las ventanas están frías aún, en la mañana o por la tarde cuando no les de directo el sol, eso facilita un poco la instalación ya que no se evapora el agua tan rápido y no están incómodas al toque de tus manos.
H**.
Muy bueno
Muy buen producto
C**N
Parfait pour la salle de bain
Relativement facile á installer (en mouillant beaucoup), on l'adore. C'est beau, la lumiere passe mais on ne voit rien au travers. Absolument parfait !
R**Y
Very good
Worth the price, looks good as well
Trustpilot
2 weeks ago
3 days ago