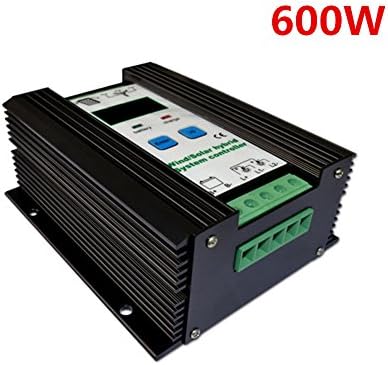
Tellunow 600W Economic Wind Solar Hybrid Controller PWM 12V24V 400W Wind Turbine 200W Solar Modules Controller/Wind Charge Controller/Wind Regulator/Solar Regulator
Product ID: 67380634
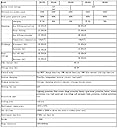
600W Wind Power Controller: Charging:12V (14.4V ± 1%), 24V (28.8V ± 1%) Equal charge protection: 12V (13.8V ± 1%), 24V (27.6V ± 1%) Charge recovery:12V (13.2V ± 1%), 24V (26.4V ± 1%) Temperature compensation:12V ( -24mV /℃ ), 24V (-48mV /℃ ) Over discharge: disconnect(DC)12V (10.8V ± 1%), 24V( 21.8V ±1%)restore(DC)12V (12.3V ± 1%),24V( 24.6V ±1%) Overpressure:disconnect(DC)12V (16V ± 1%), 24V( 32V ±1%)restore(DC)12V (15V ± 1%),24V( 30V ±1%) No-load current(DC): ≦0.1A Voltage drop(DC):≦ 0.5V control method:Fan PWM charging function, PWM offload function, PWM over current limit functionDisplay parameters:Voltage, battery power, charge statusAmbient temperature:-25℃~+55℃ Easy installation: Controller wiring 1. Battery wiring Use a copper cable with a length of not more than 1m and connect the battery to the "(BATTERY)" terminal on the rear panel of the device. Note that the positive and negative electrodes are separated. When connecting, connect the battery terminal on the controller first. Then connect the other end to the battery. Although I prevent reverse connection protection, the battery is still not reversed! 2. Fan wiring When the wind turbine is in a stationary or low speed operation (if no wind is selected), connect the wind turbine output line to the "(WIND INPUT)" terminal on the rear panel of the unit. (The three input lines of three-phase fan are not divided into positive and negative) 3. Solar panel wiring After the solar panel is shielded, connect its positive and negative poles to the "(SOLAR INPUT)" terminal on the rear panel of the device. When connecting, connect the solar input terminal on the controller and connect the other end to the solar panel.
Trustpilot
2 months ago
2 weeks ago