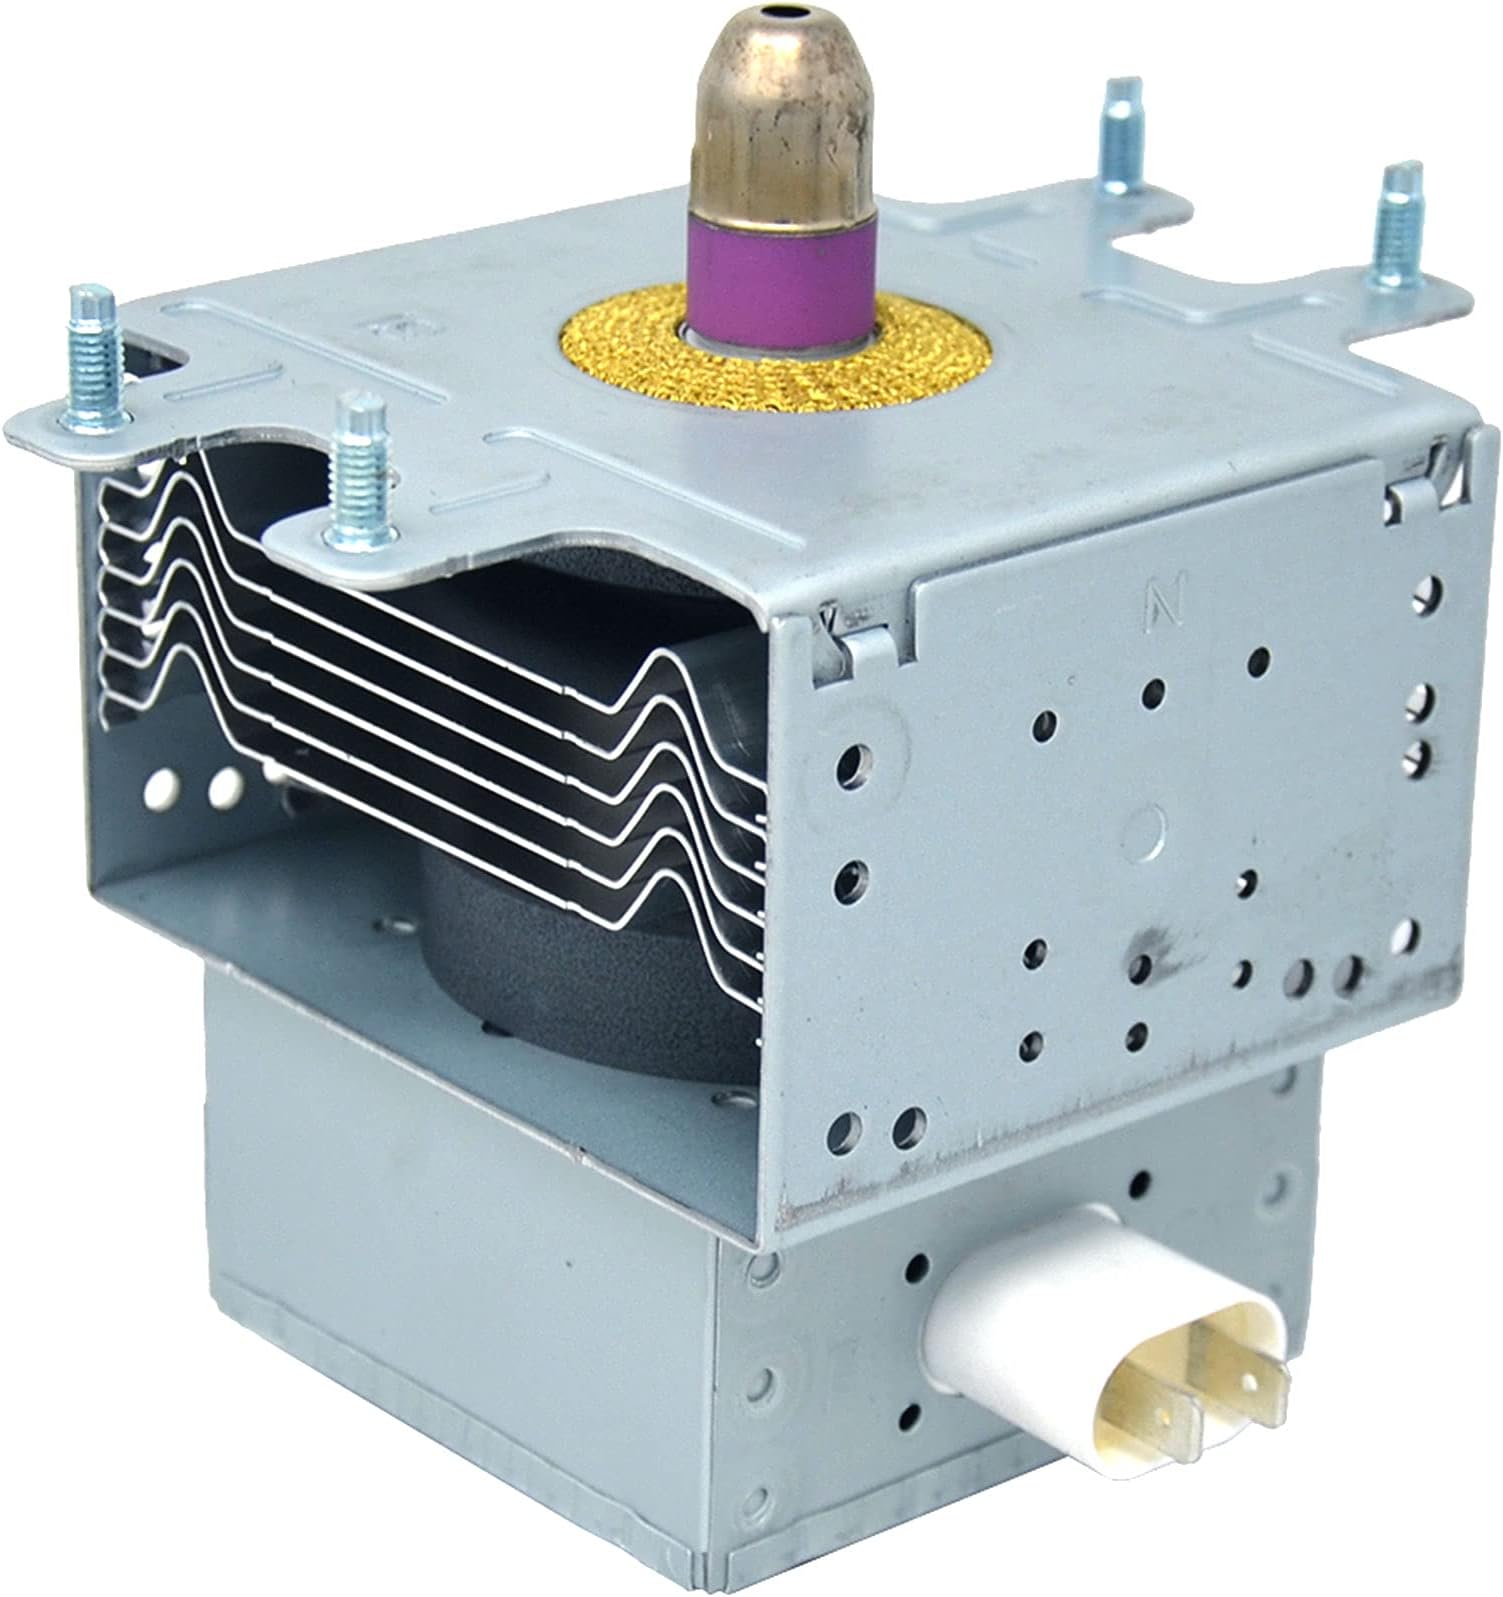


GE Microwave Oven Magnetron and Diode Kit OM75P (10) Part # WB27X10017
Product ID: 7269437
⚡High-efficiency magnetron
📏Compact dimensions
🔧Easy installation
🔧 Upgrade Your Microwave Game!
The GE Microwave Oven Magnetron and Diode Kit OM75P (10) is a reliable replacement solution for various GE and Frigidaire microwave models. This kit includes both the essential magnetron tube and diode, ensuring optimal performance and longevity. Weighing just 2.16 pounds and featuring compact dimensions, it's designed for easy installation, making it a perfect choice for DIY enthusiasts. With a focus on quality, this product is backed by GE's trusted manufacturing.
| Manufacturer | GE |
| Part Number | WB27X10017 |
| Item Weight | 2.16 pounds |
| Product Dimensions | 7.3 x 7.2 x 7.7 inches |
| Item model number | WB27X10017 |
| Is Discontinued By Manufacturer | No |
| Item Package Quantity | 1 |
| Batteries Included? | No |
| Batteries Required? | No |
J**S
Revived my non-heating GE microwave!
This part worked perfectly to replace a faulty magnetron OM75P inside a GE Spacesaver XL from 2004, using part # WB27X10017. The microwave worked fine except would not heat anything, which meant i could test the fuses behind the control panel with a multimeter and then narrowed it down to the magnetron without actually disassembling the microwave to test the magnetron directly. A couple of notes from my repair experience - there are lots of great how-to videos out there showing the basic steps, and be sure you have an extra person to help control the weight as you lower it down if its mounted above the stove - the weight is not super heavy but it can be awkward to hold it up with just one person. Also, dont skip the step to discharge the capacitor safely before you do anything else inside the microwave cabinet. Depending on your microwave model you will probably have to loosen/remove a couple of plastic or metal shielding parts to make it easier to remove the old magnetron and then insert the new one, otherwise you'll be yanking and shoving it out of and back into a tight spot - dont fight it, just move the other parts to make it easy on yourself. The last tip is that your old magnetron might still test okay using a multimeter but that is probably a false positive - that's what happened to me - both the old and new magnetron had the same continuity test results at every setting on the multimeter, but obviously the old one wasnt working and the microwave was back to normal when the new one was installed. In my opinion, replacing this $65 part was a better option than spending $250-300 for a comparable new microwave. Good luck!
R**Y
This replacement saved our microwave
This worked PERFECTLY. We were faced with the decision to discard what has been a faithful and reliable GE XL1400 and buy an ugly new microwave, when I started researching repairs. Rather than spending $300 on a new one, this economical part took less than 30 minutes to CAREFULLY and safely replace. Our old friend now heats and cooks like the 25 year old microwave it was. Thank you!
B**G
Works great, but a little harder to install than I expected.
GE microwave stopped working, so it was either replace the magnetron or buy a new one. Since a new microwave was hundreds of dollars and the magnetron/diode combo was $70 it was worth the effort. I installed the microwave 12 years ago so I knew how to take it down, but I didn't realize is there are a lot of screws to disassemble the microwave. Once the covers were off, replacing the magnetron wasn't too hard but it isn't for someone who isn't mechanically inclined. Also, the old magnetron had a upper limit temp thermostat and the new one didn't so I had to jumper the wires to the thermostat together (to simulate the unit wasn't overheating) before reassembly. That could throw a curveball to someone that isn't familiar with appliance repair. Once reassembled the unit worked perfectly, so in all I guess it was a win. Just a little more difficult than I expected.
R**.
Exact part for replacement.
The installed current magnetron passed every meter test I decided to replace it anyway since I received the replacement the next day. I was surprised when I found a pinhole burnt-out on the opposite side of the old one. Replacement was a bit difficult since the transformer was mounted directly beneath the magnetron but time was not an issue. Got both items in the package and tested before putting the cover back on and works like a charm. The money saved on a repair call or new microwave will allow me a celebratory 6 pack while I pat myself on the back.
A**S
Works well for GE Profile Spacemaker Over Range Microwave
Solved the problem of microwave won't heat food. Microwave has symptom of the light is on, the turn table rotates, just won't hear food. Need two persons to move microwave down. It is heavy. There are many screws to remove. Mark and remember where those screws are. The old magnetron has two strong magnets. You can take them out, and keep them in toolbox for future projects. The entire replacement including mounting will likely take about an hour or two if this is the first time. It would a good time to clean the exhaust vent area as you have it opened. Update 2024: The replacement lasts about two years, which says the quality of the part may not be the same quality as original. Further, my second order was poorly packaged with just bubble wrap, and does not come with diode.
L**Y
Did the job now my microwave is working like new.
Replaced my broken Magnatron in my Microwave and now running like new.
P**L
Perfect replacement for GE Profile Microwave
This magnetron was the perfect replacement for the one in my 15 year old GE Profile microwave oven. My oven is a 36" wide model and there are no replacements for this oven available in bisque. Thus, I was forced to find an alternative solution to replacing the oven. I am fairly adept at handyman type repairs and with the aid of YouTube had this microwave back up and operating in an hour. This is the second time I have replaced this magnetron so the average 7 year lifespan of the tube seems to be about right. The installation was a little sketchy because of the design of the oven but taking out about 2 more screws than I wanted to made it go in much more easily. Re-assembly was straightforward and I'm good for another 7 years. Or until we remodel with a different color... :-( By the way, a local appliance company advised me that there are basically 2 manufacturers of microwaves in the whole world (Asia) and they all use mostly the same parts. This made me more confident that the part would fit since it looked so similar to the existing one. Thankfully, this one fit exactly giving some credence to his statement.
C**D
Fixed problem hopefully
Update...8/8/2024 My microwave worked for 2.5 days after the install of this magnatron, then started making some different hum noise. I opened the microwave door and smoke came out from the vent holes inside. Did not heat food again after that. The magnetron definitely died again, whether something caused it to die, or the shipping caused it damage, I can't say for certain, but the whole experience was a waste of time and money, and ended up going to the dump. My GE microwave, started not heating a few days ago. Microwave would turn on, light, turntable, all worked but no matter how long I ran it, it would not heat food. Looked up online and common issue seems to be the magnetron. Found out this is the part for my model, jvm3670sf001. Wasn't terribly difficult to replace, though you do have to dismantle microwave side, top, bottom and back panel to get access. Replaced unit, and tried out last night, now my food gets warm again, so all seems okay. My subpar review is more a reflection on the shipping processes that Amazon uses. I am sick and tired of delicate electronics being shipped by Amazon in a plastic or paper sack. I've had halogen headlights for my truck shipped in a plastic sack and this magnetron was given the same lack of thought shipping as well, in a paper bag. The tip is dented due to the lack of protection, how that will affect the life or quality of the product at this point is not known to me but replacing this part is not rocket science but is a bit involved with having to get help getting the unit off the wall/cabinet, dismantle it, 2 days shipping and ops check with reassembly and help to install again. On the same note, I can get a box that is 10 times too big to ship a pack of rubber washers for my garden hose, or double a batteries but sensitive electronics, we're going to ship in a non protective sack.
Trustpilot
2 weeks ago
1 day ago