โจ Shield Your Screen, Elevate Your Experience! โจ
The LENTION Clear Screen Protector is specifically designed for the 13-inch MacBook Pro Retina models (Late 2012 to Early 2015). It features advanced anti-scratch technology with a 4H rating, hydrophobic and oleophobic properties for easy cleaning, and a crystal-clear finish that maintains high transmittance. Installation is a breeze with its automatic adsorption layer, ensuring a bubble-free application and residue-free removal.
G**U
No bubbles, love the material!
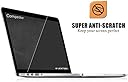
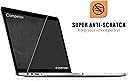
Nice thick material, helped eliminate the bubbles. I got the retail package which came with plenty of sticky pieces of tape that allow application and micro-fiber cloth for cleaning. Everything worked as expected. 99.999% bubble free (nothing visible to my naked eye) application in 7 minutes!NOTES: Lots of people complain about bubbles (this goes for ALL screen protectors). My suggestion please take the time to understand the process of bubble free application (or pay a teenager $2 to you apply it for you). I am writing a section on my technique of how to achieve bubble free application below. Hope somebody will find it useful.STEPS FOR BUBBLE FREE APPLICATION1. Understand what causes bubbles. Two things -- dirt (see step 3), and air (see step 7).2. Start with several 1-1.5 inch of clear tape cut into pieces, I suggest about 5-6. This is included with several pricey version of the screen protectors, otherwise you can use any clear tape. Cut them before you go to next step, and have them ready by sticking them on a piece of wood or metal that you can easily access.3. Start by cleaning the screen surface with micro-fiber cloth, or you can use an old cotton piece of cloth that has been washed. Do not use paper towel. Goal here is to avoid the fuzz. You can use 1 drop of water (on cloth) to reduce static that attracts dirt. Be careful not to pour water into the sides of the screen!4. WITHOUT taking any layers off, position your screen protector to your satisfaction. Now using cut piece of tape (from Step 2), hold the protector in place such that half the piece of tape is on the protector and half on your laptop edge. Use 2 or 3 pieces (ONLY on one side), so that you can swing the protector like opening a door.5. Swing the protector away from screen. Clean the screen again to remove all visible pieces of dirt (don't work too hard). Apparently, rubbing causes static and pulls airborne dirt towards the screen.6. Now take the layer 1 off the screen protector (this is between your laptop and the protector) while the screen protector is opened like a door.7. Starting from applying the protector from side with temporary pieces of tape (see step 4 above) gently apply the protector to laptop screen. It should self stick, if you position it correctly. Move slowly. I recommend going at speed of about 2 seconds/inch. THE GOAL her is not let any air-pockets be created. If you do get trapped air or bubbles, pull back 1 or 2 inches of protector and apply again slowly.8. Depending upon your patience level in last step, your environment, and the quality of screen material -- you will have some bubbles. I get about 1 small bubbles per 10-20 sq. inches at this stage.9. If it is pure air-pockets towards edges, you are press with a credit card and they should go away. IF you have large air pockets, then I recommend going back and repeat step 7, and remove only half or more of the screen protector to remove the bubbles.10. Now you can take the second layer of plastic off (layer 2) and this should remove the pieces of tape applied in step 4. You can remove the piece of tape from laptop now or later.- You should now have a satisfactorily positioned screen, with no air-pockets but may be small bubbles due to dirt --11. For removing pieces of hair/dirt (or fuzz, bread crumbs, silver, gold etc.), you need to use a small piece of tape on closest corner to lift the protector, and another piece of tape on other hand to reach the hair. Be patient and think of your happy childhood memories, and it will work.12. Gently release the screen protector like Step 7 and things will work.13. Enjoy your new screen protector!If these steps do not give expected results, I can say there can be at least three causes (in addition to thousands others).ONE: There is too much dirt in the room, or your screen and or screen protector is charged to attract dirt. Gentle cleaning with 1 drop of water (step 3) reduces static charge for me.TWO: The quality of protector is not good or thick enough :(THREE: You need more practice (sorry this is true, I use to think it was the problem with screen protector till my friend showed me and since then I am doing well).
C**A
Time intensive but makes screen easier to clean
The product protects the screen and fits well. It's also easier to clean fingerprint smudges off the protector than the actual Macbook screen. The screen cleaning cloth they included didn't help for installation, but it's actually a very nice screen cleaner, which i now use for my glasses and Macbook screen.I've used a similar kit to install the tempered glass protector on my phone before, so I knew how to use the kit (the instructions left out a few important details, which is a Major Issue). Even then, it took me 1+ hrs to install the screen perfectly because dust kept getting trapped between the screen protector and the actual screen.1) Turn off your screen for the whole process. Clean your screen. Get rid smudges etc. while you still can.2) Use the sheet of adhesive tabs to attach the top side of the screen protector to the top edge of your Mac screen, with the film still attached to both sides of the screen protector. It should open like a hinge, and attaching it from the top prevents more dust from falling onto the screen when you try to readjust it. Alternatively, you could do what I did and attach it like a hinge from the side of the screen. You have to deal with getting rid of more dust, but it is easier to take care of large bubbles this way.3) Use the blue plastic film sheet included in the kit to get rid of dust on the Mac screen. This blue film thing has a weak adhesive on one side, allowing it to effectively and gently remove dust particles from your screen. Just do it in a well lit area and look for small white specks.4) Start removing the plastic film in between the protector and the Mac screen. Do it slowly, and use a stiff card (like an ID card) to push out large bubbles as you go. If you see small bubbles even after pushing through it with a stiff card, check if there is a speck of dust preventing the protector from properly adhering to the screen. Work your way back by lifting the protector and using the Blue film to remove the dust speck.5) Continue this way until the screen is properly installed. Recheck for any bubbles, especially near the corners and edges. If there are any, lift the protector again and redo as needed.6) There should be a bit of space still between the protector and screen where you applied the adhesive tabs in step 2. This is because the edge of the Mac screen (for my Pro Retina 2013 at least) has a small ridge. Lift the plastic film that covers the top of the screen protector a little and make sure there are no bubbles. Use a stiff card to push them out, or lift the screen protector as necessary to remove any dust with the Blue adhesive film.7) Once you're sure there are no bubbles or dust, remove the plastic film covering the top of the screen protector (the side not facing the screen). Use your stiff card to push out bubbles at the edge as necessary, or lift portions of the screen protector to remove dust with the Blue adhesive film.It is essentially a long trial-and-error with a lot of micromanaging involved. The sheet of adhesive tabs is a bit stiffer than normal scotch tape, so it might come off the edge of your screen when you are working with it, as it tends to not like curling around the edge. The adhesive tabs also have a few pieces that are supposed to help you lift the screen protector if you need to redo some parts, which might be useful, but I myself just used my nail to lift a corner when I needed to redo a small part after laying it flat.
B**R
Functional and Economical Screen Protector for Your Retina MacBook Pro
I recently got a new MacBook Pro with Retina and wanted to protect my screen for possible resale in a few years, and this protector had a good review average. I feel like the bad reviews are because people didn't know how to apply it on properly.There are tools provided to apply this screen protector on, and clear instructions on how to do it. There is a big blue sticker to grab any stray dust (because one speck can ruin it all!), and some strong stickers to hold the protector in place for proper alignment before finalizing anything.Being a perfectionist you bet it went on flawlessly [see photos]. I used the front FaceTime camera as my main guide. There was a speck of dust on the edge, but I was able to lift off the protector with a knife, and remove the speck with the dust sticker for a perfect finish. You cannot tell the screen protector is there at all.I did remove one star because of a slight rainbow effect at certain angles, but I didn't want to remove it to compare it to the before. It's barely noticeable.โ BONUS โAs a bonus, it also comes with a thin silicone keyboard protector but I gave that away because it was unnecessarily branded, but a plus if you don't mind that. If you happen to be looking for a keyboard cover as well, I recommend theย UPPERCASE Ultra Thin Keyboard Protector for Macbook Pro with Retina Display 13-15" , because it is *very* thin and will protect your keyboard from dust.For the price, functionality, and ease of application, this screen protector is a great value. Recommended.
M**N
Easy install and really good fit
The protective film on the screen of my MacBook was starting to wear off and the damage was creeping from the bezels onto the screen. I was quoted $900 to get the screen replaced officially and $500 unofficially. Either way not worth it. So I reckoned a screen protector might solve the problem. I tried a tempered glass one to start being a bit wary about film protectors - always found them hard to fit. Didn't work - always seem to get a halo with them. So last resort was getting this protector. And it worked. Went on real easy and has pretty much dealt with the wear issue on the screen. Really good product but do make sure you follow the instructions when you apply it.
S**T
Better Than Expected
Great Product
M**Y
Good product
Good product and easy to install
V**H
Very nice product
Wonderful product but very difficult to apply though they give one extra sample to try. I got the screen applied through a professional and recommend the same
Trustpilot
2 weeks ago
1 day ago