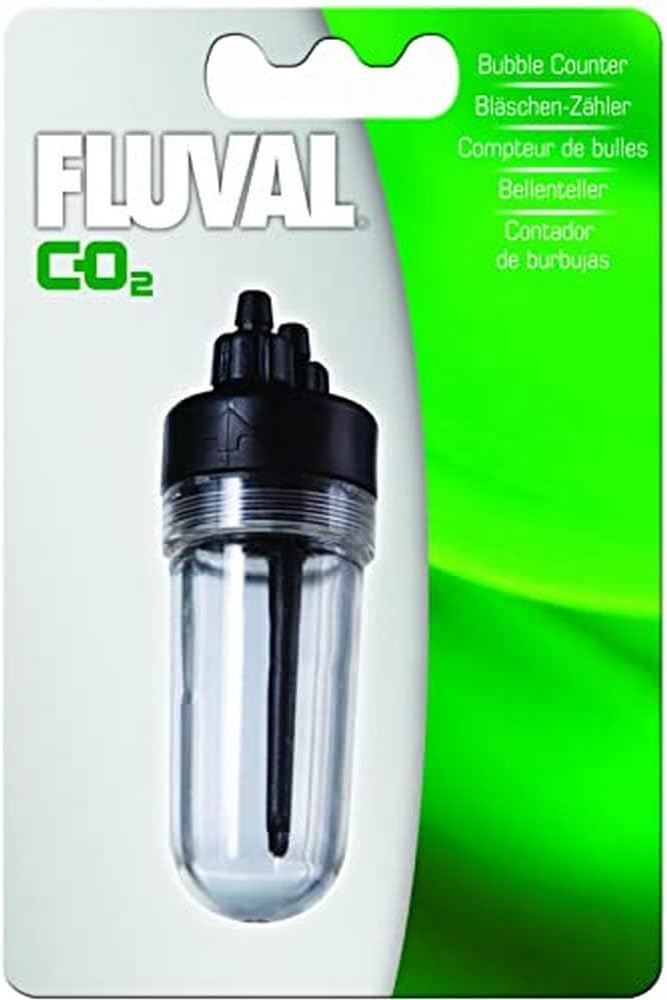
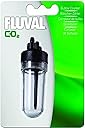
🌊 Dive into Precision with Every Bubble!
The Fluval88g-CO2 Bubble Counter is a must-have for planted aquarium enthusiasts, designed to accurately monitor CO2 dosing, ensuring a vibrant and healthy aquatic environment. Weighing just 1.44 ounces and with a liquid volume of 91 milliliters, this user-friendly stick form product is proudly made in the USA, making it a reliable choice for fish lovers.
Item Weight | 1.44 ounces |
Liquid Volume | 91 Milliliters |
Target Species | Fish |
Item Form | Stick |
M**M
Works well
The product really helps plant growth, and longevity, it also looks nice by the tank, was easy to set up, small size and ok value for the money.
A**O
Great in line bubble counter
Needed this to replace my previous leaking bubble counter, this one is inline and works great, easy to put together, it’s slim and sleek, so it can be tucked away, feels pretty durable and I’d definitely buy another one if needed
C**S
Great product does it's job
Easy to use. Works very well as a bubble counter for my fish tank. No issues with leaks. Definitely recommend.
N**T
Works great! Holder design could be better.
Works great, very simple design and easy to see the bubbles. It loses a star because the way it's held to the tank isn't that great.You have the option of using either the included suction cup or a little clip to hold the bubble counter to the tank. The problem is with how the clip and the suction cup attach to the bubble counter.When using the suction cup, there is nothing really holding the suction cup to the bubble counter other than a light friction fit. Most of the designs I've seen have the suction cup fit into a hole which is too small for the nipple on the end, but once pressed through the nipple fits into a larger cavity, and this design works great. The Fluval bubble counter however just has a little slot. Not a cavity that's larger on the inside, but a straight up slot, which is only a little smaller than the suction cup, so when you press the suction cup in it's not "snapping" into place or anything, it just sits there due to friction. This will easily fail over time even with very minor disturbances. In the short term or installation where it will not be disturbed, however, I'm sure this works great.The clip has a similar problem. The clip itself just slides into the slot, sitting there by friction. There's no little "click" or anything, so with a tiny bit of force the bubble counter pulls right off, leaving the clip behind. My other issue with the clip itself is that it's only maybe half an inch wide, so it cannot fit over the rim of a standard tank. I assume this is for rimless tanks. Again for short term or installation where it will not be disturbed, I'm sure this works great.The tightening nuts work a treat. They hold the tubing on very securely. I used this with the AQUATEK CO2-Proof Tubing and had no leaks or issues of any kind.If you get similar tubing, I would recommend boiling a mug of water in the microwave, and then holding the end (about the last inch or so) of the tubing in the water for about 30 seconds. The tubing becomes very flexible, and can then be put on very easily. Depending on your tubing, this may not be necessary (or recommended).
K**T
Easy-to-use for CO2 in planted tanks. Highly recommended!
I have been keeping planted tanks for a long time. I recently set up a DIY CO2 generator for my tank and had used Fluval's diffuser in the past in a similar setup. I ordered another for my latest planted tank and the bubble counter for ease of use.You do not need to have commercial tanks of CO2, a fancy regulator, or an expensive setup in order to have lush CO2-assisted growth. I use an old Gatorade bottle, some black airline tubing, Fluval's diffuser, and this bubble counter. I wasn't going to get a bubble counter but it was so cheap on Amazon that I went ahead and ordered it, and I am glad that I did! It provides another piece of equipment that prevents the tank from leaking back out the tubing onto the floor and allows you to see if your generator is still producing gas.For a DIY CO2 generator:1. Gatorade or other thick plastic bottle. Many people recommend 2-Liters. I think these are too big.2. Fleischmann's Active Yeast, or some other baker's yeast. Not the Fast Rise kind3. Airline tubing. CO2 tubing is really expensive and since you are generating your own CO2 for pennies, don't worry too much about gas escaping.4. Check valve. Very important.5. Plastic inline connectors for tubing6. Bubble Counter7. Diffuser8. Silicone (if needed)Drill hole in lid of plastic bottle. Affix plastic inline connector INSIDE the bottle with one side pointing down into the bottle and the other pointing up out of the lid. (if necessary, you can use silicone to get an airtight seal) Attach a small length of airline tubing inside the bottle. This length should be short enough that it will not dip into the Yeast and sugar mixture in the bottle. Affix another piece of airline tubing to the connector poking out of the lid. This goes to the bubble counter. Place the check valve between the counter and the diffuser.The bubble counter will allow you to count Bubbles Per Second for your tank. (Various plants require different levels of CO2 in the water and are almost always measured in this BPS count.) It should have about an inch of water in it and be attached to the exterior of the tank. As gas is pushed into the counter, you will see a bubble form from the stem inside. It will pop and the gas will float to the airspace above the water level, and after enough pressure is built up, will begin pushing gas into the tank via the diffuser.For this bubble counter, make sure that the intake and output valves are screwed as tightly as possible. I found a gas leak on the intake because I didn't have the tubing pushed down far enough on the stem.The diffuser should go in the tank in a location that will provide for the maximum transfer of CO2 gas with the water. In my tank, I have attached it directly underneath the intake for my Fluval 305 filter. The CO2 goes into the filter, slowing through the media for a longer time of gas exchange, then hits the impeller as it is pushed back into the tank. You do not want to put the diffuser near the surface or around an airstone. In fact, you don't want to use an airstone for oxygen in the tank during your photoperiod. Oxygen bubblers cause CO2 to not be in the tank long enough to have a good gas exchange. (I use an air pump at night to make sure that oxygen levels to not drop dangerously while the lights are off and photosynthesis has stopped for the day. I turn off the pump about an hour before the lights to come on to allow CO2 to build back up in the tank and be readily available to the plants when the lights come back on) If you do not wish to have your CO2 go through your filter, put it in an area as close to the bottom of the tank as possible, with as little water movement as possible. You can hide the diffuser anywhere if you are using a bubble counter because you will still be able to tell if the generator is producing gas by looking at the bubble counter.In the bottle, mix warm water with sugar, swirl it around until the sugar dissolves, then add the baker's yeast. The amount of sugar and yeast that you use will determine how long the generator stays charged. I have had bottles last two weeks, and I have had bottles last two days. Basically, you want there to be enough sugar to feed the yeast as it reproduces. More sugar means longer CO2 production. Keep in mind that a whole packet of yeast will be waaaaaaaaaaaay too much and may cause your bottle to burst.After putting the lid with its attached line back on the bottle, walk away. It takes time for the yeast to produce enough gas to provide sufficient pressure. You will be tempted to open it. Don't. If after three hours there are still no bubbles coming through the diffuser, one of four things has happened:1. You have a leak in your system (fruit flies and/or the smell of rising bread will tell you this)2. You did not use enough yeast, your yeast was not active, or your water was too cold3. You are impatient and still need to wait4. You have water in your system and you will have to wait for internal pressure inside your bottle to overcome the water pressure from your tank (this is why I recommend the check valve)
C**T
Works great, easy to use!
This bubble counter is really simple to use - just connect your airlines using the strong, secure compression fittings, fill it part way up with water, and suction-cup it to your tank! It's been working great!One word of warning: this bubble counter doesn't have a built-in check valve, so if your CO2 supply pressure drops (or gets disconnected), water is forced back through the input. Do NOT connect this bubble counter directly to a needle valve and/or regulator without a check valve in between, or you could your damage equipment. There are other bubble counters with integrated check valves - some people may prefer those to this one. I've been very happy combining this bubble counter with the Water & Wood 12 Pcs Aquarium Red Clear Plastic One Way Non-return Check Valves check valves.
B**U
Counts Bubbles
Pros:* Does what it should and allows you to count bubblesCons:* You may need to install a one way valve somewhere because if pressure is 'negative', it will allow all the gasses and the water to be sucked up the pipe where all the gasses are supposed to exit from for counting the bubbles.
Trustpilot
1 day ago
2 days ago