

⚡ Power your lifestyle, no interruptions allowed!
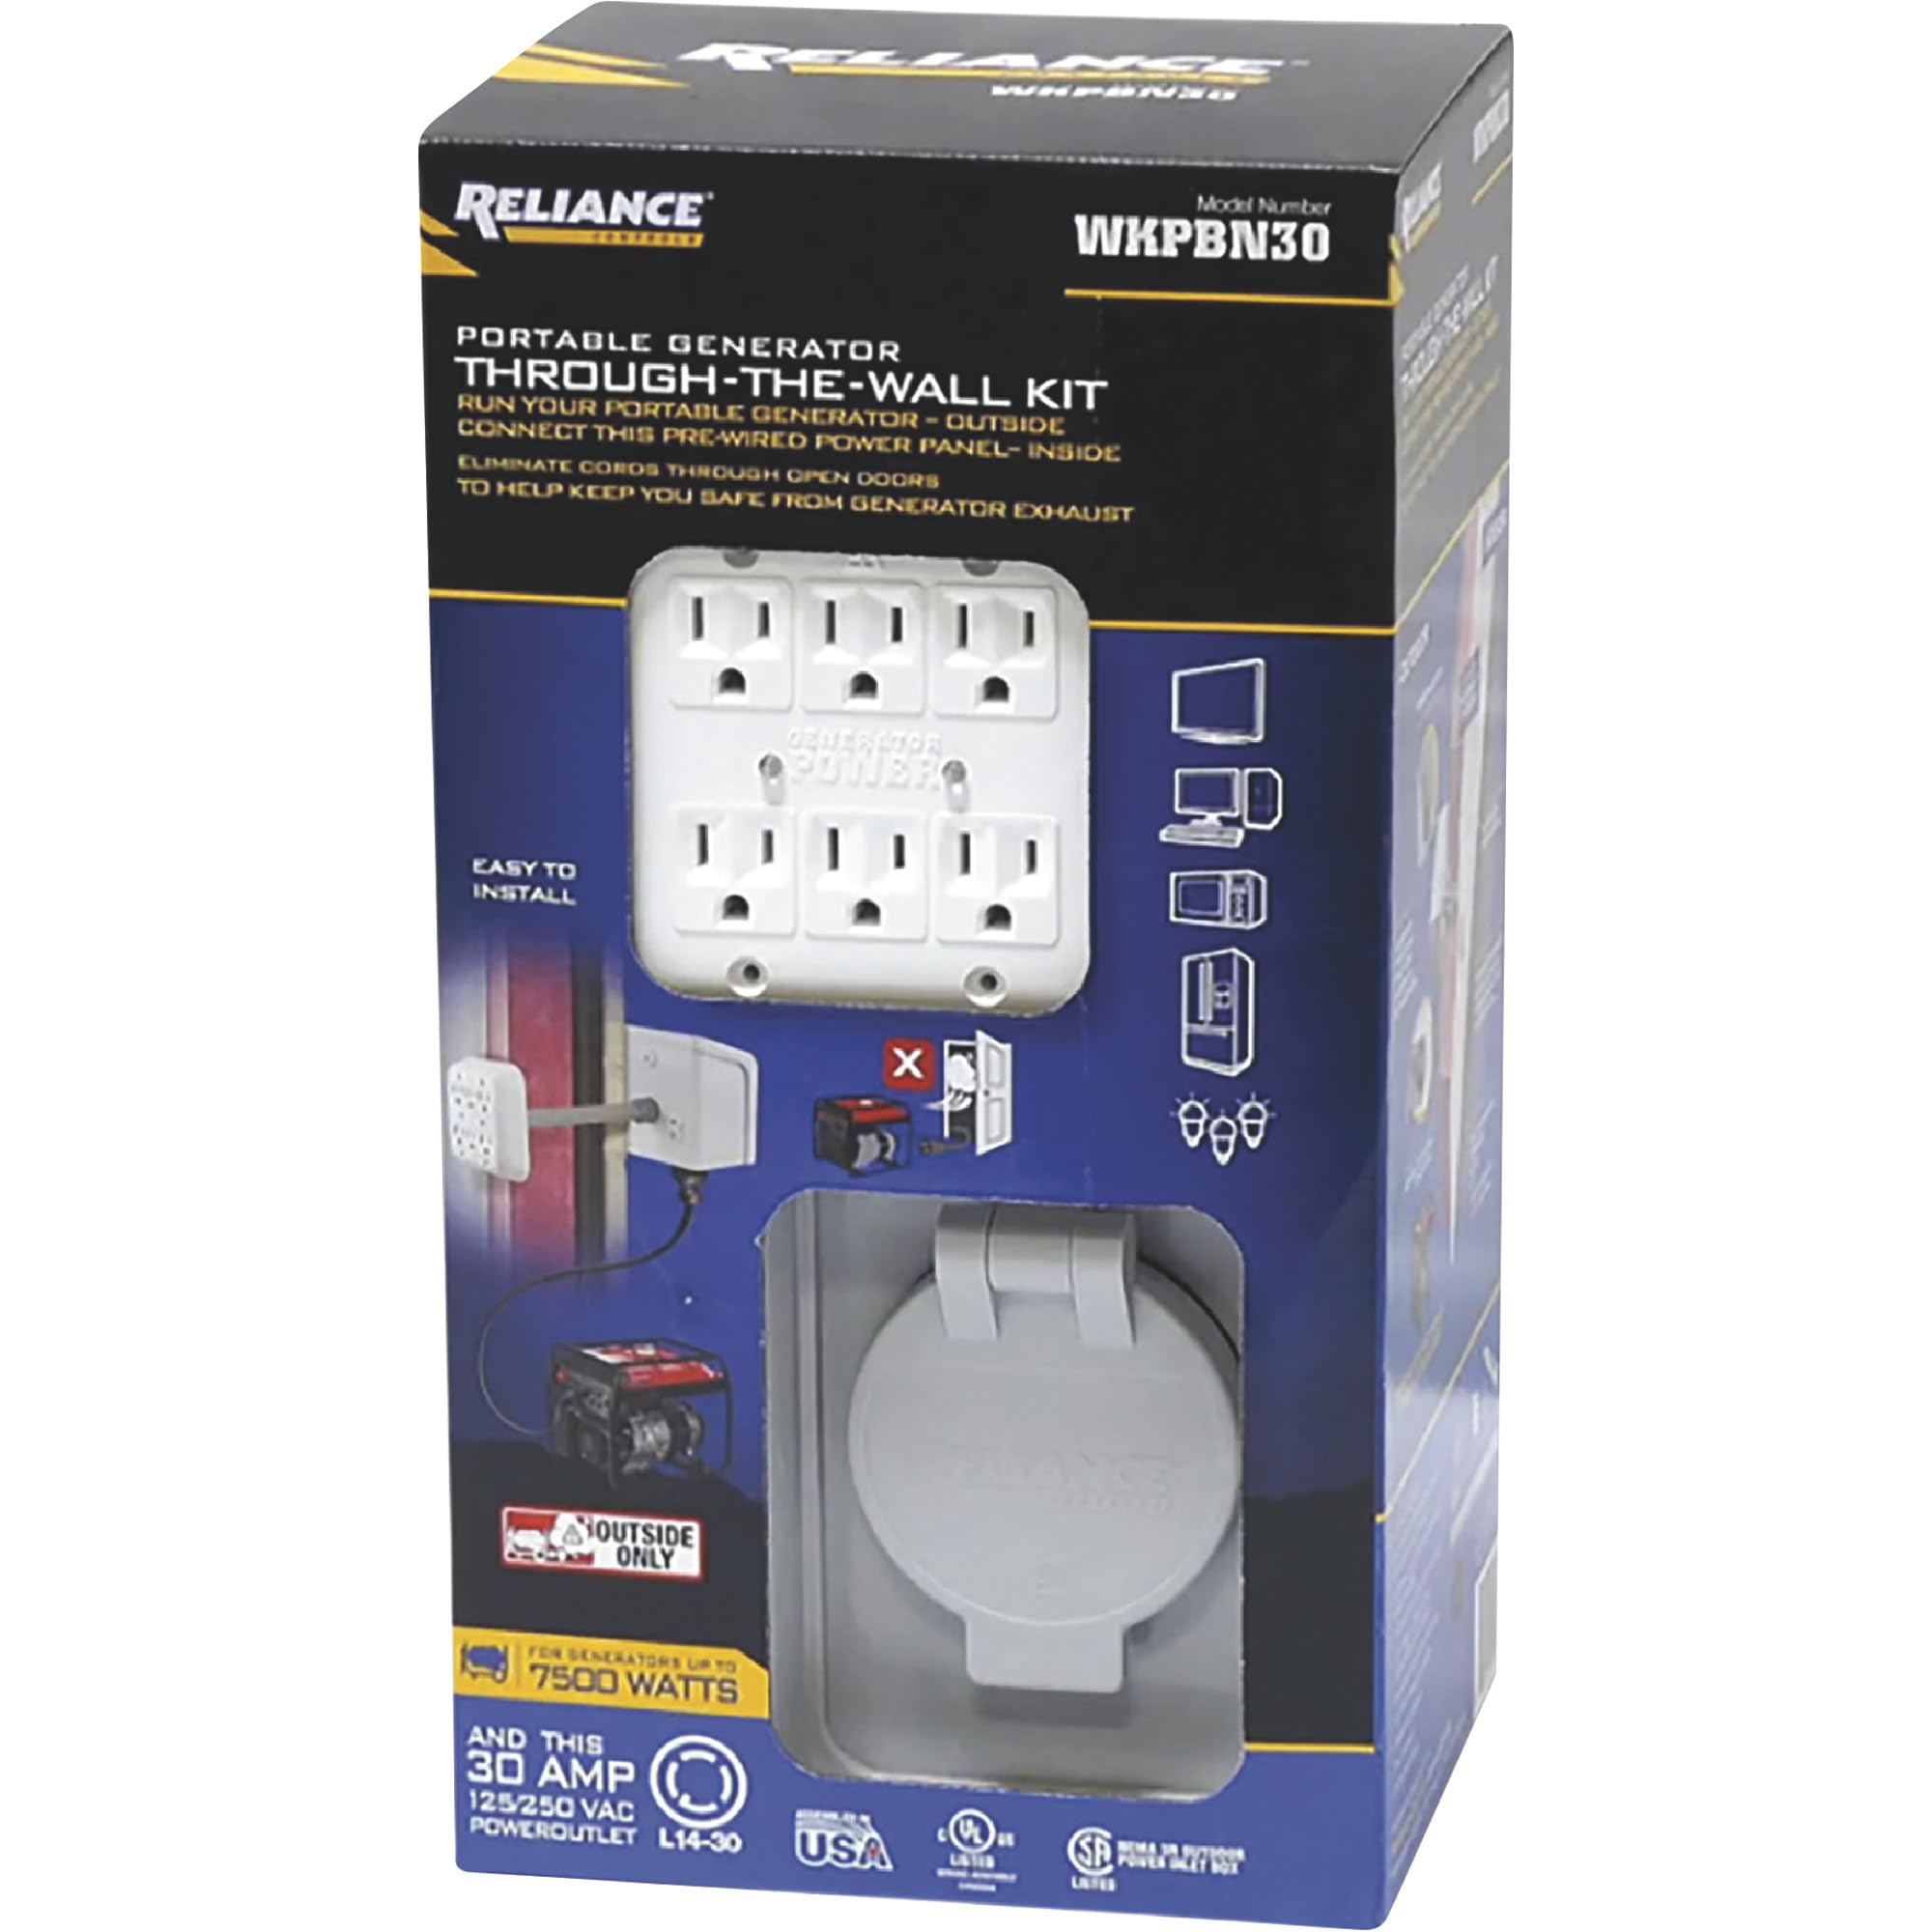
The Reliance Controls WKPBN30 is a portable generator transfer kit designed for quick, safe through-the-wall installation. Delivering up to 3750 watts with automatic voltage regulation, it supports residential and outdoor power needs. Lightweight and complete with all mounting accessories, it ensures hassle-free setup and reliable performance.
| Brand | Reliance Controls |
| Wattage | 300 watts |
| Fuel Type | Gasoline |
| Power Source | Battery Powered |
| Recommended Uses For Product | Residential, Camping |
| Item Weight | 3.3 Pounds |
| Voltage | 120 |
| Output Wattage | 3750 |
| Special Feature | Automatic Voltage Regulation |
| Included Components | 1 |
| Color | EMW3790037 |
| Product Dimensions | 15"L x 15"W x 9.02"H |
| Material | Plastic |
| Model Name | WKPBN30 |
| Engine Type | 4 Stroke |
| Ignition System Type | Electric |
| Engine Displacement | 418 Cubic Centimeters |
| Total Power Outlets | 6 |
| Frequency | 50 Hz |
| Starting Wattage | 7.5E+3 Watts |
| Running Wattage | 300 Watts |
| UPC | 815181017538 |
| Manufacturer | Reliance Controls |
| Global Trade Identification Number | 00815181017538 |
| Item Package Dimensions L x W x H | 13.54 x 7.48 x 6.54 inches |
| Package Weight | 1.67 Kilograms |
| Item Dimensions LxWxH | 6.5 x 7.5 x 13.5 inches |
| Brand Name | Reliance Controls |
| Warranty Description | Warranty |
| Suggested Users | unisex-adult |
| Number of Items | 1 |
| Part Number | WKPBN30 |
| Size | One Size |
J**.
Very Well Designed, Easy Installation
Very well designed for easy installation. Good instructions and YouTube videos on installation available. I installed mine through brick masonry with no problem. I started from a height of 19" above the interior floor, and double checked that would equate to a height higher than 24" on the outside. Thoroughly checked the wall area for AC, pipes, studs and other hazards to avoid. I started from the inside with the included paddle bit, carefully cutting through the insulation so it wouldn't wrap up on the bit. I verified clearance and no obstructions, and then carefully centered and leveled a 1/4" diameter by 12" long masonry bit from the inside out to create a pilot hole through the brick with a hammer drill. Then with a 1" diameter by 14" long masonry bit drilled from the outside, the holes lined up perfectly. (No masonry bits are included with the kit) I didn't use PVC cement; I used a liberal amount of silicone caulk sealant on the fittings and around the exterior hole. I also put a bit of silicone sealant inside the 1/2" pvc pipe at the exterior.I purchased a heavy duty 25', 10-gauge cord with TT-30P (male) plug (also known as a RV plug, for campers) to match the 30 amp plug on generator, and had to buy a 4-prong L14-30 (female) plug for the other cord end to fit with this kit's plug L14-30 (male) plug. It would have been nice if the kit came with the option of a male TT-30P plug in the housing.**BE VERY CAREFUL WIRING THE PLUG. Also note the top row of outlets covers 15 amps and the bottom row covers 15 amps for the 30 amp total capacity that it can handle - that's important as how you coordinate your plugging in of appliances, etc. **I bought this to use with a WEN 3800 generator after winter storm Uri in Texas, with 34+ hours with no power. With this simple setup it's worth the price you'd lose in food from your fridge/freezer, not to mention the other having power benefits.Overall I think it's a great little kit, although just a bit pricey.
O**5
Excellent Solution with a Nearly Complete Kit
This is something I had designed in my head before the guy at the home improvement store showed it to me but this is much better than my design and is much easier to install. The unit was cheaper on Amazon so I ordered here. Bottom line: this is an excellent solution for the problem of "how do you get a wire into the house from the portable generator outside without partially opening a window or door."The kit is very complete -- I couldn't believe it even came with the drill bit needed for the job. The exception in "completeness" is not supplying the PVC cement, which I didn't have and had to spend another $4 for a small can (you only use 4 swipes of it). My guess is that it doesn't come with the kit because it's volatility makes it hard to ship.The instructions are excellent and are reflected similarly in the youtube video. I'd highly recommend reading the instructions, then watching the video, before you start the installation (while reading the instructions again). Customer support was easy to reach by phone when I had a couple of non-critical questions like, "Why is the recommended height 19 inches?" (answer: to avoid "splash" and to access the connector on the underside of the outside housing.) In my installation, the outside bottom surface was lower than the inside floor so my inside height is actually more like 17".One minor redundancy in the instructions: Step 7, substep 1 is unnecessary. It says you should pull the power panel off the wall, but you've already done that in substep 4 of the (unnumbered) preceding section.The only improvement I can think of is to offer a version for a NEMA L5-30R so you don't have to add an adapter or (as advised) replace the receptacle end of the cable to service generators with that style plug.Overall, highly recommended!
N**E
Great utility for generator use but installation is tricky
This utility, once installed, makes generator use very convenient. However, there are some tricks to installation. First the conduit must be cut precisely in order to fit. The recommended length of 1/8" past the outside wall isn't quite right, because most of the conduit fitting needs to be inside the wall and might not be set back enough with the 1/8" overhang. I did not install the knockout washer into the power inlet box knockout hole because it doesn't allow the conduit fitting to protrude through the inlet box enough to thread it. In the online video Reliance provides, they don't install the knockout washer either, so I can only assume it's not essential. One final pitfall, if you have overlapping clapboard on your home and you install the exterior inlet box just below an overlap, you won't be able to install the box cover. So after install the box, I had to cut pieces of overlap in order to fit the box cover. Installation took me about 6 hours. Results are great but the job was hard.
Trustpilot
1 week ago
2 months ago


