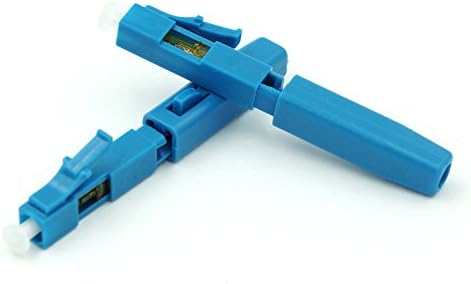
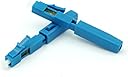
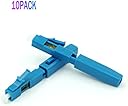
It should be noted that this product doesn't come with any documentation. On the plastic there's a diagram that shows a total length of 28mm and another length of 6-8mm (inclusive of the total length). I've found this to be pretty close, but you may need to adjust it a little bit. To use this product you need: a quality fiber stripper, a quality cleaver (very important!), and lint-free IPA wipes. It helps to have a visual fault finder. This is not required but highly recommended. Always wear safety glasses and never eat or drink while working with fiber. Know what you're doing and if unsure you should probably hire a pro. Given the lack of documentation, and the number of folks who have had issues, let me explain how you use these. I am using a buffered cable: that is, I have a 900um buffer, 125um cladding, and 9um core. You may be using something else, so you'll need to adjust these instructions if you're using for example loose tube unbuffered fiber or fibers in a zipcord. 1) Remove the housing from the connector by pressing on the indent and pulling apart. Place the housing over the cable and out of the way. 2) Strip at least 33mm of (900um) buffer off of the cable so that you have 33mm of (125um) cladding. TIP: When stripping cladding, take a little at at ime with the strippers at a straight angle to the cable. Using an angle may cause your strippers to remove cladding which we do not want. 3) From the end of the exposed cladding remove 12mm of cladding, to expose just the 9um core. TIP: When stripping cladding, use an angle on the stripper. 4) At this point you'll have your 900um buffered cable with 21mm of cladded fiber exposed and 12mm of exposed 9um core. Clean the exposed cladding and cable with a lint free IPA wipe by pull the cable through the wipe. 5) Cleave 5mm off of the end of the cable. You'll now have 21mm of (125uhm) cladded fiber exposed with 7mm of (9um) core. That's 28mm total. 6) You're ready to insert the fiber into the connector but before doing so, make sure that the connector is not already locked. The connector locks by moving the yellow thingy forwards, towards the ferrel (there's a triangle that shows this on it if you look closely). If there's a gap between the yellow thingy and the housing on the fiber (not ferrel) side, its locked. Move it in the other direction to unlock. See the photo with locked connector (with a fiber) and the unlocked to compare. 7) Now that we've made sure the connector is in the open position, insert the fiber until there is a small bend. This will enesure that you've inserted the fiber all the way. If everything is measured right, the buffer will be just inside of the connector, with the cladded fiber visible and the uncladded fiber inserted far enough to be non-visible. 8) While holding the slight bend move the yellow tab closed (towards the ferrel). The cable should now be connected and locked. Make sure that the fiber will not come out of the connector by giving it a slight tug. 9) You're done. As you can see I've personally used and tested these connectors. They kinds of connectors are NOT for every day use - if you just want to connect a server to a switch use a premade patch cable. These connectors should be used for permanent installs - e.g. for connecting a cable run to a patch pannel etc. They're not sturdy or durable enough to be frequently inserted or removed. That said, if you're willing to invest in a good pair of fiber strippers (~$20) and a good cleaver ($~120), a visual fault locator (~$20) and some IPA wipes, you can run and terminate fiber. Anyone can. It requires patience and practice. First get down your method of stripped the buffer without damaging the cladding, then figure out how to strip cladding without breaking the core. Practice this a ton, don't move onto trying to use the connectors until you can do a great job with your prep work - otherwise you'll be throwing $$$ down the drain. If you get the right tools, put some hours into practicing your prep, you'll be terminating fiber all day like a pro.