🛟 Patch it. Play on. Never miss a wave.
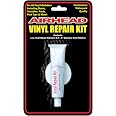
The AIRHEAD Vinyl Repair Kit is a professional-grade, waterproof repair solution designed for all vinyl inflatables including boats, towables, and pool toys. Featuring commercial waterpark quality adhesive and four durable 2-inch vinyl patches, this lightweight and portable kit ensures quick, reliable fixes so you can get back to your water adventures without delay.

| Size | One Size |
| Color | Multi |
| Brand | AIRHEAD |
| Material | miscategorised |
| Product Dimensions | 2"L x 2"W |
| Item Weight | 1.6 ounces |
| Age Range (Description) | All Ages |
| Global Trade Identification Number | 00737826018246 |
| Item Form | Inflatable |
| UPC | 737826018246 737826037445 |
| Manufacturer | KWIK TEK |
| Weight Limit | 225 Pounds |
| Item Package Dimensions L x W x H | 6.02 x 4.96 x 1.14 inches |
| Package Weight | 0.06 Kilograms |
| Item Dimensions LxWxH | 6.1 x 4.9 x 0.7 inches |
| Brand Name | AIRHEAD |
| Warranty Description | See Manufacturerer |
| Model Name | Kwik Tek AHRK-1 Airhead Vinyl Repair Kit |
| Suggested Users | Water Sports > Towable Accessories |
| Number of Items | 1 |
| Part Number | AHRK-1 |
| Style | Tubes Repair |
| Included Components | Kwik Tek AHRK-1 Airhead Vinyl Repair Kit |
| Sport Type | Boating |
J**G
best vinyl patches
i've tried a number of vinyl patches over the years. most start peeling off after not much time if not immediately. these patches have held up for years and i consider them to be fairly permanent solutions. have even used them on torn seems with extra glue and they held up fine. have been good so far on holes that were a half inch wide on air mattresses and inflatable kayaks and have not have one give out to date.
R**N
Works Fine if you follow Directions
Patched a small hole in blow-up boat. Cleaned area well several times. Drew circle around hole larger than kit patch. Applied glue to kit patch on textured side. Thinned glue on patch with finger but could use Q-tip or other. Waited a minute or 2 for glue to begin to get tacky. Nice even thin glue on patch. Placed kit patch over hole with patched centered on hole and took glue around edge of patch, again making sure patch edge and some on patch covered. Put parchment paper over patch and on flat surface, pile 4 bricks right over kit patch and waited 48 hours. I waited 48 hours. Blew up boat and patch holding for week now.
P**E
Secrets to Patching Aerobed with this Product
Pros: Plenty of Glue. The amount of glue, if bought alone, could cost more than the whole kit. The 2" patches are strong, thick and large enough to cover most punctures and seam splits and tears.Cons: 4 patches is not enough for the amount of glue. But you might have a old vinyl shower curtain or umbrella to make all the patches you need. The instructions are lacking details.===== Tips From Me Owning And Patching 10 Aerobeds ======Finding Leak: Aerobeds tend to fail at the seams and horizontal channels on the top. Otherwise you are looking for an accidental puncture. Most leaks can be found by holding your ear near the full bed and listening in quiet environment. If it is a slow leak, you may need a sponge soaked in soapy water; starting with bottom of bed wet the bed with the sponge and look for bubbles forming where the leak is. If needed, next check the sides then top of bed.Clean: Clean and Dry an area the size of patch around the hole to remove dirt and oils. Use a folded 2 inch square of medium sandpaper to rough area. If you are working on a seam or channel, be careful not to over sand the raised area and create a larger hole! If your bed has the felt top surface, sand felt coating off.Applying Glue: Cover half inch area around the hole itself with thin layer of glue and rub glue in with top of glue tube; this is to ensure the glue is in any seams near hole. Apply a thick layer of glue to patch (textured side) so that when patch is place on hole and lightly pressed with your fingers glue will bead out around the entire patch. Over gluing is better than not using enough.Set the Patch: Get the area with the hole on a surface and portion of bed as flat as possible. Using a 6 inch square of wax paper, cover the patch with the wax paper and place a 10 lb flat plate iron weight, or other flat heavy object, over the patch. Don't worry about the extra glue! The glue will not stick a bit to the wax paper and when you are done it will look pro. More weight seems to help if there are seams under the patch. This also ensures the entire patch sets into the groves and channels. I use 4 ten pound plates stacked. To improvise, you can use any flat surfaced object like junk CDRoms (with the open hole off the patch) and any heavy objects like 5 gallon jugs of bottled water...Dry Patch: I prefer to wait 24 hours, but have successfully inflated a bed that was needed from a morning patching 10 hours later with a perfect result and no leaks later. Once dry, the patch will be strong and will not stick to the wax paper. In case you have a large tear I used 2 slightly overlapping 2 inch round patches from this kit to cover the 1.5 inch split in a channel. But be careful, it glued the top layer of the bed to the bottom because of glue leaking into the large tear and drying them together under the 40 lbs of weight! I noticed when inflating bed a giant dimple at the point of repair. I just kept inflating and the to halves separated with a pop under the pressure of the air pump... and the patch worked!Good luck.
♡**♡
Worked better than expected!
I bought an air matress for my son from a thrift store, and quickly discovered why it was at the thrift store (see picture above).One side of the provided patches is more slick and plastic-y while the other side is softer, the directions didn't specify which side to use so I assume whichever side matches the material you're patching is the right side!I tried to leave room around the rim of the patch when applying to avoid the extra glue getting everywhere, but I ended up smearing the glue all over the edges of the patch anyways, I really didn't want any more air leaks! The glue smells and looks a lot like souped-up crazy glue so you have to work fast to wipe up the extra. In my case the holes were on the bottom of the mattress so I wasn't too concerned about appearances.We needed the air mattress that night, so after seeing how quickly and strongly the glue adhered I took a risk and inflated the mattress an hour after application. Everything seemed fixed! I spritzed some water around the patch but didn't see any bubbling indicating an air leak.My son slept on the matress that night and I waited a week to write this review just to see how it would hold up, it's still inflated! This product was easy to apply and saved me buying a new mattress, I highly recommend it!If this review helped you make an informed decision about this product, please mark it as helpful :)
C**E
Potentially good kit, bad directions
I have an Airhead inflatable tube that we pull behind our boat when at the lake. We let kids jump on it while on land, and lo and behold a rock punctured a small hole in the tube. The hole was about 1/4 inch in diameter and on a flat spot of the tube (which is good because holes or tears in the seams typically render tubes to the scrap yard). I purchased this repair kit to hopefully do the job. The kit itself appears to be high quality. It included 4 vinyl patches that can be cut if needed to the size of your application, and a tube of "glue" that I would guess is enough for 50+ applications. The patches had two textures - smooth vinyl on one side and textured vinyl on the other. While you would think the application would be straight forward, the kit actually has pretty bad directions. I went with the textured side down, put a heavy object on the patch while it was drying, and then refilled the tube. It appeared to hold at first, but the next day she was back to flat again. Disappointed, but perhaps it would have worked better with the smooth side down. Next step is to try and remove the patch and use the smooth side - if that's possible (but this won't happen until spring). I will be sure to update the review with my results.
Trustpilot
1 day ago
2 weeks ago