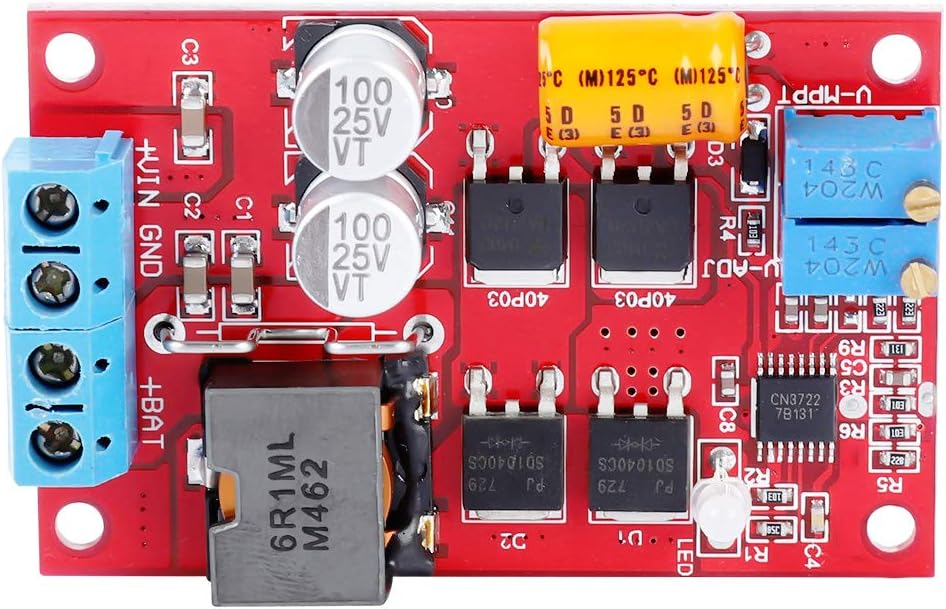
Review date: 6-5-2024, Revision: B... They deleted my original review. This is another try... This is a DIY solar controller. It requires that you google, an alignment procedure that's, might be a bit too much for some to follow (you need to have, and know how to use, a volt and current meter - Your volt and current meter, needs to go up to at least, to your solar panels spec'd output). See below, "Required reading," for how to align the controller. I used mine on an OLD Sunsie SE-1800 (18W) solar panel, with new leads. This was without the in-line diode that were made by Sunsue, that I already had. My panel has an OP of 21v approx., and short circuit test op current of 0.44A (440mA), sitting outside, under full sun. Other spec's are, 1.2A at 15V (18W). Using this MPPT controller, I got 0.52A output, from inside my car (sitting on my dashboard, under full sun, through the cars windshield.). I use this set up to keep my cars battery charged, because the car sits a lot. And, I have HAM radio's pulling parasitic current, and I can't just disconnect the radios. My battery is an AGM. Its a Odyssey ODX-AGM34R (this is oversized for my car, because, HAM Radio). Bottom line after, misreading one sentence, I had to re do the set up, as described below (google, the above key words, or read below, "Required reading"), and now the controller seems to be working correctly. I'll keep checking on it.. Required reading: Google : “robotzero.one 5a-mppt-charger-instructions” Below is the just of what the instructions say (it a copy).... Instructions for setting up the MPPT-V08A Lithium Solar Charge Controller with CN3722 The information in the listings for these modules is virtually incomprehensible so after a bit of trial and error I’ve worked out how to set the maximum output current for your solar panel and the cut off voltage for your batteries. The instructions below are using the following items. Step 1 First turn the voltage pot fully anti-clockwise and turn the MPPT pot fully clockwise. You will be able to hear them click when they are fully turned. Step 2 Connect the solar panel but don’t connect the batteries. Connect a voltmeter across the battery terminals. Turn the MPPT pot anticlockwise until a voltage reading appears and the LED flashes blue Step 3 Connect batteries that aren’t fully charged via an ammeter. Turn the voltage pot clockwise until a reading appears and the LED turns red. Step 4 Adjust the MPPT pot to reach the highest value on the ammeter. This is the maximum charging current your solar panel can provide. Step 5 Charge the batteries in a quality charger until they are full. Connect the charged batteries. Slowly turn the voltage pot anti-clockwise until the current shown on the ammeter is 0. This is the cut off for charging when the batteries are full IE the maximum charging voltage. Advice Note that the above is just a tutorial for setting up these devices. Your finished system must include battery balancing so your batteries are evenly charged. Without a balancing system your maximum charging voltage could be unevenly distributed. For example if your maximum is set at 16.8 for 4 batteries you might expect them all to be topped up to 4.2v but without the BMS they are could have any value that adds up to 16.8v. Some of them could be overcharging.