✨ Crown Your Creativity with Ease!
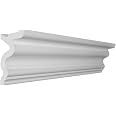
The Creative Crown Foam Molding kit offers 48 feet of high-density polystyrene foam crown molding, designed for easy installation without the need for complex cutting or additional tools. Made in the USA, this versatile molding is perfect for enhancing your home decor and is compatible with various surfaces, making it an ideal choice for DIY enthusiasts.


| Manufacturer | CCM |
| Part Number | ACM354-48 |
| Item Weight | 38.5 pounds |
| Product Dimensions | 95.5 x 2 x 3.5 inches |
| Country of Origin | USA |
| Item model number | 354 |
| Is Discontinued By Manufacturer | No |
| Color | White |
| Material | Foam |
| Item Package Quantity | 6 |
| Batteries Included? | No |
| Batteries Required? | No |
T**.
So easy, a caveman can do it
The media could not be loaded. I purchased this molding to hide led lighting in my daughters room. People are using this led lighting everywhere and when I remodeled my daughters room, I was not going to just stick the lights on the wall where you can see the led strips. I searched for trim specific to accent lighting and there are tons of options. Most mill work was around $100.00 per eight foot sticks.Then I stumbled across this option and thought I would try it. It is awesome. It is made of styrofoam so I would not recommend it areas where it can be bumped or where kids would potentially damage it. In my case, it is installed over seven feet up the wall and installation is super simple. I recommend Power Grab. Cuts and paints like wood at a fraction of the price. I especially like that the top has a trough that you can place the led strips in so you do not see them.Tip - purchase the chrome duct work tap and line the troughs with it before you place the led strips. It will reflect the lighting and produce a nice glow.
Y**E
End product is amazing! Careful during installation
I was debating between giving this a 4 or a 5-star review due to a couple reasons. I knew that the molding was going to be a foam molding but I wasn't expecting such a soft styrofoam and I was disappointed that I nearly paid $200 for styrofoam. You have to be very careful during Painting and installation because any Nick and scratch is visible. So I would not use this anywhere within reach or high transit areas. I used this to do Cove lighting which turned out gorgeous. I will upload some pictures as soon as we are done painting. we put reflective tape on the inside of it and then used caulking to paste it up. We let it cure for 6 hours and then added lighting.I decided to give this five stars just because the end product was really gorgeous but the price point and the material makes me nervous.
S**K
Beautiful and lightweight - just be careful!
*edited after finishing the project*Pros: This stuff looks the part and is SO Lightweight. I wouldn't exactly call it 'easy' to install (I don't think anything is easy when you're working with imperfect walls from awkward angles) but it doesn't hurt as much trying to get it on imperfect walls 'just so' since it's so lightweight. It looks great from the ground and is super easy to cut. I learned all kinds of neat new trim cutting 'tricks' like dead ends, outside angles, odd angles (I had an inside corner that needed to join at ~22 degrees), etc... all just using a cheap plastic miter box. Also learned to faux paint on it and though I didn't end up going with it (didn't go with the new paint color as well as I'd hoped), the piece I painted seriously *looked* like antique wood. Also on my very *last* piece, I set it down for two seconds to grab the caulk gun and my cat immediately walked across it, gouging the heck out of it. I was freaking out thinking I now couldn't finish my room, but tried filling the gouges with spackle, sanded it down... they're nearly invisible now and I'm sure won't be seen at all once painted.Cons (aka - lessons learned): Because it's so light, it's easier to mess up. Press too hard sticking it to the ceiling? Thumb straight through the front. Destroyed a piece doing that, went and reviewed the video and realized they said use the *flat* of your hand, not fingers. Also, when you have to join two pieces together if the wall just happens to be a bit wavy there, your seams *will not* line up no matter what you do to try to get them to stick in line (using the strongest 'instant grab' caulk you can get, tried holding it in place for the full 10 minutes flex time the caulk gives - only managed to break yet another piece shoving my thumb through the front). You can try and hide it with spackle, but that only hides it so much. On one wall that's fairly straight, I just have it seamed together at an angle with no spackle or anything in it and it's absolutely invisible. The opposite wall has a wobble in it though, and my eyes are drawn straight to it, even with spackle. Best to measure and make sure your piece isn't joining at a wavy part of the wall (I can't be bothered to -- it's just two spots and I'm hoping a couple more coats of paint hides it better).Anyway, I'd still recommend it - it IS very pretty, and is nice not dealing with weight and trying to hold up wood while nailing, etc. Just gotta be super extra careful! Have three more rooms to paint and planning on putting it there too, and possibly trimming windows with it too. I've included some detailed pictures, including both visible and invisible seams, my dead end cap (complete with weird 22ish degree cut), and my 'crowning' achievement: a full 1/2" mis-measure that is filled entirely with spackle against a corner block, and nearly invisible (a big cat-claw gouge is also visible in that picture, if you can spot it). Also included a picture of the faux finish I put on a piece (really wish it'd gone with the room paint!) I still need to caulk everything up and paint over where I smeared spackle all over the place, but I'm loving it!
M**E
These mouldings are absolutely fantastic. What would have taken an entire day to ...
These mouldings are absolutely fantastic. What would have taken an entire day to cut every board and nail them , then fix the nail holes, took 1/4-1/2 the time! We painted them our trim color, and then used caulk to attach to the ceiling/wall, and they look fantastic. Great product and cannot wait to fix up other rooms with it! My only complaint is that Austin Crown Moulding doesn't have a rope design that I could find!
T**H
Crown molding
THIS CROWN MOLDING IS EASY TO WORK WITH, REALLY LIKE THE WAY IT LOOKS LIKE WOOD WHEN FINISHED.
E**E
Awesome a must for easy room remodling!
This is the easiest product to install. I will not order anything but this for my crown molding needs! It cuts easily using a manual miter box and saw and it paints up well too. Awesome, hands down the best crown molding ever!
C**T
This was scary at first , but it’s tougher then it looks
Great product ready to do another room soon add the led tape lights awsome effect
C**Y
Never seen a product like this before
Never seen a product like this before, and I am totally satisfied with it. The ad says how easy it is to install and for once the Ad does not lie! I did a large room in no more than an hour. Super super easy. I ordered more of the product to finish the entire floor.
Trustpilot
1 month ago
1 day ago