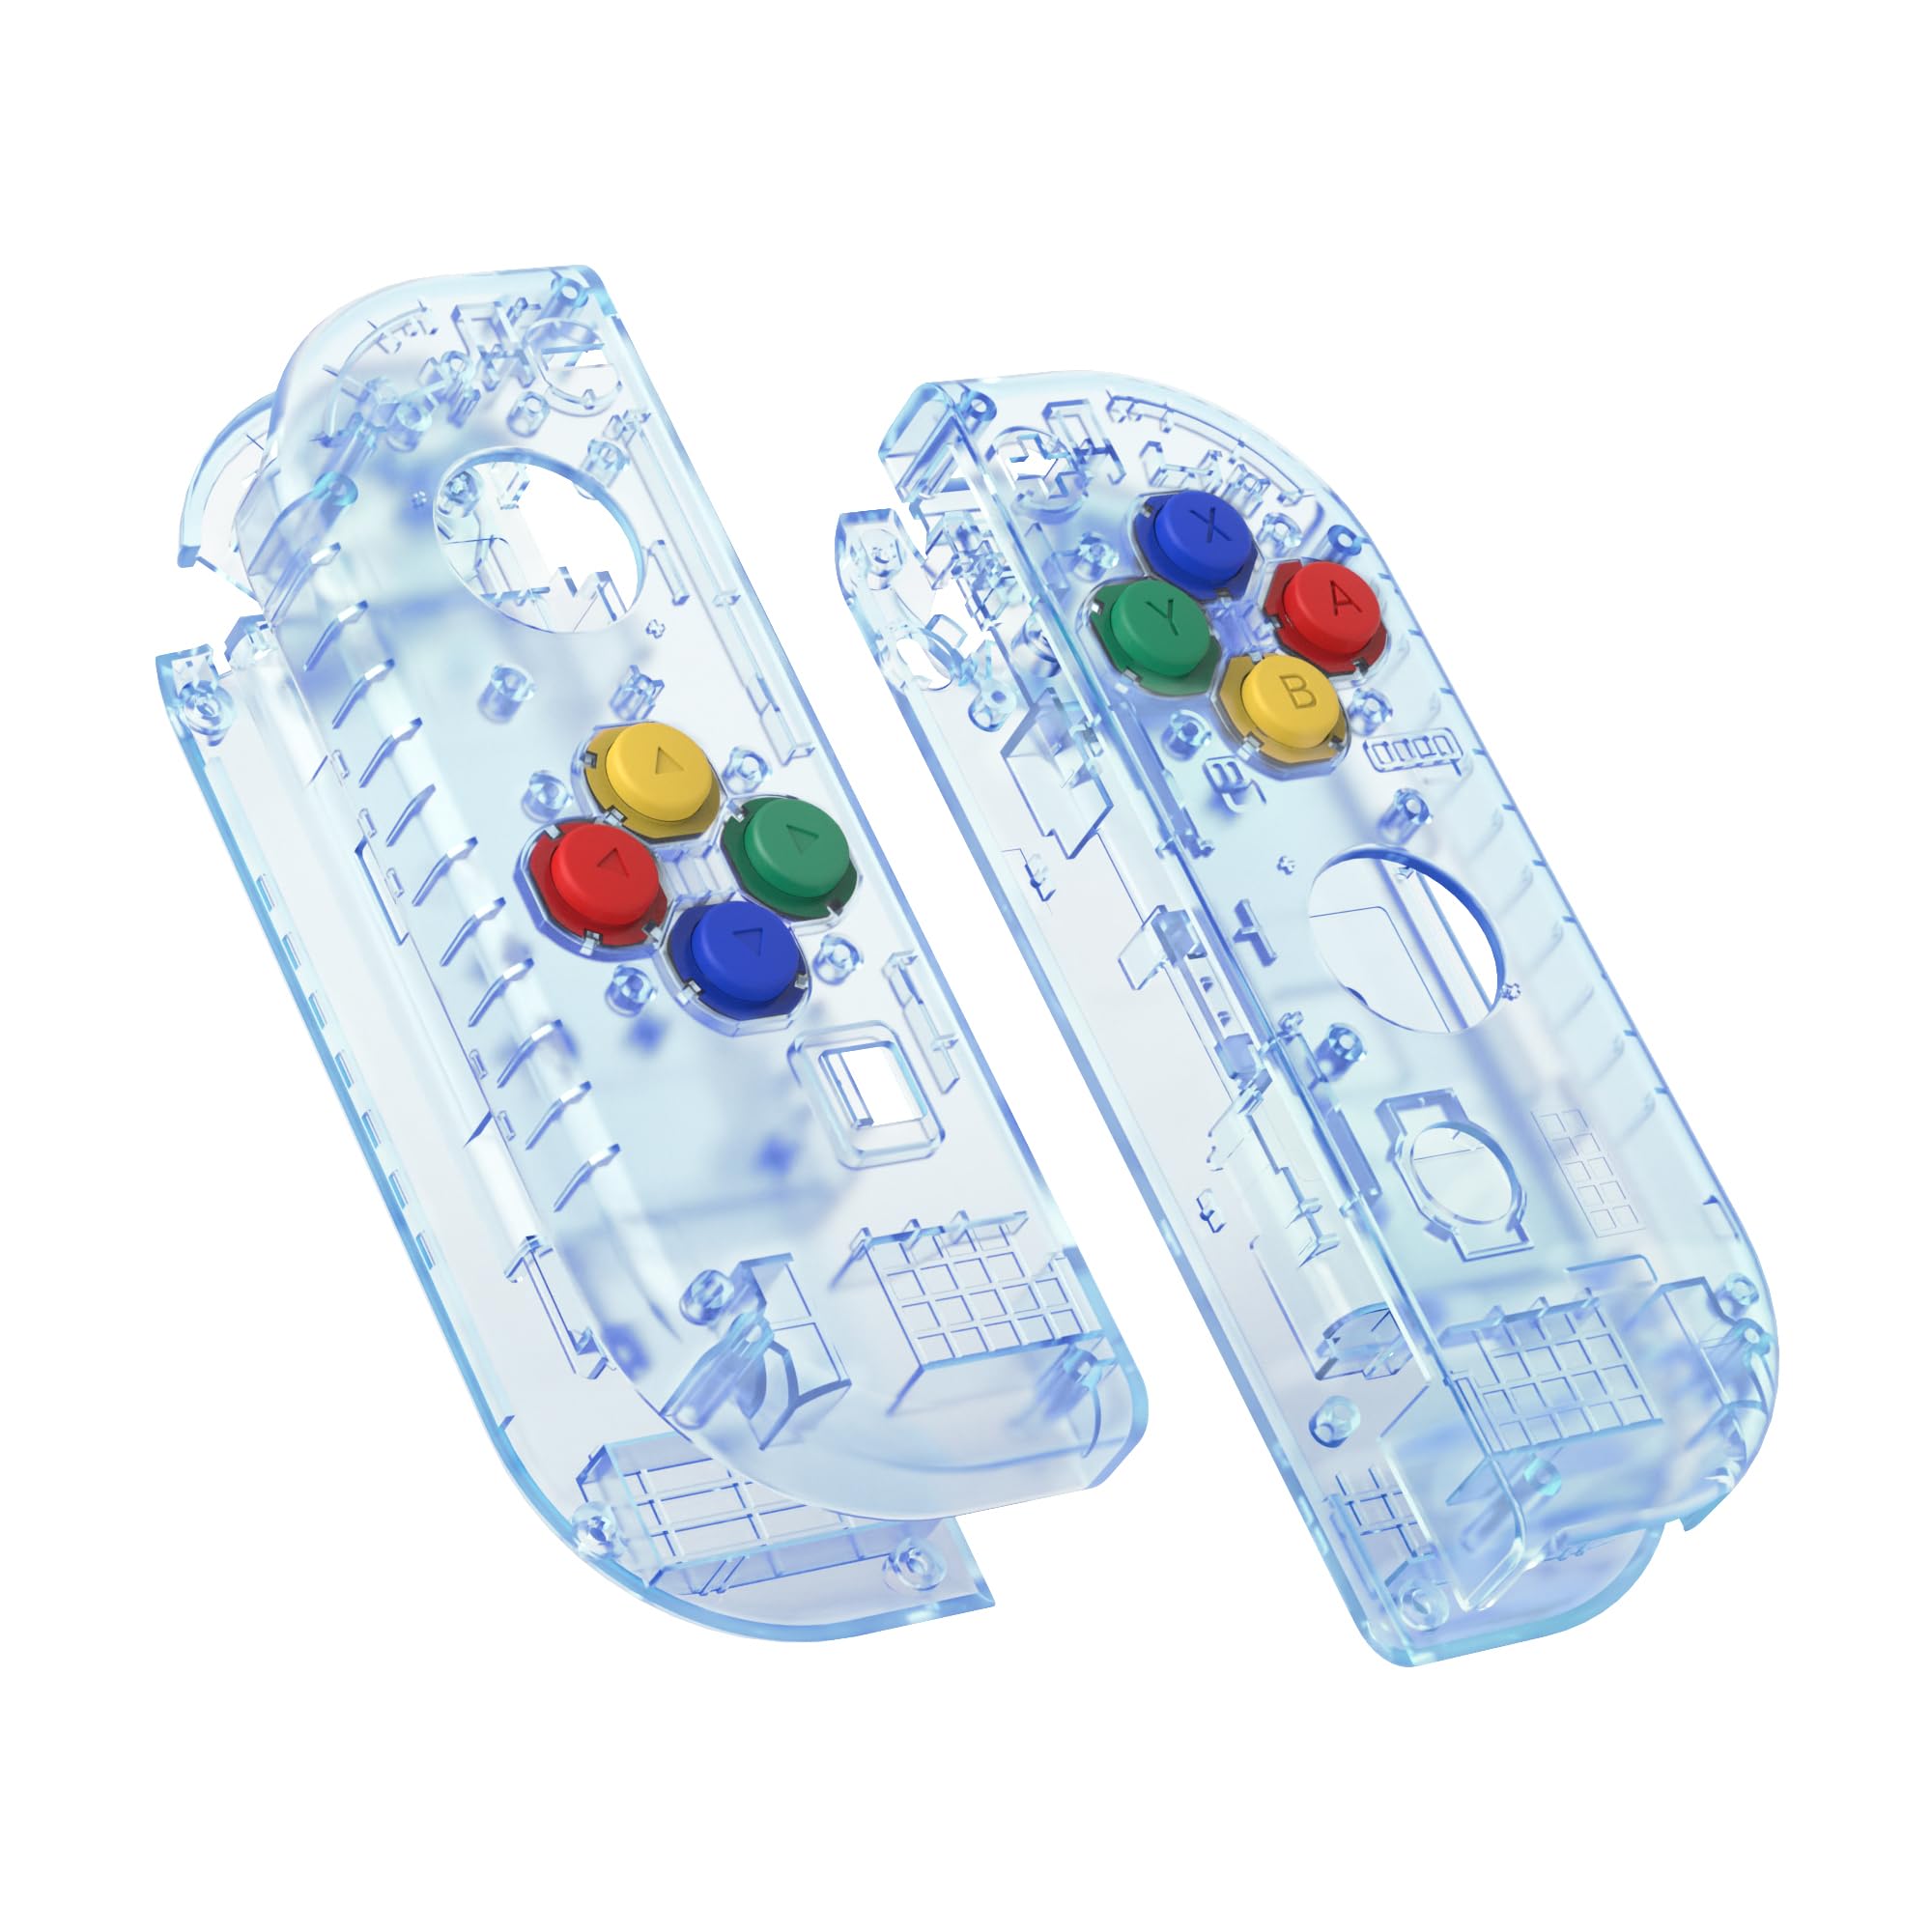
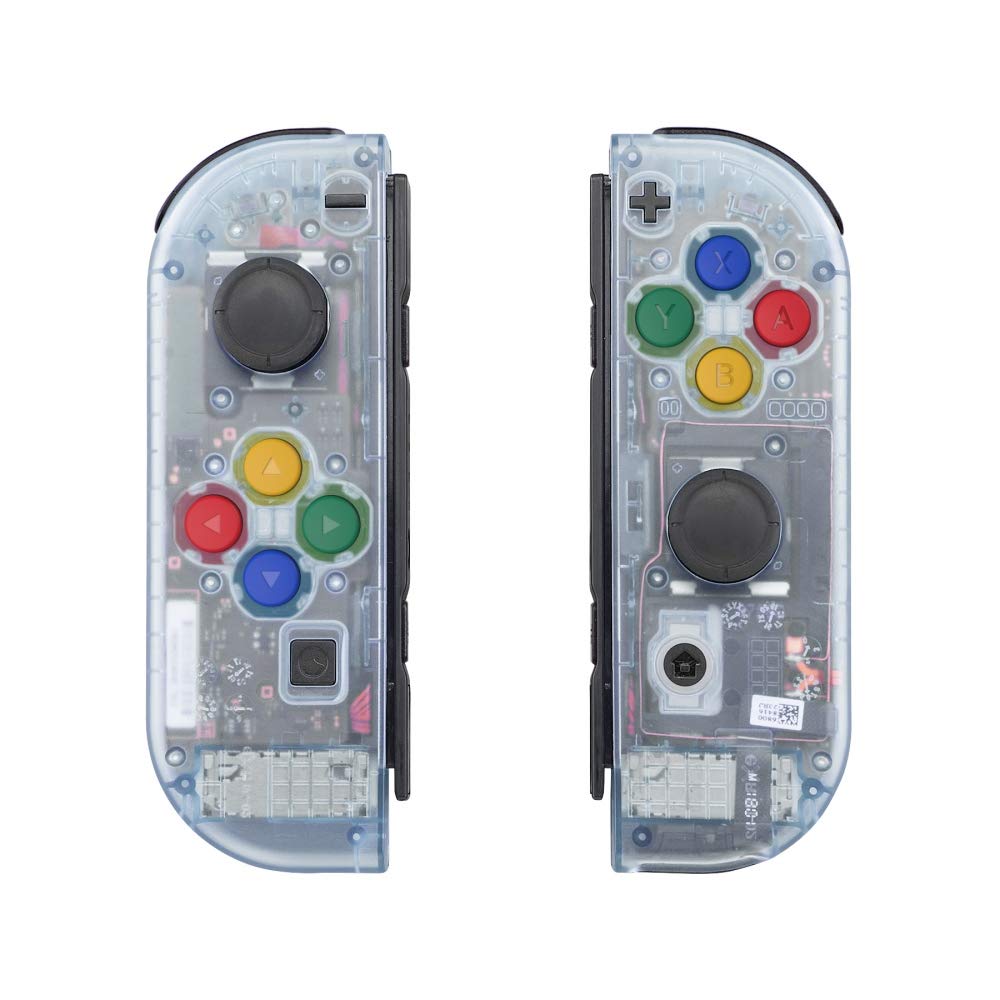
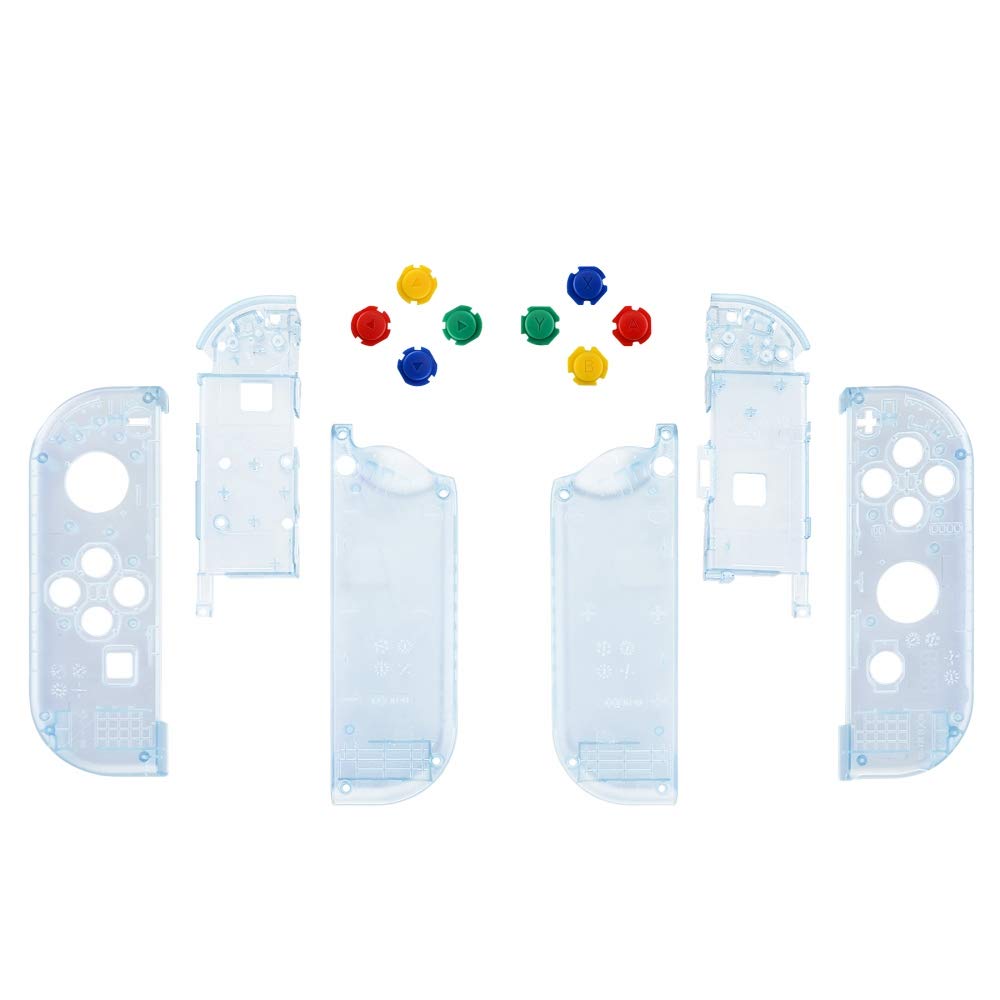
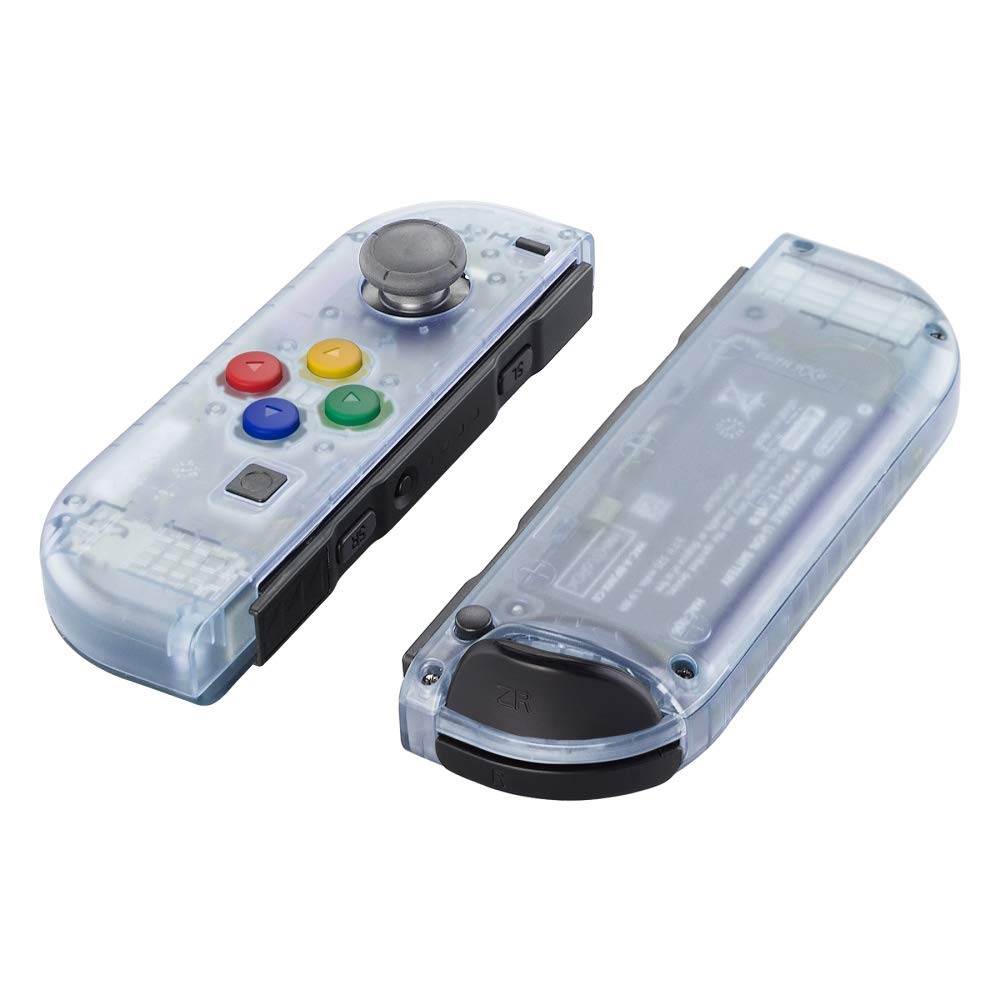


🎮 Unleash Your Inner Gamer with Style!
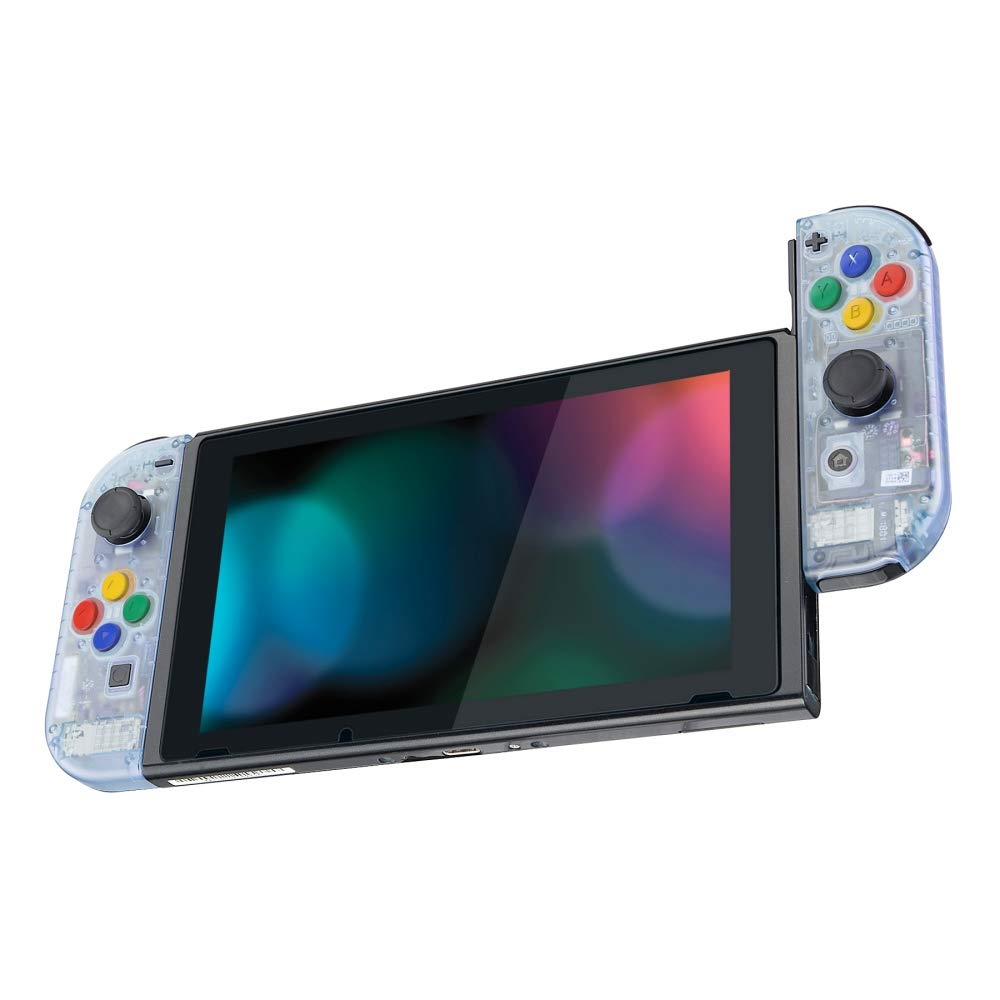
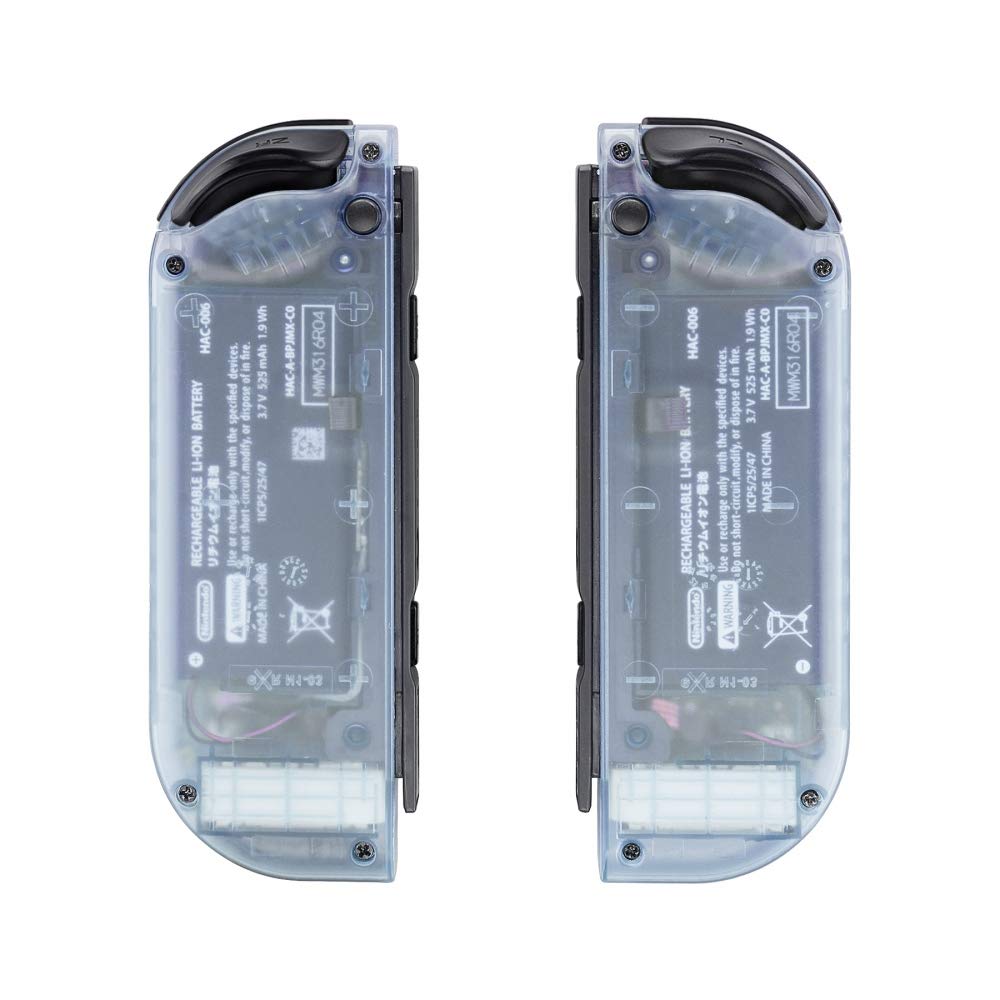
The eXtremeRate DIY Replacement Shell Buttons for Nintendo Switch & Switch OLED offers a custom-designed housing case in a striking clear glacier blue. This kit is perfect for gamers looking to personalize their Joycon controllers while ensuring a precise fit and durable performance. Installation requires moderate electronic modification skills, with a helpful video guide available on YouTube. The package includes all necessary components for a complete transformation.
S**R
Excellent, refreshing visual update to my Joycons
The media could not be loaded. I wasn’t a big fan of the bright white Joycons that came with my OLED Switch, but I didn’t like any of the stock color options you could buy from stores. I figured I might just try swapping the shells (since the project looked fairly easy after looking up some tutorials), and I found these great looking smokey-clear shells on Amazon for such a good price!Overall, this entire project took me around 2.5 hours to complete. I’m not a tech novice, but I definitely took my time and ended up having to do a few steps over – those tiny components were a little tricky! For someone a bit more experienced in fixing tech, I would estimate it taking about an hour. It just takes plenty of patience and steady hands!The replacement shells looks and feel excellent in quality. I couldn’t be happier with the results!
J**Y
they look great!
When I was a kid they made transparent controllers for nintendo consoles called "jellies". I had to have jelly everything. N64 controllers, camecube controllers, I was obessed. It's dissapointing that nintendo no longer sells transparent controllers. Tjanks to these casings, I'm over the moon that I can have jelly joycons. Instead of using the multi-color buttons that the casings come with, I purchased a set of opaque buttons in the color "cherry blossom." I think that the casings and the buttons I purchased are from the same provider. The casings themselves are pretty much replicas of the original joycon casings, and they are just as thick. The casings came with spare screws, springs, and screwdrivers. I actually liked these spare screws so much that I replaced my old screws even though the majority were fine. The screws provided in the kit seem sturdier, and they are certainly less prone to stripping, which is a huge issue with switch screws. I wish that a prying-pick had been included in the kit for popping the back of the joycon away from the front. And I wish that a pair of tweezers had been included. You will want to definetly get your own tweezers, specifically angled precision tweezers. My biggest issue is that these casings did not come with instalation instructions. However, after watching a disassembly video for joycons on youtube, I kind of understand why. If directions had been provided it would have undoubtedly been a thick booklet. Installing these casings and the new joysticks and buttons took me about 4 hours. If you're willing to spend an afternoon stressing over something tiny and fiddly for the sake of the aesthetic, I reccomend these casings.
N**N
In another league compared to BASSTOP shells
I've used BASSTOP's atomic purple shells up till this weekend when I received the eXtremeRate shells. They looked OK but had way too many small problems, and these eXtremeRate shells just blow them out of the water. Simply put, the BASSTOP shells did not fit together correctly, so there were all kinds of problems with regards to button press feel, bulging plastic, etc. They were not suitable for consistent behavior, and I would get phantom button presses all the time which caused me to stop using them pretty much altogether. On top of all that, they had a glossy finish which further detracted from their usability.The eXtremeRate shells remedy EVERY SINGLE ONE of those problems. There are complaints in some reviews about stripping screws, but I stripped the screws that came with the BASSTOP shells when removing those screws anyway, so you're kind of...screwed...either way. That said, I didn't have any issues with my eXtremeRate screws stripping. I used the original external tri-wing screws to attach the outer shells, and those seem to be made better for the most part, so that's a safe bet; and the internal screws aren't super tight going on, so it would take some unnecessary effort to strip them. These shells fit together perfectly, no longer cause erratic button presses due to incorrect fit, and they have a matte finish which is not only way more comfortable to use (glossy slips around too much) but also more accurately reproduces the look and feel of the GBC/N64 look that they are after.Some bonuses with the eXtremeRate shells include:1. Screwdriver which includes interchangeable bits for phillips head and tri-wing screws. And the top swivels, which makes using the screwdriver so much more comfortable. Big plus on that2. Replacements for every screw/spring in either joycon are included. When doing this in the past, I had one of the shoulder springs fly out of the controller when I removed the bumper while disassembling, and it took me literally hours to find it on the ground. You can still use the original parts, but every replacement you could need is included in the box.I cannot be more clear. These are the shells you want to buy. DO NOT BUY BASSTOP.TL;DR:* Everything fits together as it should* Button presses feel as they should* No issues personally with stripped screws* Bonuses in-box (screwdriver, replacements for every screw/spring)
T**T
Pretty Easy Install
Fairly straight forward install. I went step-by-step off the iFix-it guide and was able to get both done in about a hour and a half. Everything went together without issue and feels just as solid as the factory clamshell. I also think they look pretty sweetI left a couple buttons factory for aesthetic purposes but honestly may end up going back and swapping out the buttons for a different color set if I end up having to open these up for anything else (I was doing a left joy stick swap today and figured i'd do the shells while I was at it.)My only advise would be to have a pair of tweezers/forceps handy because they are very helpful with reconnecting the cables. I would also advise using the factory screws and not the ones included with the replacement shell. There is a definite quality difference there, but I'm happy that it's only the included screws that seem lacking in quality.Would definitely buy again, but they seem solid enough that I doubt I will have to.
E**O
Se ven super bien
La instalación es un poco laboriosa, pero si sigues un tutorial y eres cuidadoso, el resultado final es muy bueno. Se siente solido y a comparación a la carcasa original, se sienten mucho mas solidos al colocarlos en la switch. Recomiendo ponerle los tornillos phillips en vez de los originales, por si acaso, y también por comodidad.
A**E
Super bonne coque de remplacement
Super bonne coque de remplacement, a posé avec délicatesse et minutie, demande un peu de savoir faire en la matière et un bon outillage, mais une fois fait, le rendu est juste magnifique.
R**N
Looks great but cracks
feel awesome in the hand and easy to install. Sadly it cracks really easy.
D**.
great shells, but bring your own screwdrivers
The shells arrived in good condition with no scratches or deformities and fit together perfectly. I don't know about the soft touch ones since I didn't get them, but I can vouch that the finish on these clear shells feel nice to hold. The replacement screws and springs were fine as well. However, the screwdrivers are cheap, so I highly recommend you use different ones. In fear of the notorious outer triwing screws stripping, I bought a Y00 screwdriver from somewhere else and it worked perfectly. I used the phillips screwdriver included in this kit for all the other screws. It was serviceable for the internals, but started to strip the outer grey screws so much that I opted to reuse the triwing screws instead. Also note that this kit does not come with replacement SL/SR buttons, but I'm okay with that since it wasn't advertised to include them in the first place.If anyone is still on the fence of attempting a shell swap, I was a complete newbie with any sort of electronics modifications before this and managed to install these shells without accidentally destroying anything. That said, I wouldn't say it was easy. If you're very careful, you can do the entire shell swap without having to mess with any of the ribbon cables. I recommend CptnAlex's tutorial for this method. He doesn't teach you how to change the middle battery cover piece, but it may not be necessary, as it only shows as a tiny sliver in between the trigger buttons. I opted to change it and in my opinion, it was the most difficult part of the shell swap. There's no easy way to remove the ZL/ZR triggers from the battery cover other than forcing them off with a spudger or similar tool. I was very afraid I would break something. Thankfully I didn't, but when I finally got the triggers off, the little springs flew everywhere! Trying to find them again was not fun :/Some random tips if anyone needs them:- when dealing with the outer grey screws(both the original triwing + phillips replacements), go slowly and apply a lot of pressure while you turn as to not strip the screws.- theres a little black film around the joystick hole in your original joycon shells. Don't forget to transfer that to your new shells, as it's there to keep dust out of the joystick. Dust getting into the joystick is a major cause of joycon drift. I forgot this the first time which is why it doesn't show through on my photos.- don't overtighten any of the screws or else the buttons may not function properly.- if your right joycon bulges slightly, it may be because part of the bluetooth antenna is sticking out on top of the battery. It should be routed along the outside of the battery cover, then inside its slot beside the battery.Despite the pain it was to tear apart and put together the joycons, this kit was 100% worth it, because now I've got snazzy clear pink joycons and the coolest looking switch out of all my friends :D.
A**O
Impresionantes
Estas carcasas son magníficas. Después de un rato para la instalación de las mismas, se puede afirmar que el resultado es muy bueno, evidenciando de esa forma la calidad de las mismas. El único punto negativo que le encuentro es la ausencia de unos reemplazos para los botones SL y SR, ya que al tener la versión neón de los joy-con desentona un poco con la estética general del mando. En general, las recomiendo mucho para quien esté dispuesto a abrir su joy-con.
Trustpilot
5 days ago
2 weeks ago
