📬 Mailbox Goals: Where Function Meets Fabulous!
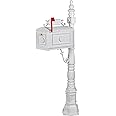
The Polar Aurora Barcelona Decorative Post Mailbox is a heavy-duty, rust-free cast aluminum mailbox designed for both functionality and aesthetic appeal. With a large capacity for daily correspondence and magazines, it features a classic design that complements any décor. Easy to assemble in just 15 minutes, this mailbox is built to withstand the test of time with its sturdy construction and advanced weather-resistant coating.


R**H
Beautiful mailbox, good customer service ***FULL INSTALLATION GUIDE BELOW***
First the negative (minor issue): We ordered the mailbox in black, but we received a black post with a bronze mailbox. I emailed the seller who promptly agreed to send us a black mailbox and provided a return shipping label for the bronze box. Problem solved.Now the positive: The mailbox is beautiful and is a huge upgrade in appearance and curb appeal over the mailbox installed by the previous owners of our home (plastic step 2 mailbox stuck in a 5 gallon bucket half buried in the ground and full of rocks). We couldn't be happier with it.NOW FOR A LONG AND EXTREMELY DETAILED INSTALLATION GUIDE...if you are an experienced DIYer and don't need it you can stop reading here, but if you like how my installation looks in the photos and want to know exactly how I did it then read on.To install, (all done with my 13 year old son's help): We pulled the 5 gallon bucket out of the ground, which gave us a pre-made 12" x 12" x 12" hole. We expanded it to 16" x 16" x 16", which turned out to be overkill, but now I know the new mailbox is rock solid.Before pouring concrete: There is a roughly 13" x 13" x 1/2" piece of wood in the packaging with the post. To get your anchors set perfectly in the concrete, set the post on top of this piece of wood and mark the 4 anchor holes on the wood with a pencil. Make sure to mark the FRONT anchor bolt hole on top of the wood. The holes are not perfectly symmetrical in the post base, so if you don't have the front marked and put the bolts into the concrete in the wrong direction you won't be able to get the post onto the anchors with the front facing the street (unless you want to spend time really reaming out the holes in the base to make them fit). Next, drill out the 4 holes in the wood with a 1/2" drill bit. For anchors, I used 1/2"x10" zinc plated anchor/"L" bolts (4) with matching zinc plated nuts (8) and washers (8), and zinc plated acorn nuts (4) for the final finishing touch. These are readily available at any hardware store and cost about $12-15 total. Run 1 nut down the threads on each bolt, then place a washer on top of the nut. At this point, put all 4 anchor bolts through the bottom of the piece of wood so that the washer and nut are on the bottom. Next, on top of the wood place a washer onto each bolt followed by another nut.At this point, adjust the nuts on the bottom side of the wood so that approximately 1/2"-3/4" of the bolt sticks out of the top of the board. Now tighten down the nuts on the top so that the bolts are firmly anchored to the board with no wiggle at all (this is important). You will end up setting the bottom washer and nut into the concrete, where they will stay for eternity, and this makes sure that the angle and placement of your bolts doesn't change when you set them in the concrete and will line up perfectly with the holes in the post base. Time to mix and pour the concrete.We mixed the concrete by hand in a wheel barrow and filled the hole to just below (maybe 1"?) ground level. In the end we used 2 1/2 x 80lb bags of concrete. Like I said above, complete overkill, but concrete is cheap ($13 for 3 bags). At this point, I used a 12" round concrete form ($12) to give the slab a nice finished appearance. I cut off a 3" high piece of the form with a razor knife, and set it approximately 1" into the top of the concrete in the hole, so that 2" of the form was sticking up above the poured concrete. I used a level to make sure the concrete form was level front to back and side to side, then filled the form to the top with concrete and used a piece of 2x4 to smooth and level the concrete in the form.Next we set the anchor bolts in the concrete, being careful to center them in the 12" form as perfectly as possible. Make sure the the FRONT anchor bolt you marked on the wood is facing in the direction you want the mailbox to face when fully installed. As you press the anchors down into the concrete using the wood form, gently wiggle and twist to allow any air in the concrete to rise to the top and the concrete to fully encase the bolts. Stop once the wood reaches the top of the form. At this point check with your level to ensure the wood piece is set level front to back and side to side. If you were careful placing it down into the concrete and didn't disturb the form it should be just about perfect but you can still gently adjust if necessary. Once you are satisfied that everything is set where you want it, you are done for the day. Let the concrete set for 24-48 hours before completing installation.Now that the concrete has set, remove the nuts and washers from the top of the board. Remove the board and toss it in the trash. This will take a little shimmying of the board, but it should come off easily. The bottom washer and nut should be set just into the top of the concrete. Leave them there, even if the washer isn't fully encased in the concrete, they won't hurt anything and will ensure that everything is level in the end. Set the post onto the anchor bolts and lock it down with the washer and nut you removed from the board earlier. Tighten firmly, but don't overdo it. Overtightening can cause the base to crack, so tighten just to the point that the post can't move. Finally, put your acorn nuts on top of the anchors to hide the threads and make sure no one hurts themselves on the exposed bolts (looks nicer too). From here just follow the directions included with the mailbox to attach it to the post and you are all set.We used left over dirt from digging out the hole to cover over the concrete so that only the 12" circle shows under the mailbox. I think this gave it a very nice and professional looking finish.One final note: if for some reason the mailbox is at all out of level when you are finished, it can be leveled by using additional washers as shims under the base of the post. It's kind of a pain since you'll have to take the post off the concrete, but not a big deal and you'll be happier with the finished installation if everything looks nice and straight. I didn't have this problem, but it could happen. GOOD LUCK!
E**.
A mailbox that will last my lifetime
The mailbox was absolutely beautiful and I had a professional to install it. The job came out absolutely amazing with this product.
T**.
Gorgeous mailbox
A little expensive but this is a gorgeous mailbox! The door pulls down sometimes and we have to fix or our mail gets wet but other than that! It beautiful!
R**H
This mailbox will keep your mail dry.
My new mailbox doesn't let the rain inside, so my mail stays dry. My old mailbox looks very similar to the new mailbox except the old mailbox doesn't have 90 degree folds on the sides of the door. That will make the difference between wet mail and dry mail. My new mailbox is well constructed and I'm very happy with it.
M**A
excellent post and service
We ordered the mailbox, and the post arrived with a crack in it. I contacted customer service, and they had a new post to replace it sent promptly. The wife loves the mailbox. It is elegant. We lost our mailbox in a hurricane, and this is an ideal replacement and the nicest we have seen. The 180 pounds of concrete needed a few days to dry.
E**E
Help!!
I luv the style and durability of the box and post, however the packaging didn't provide the right products or directions to install the red flag. Very frustrating!!
G**E
Great purchase
Shipping packing was great and the quality of the product is Excellent
R**H
Perfect Fit
Mail box was a perfect replacement for old one, high quality and fairly simple to install. I would not hesitate to refer or purchase again.
Trustpilot
1 week ago
4 days ago