


🔥 Elevate your 3D prints with the Dragonfly Hotend — where precision meets power!
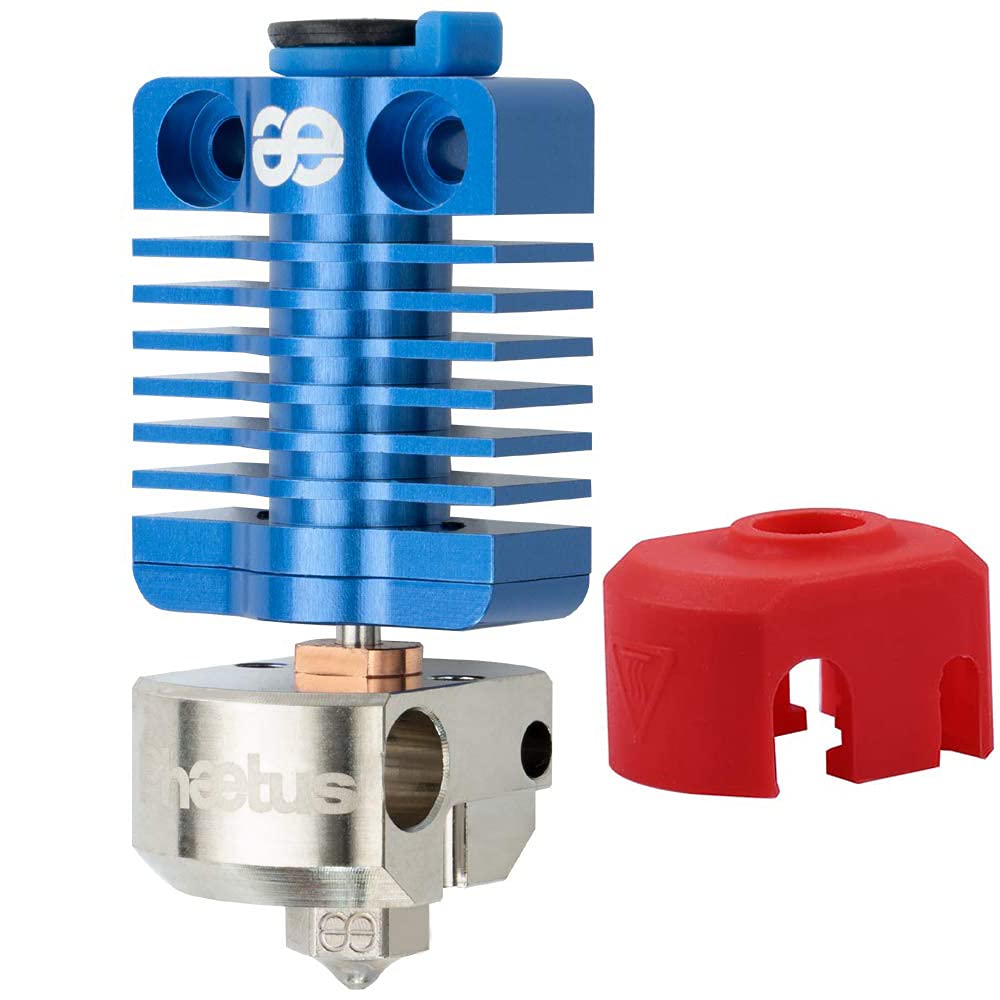
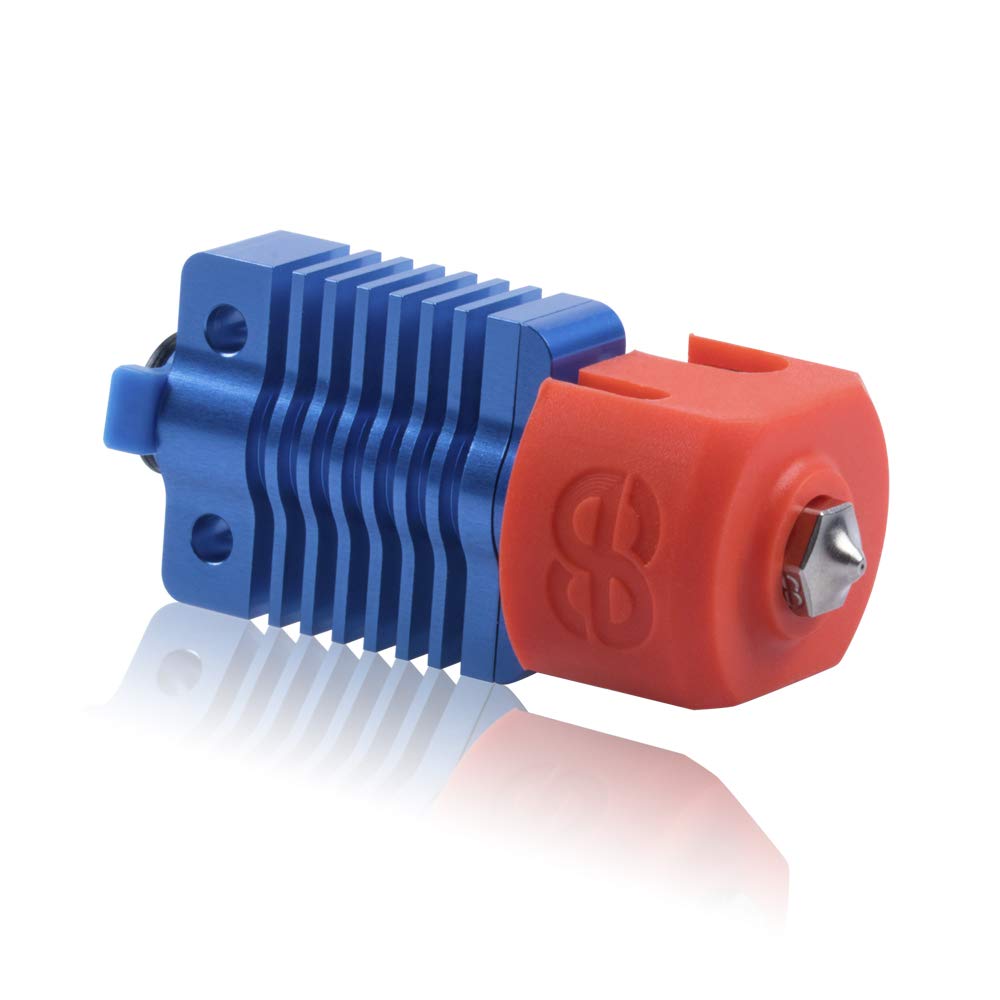
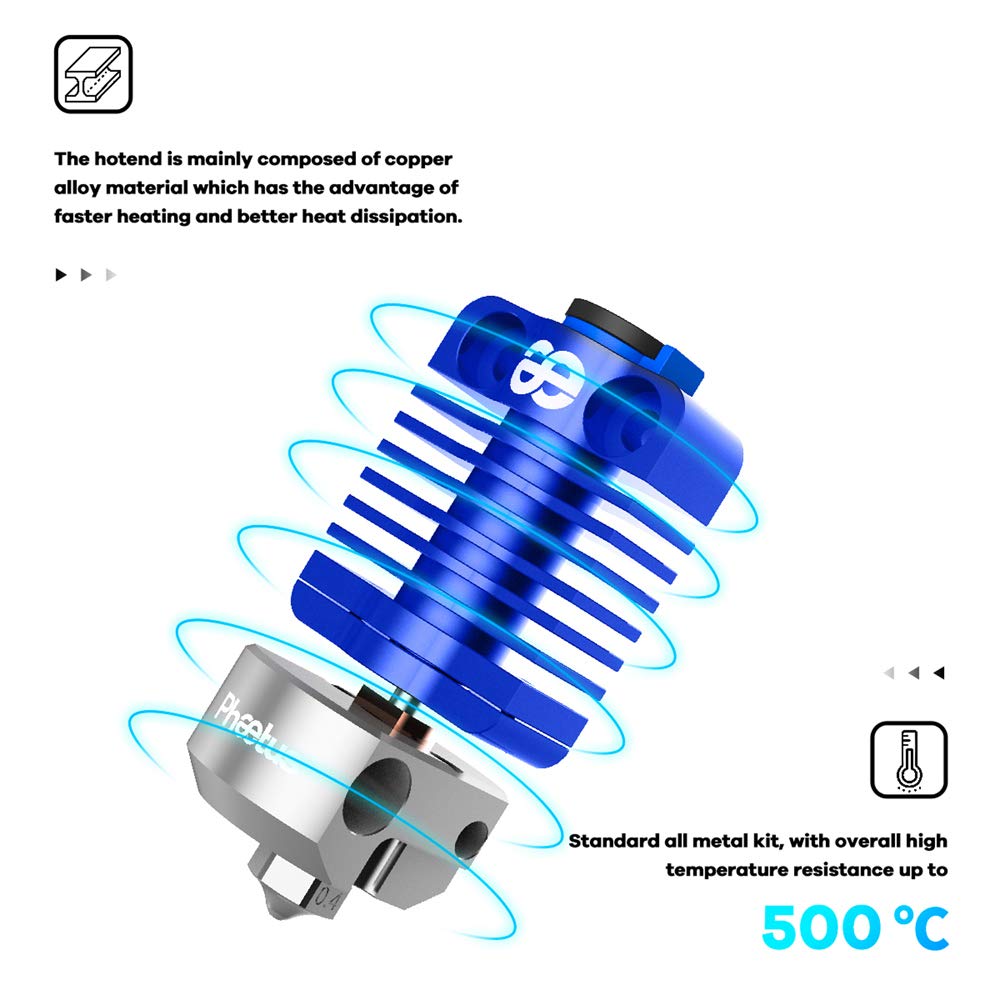
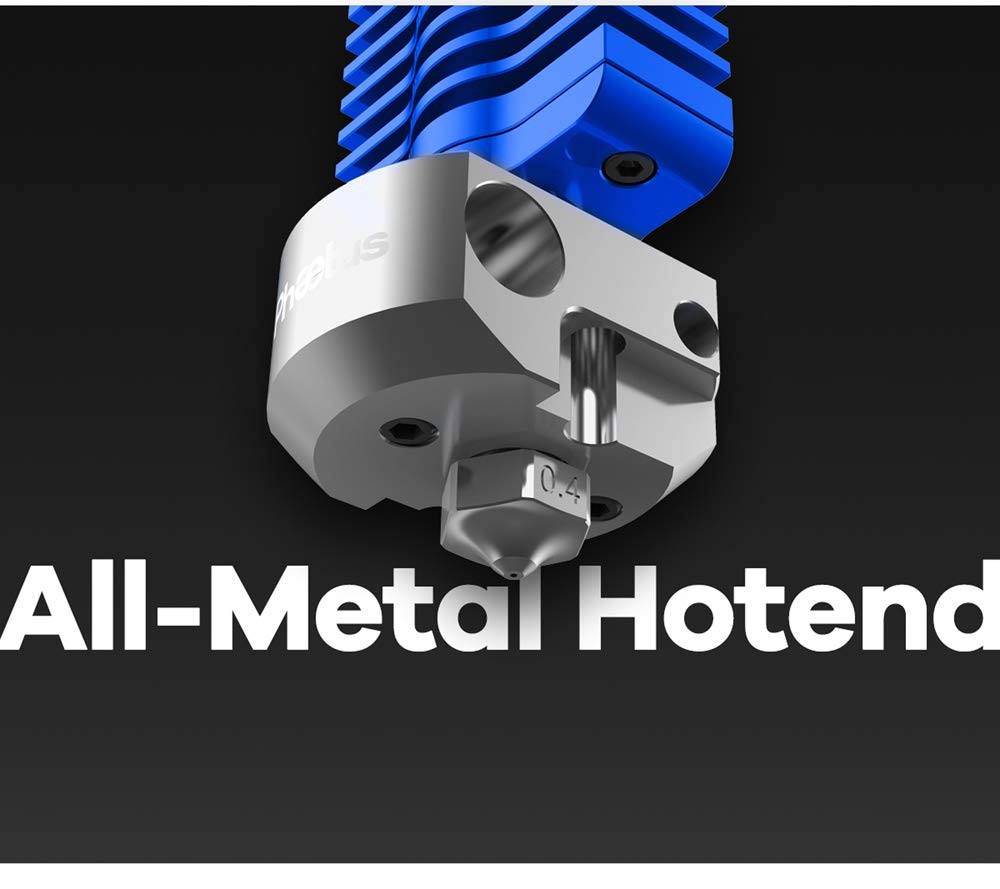
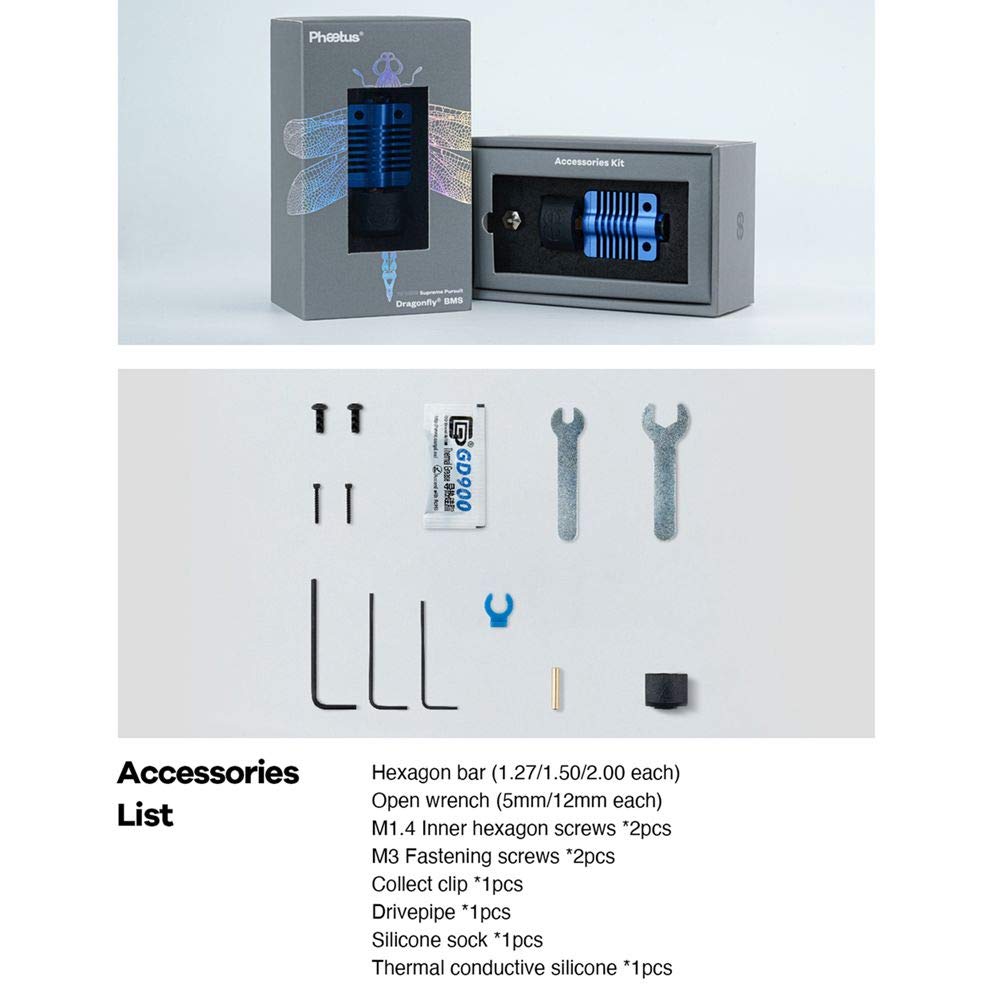
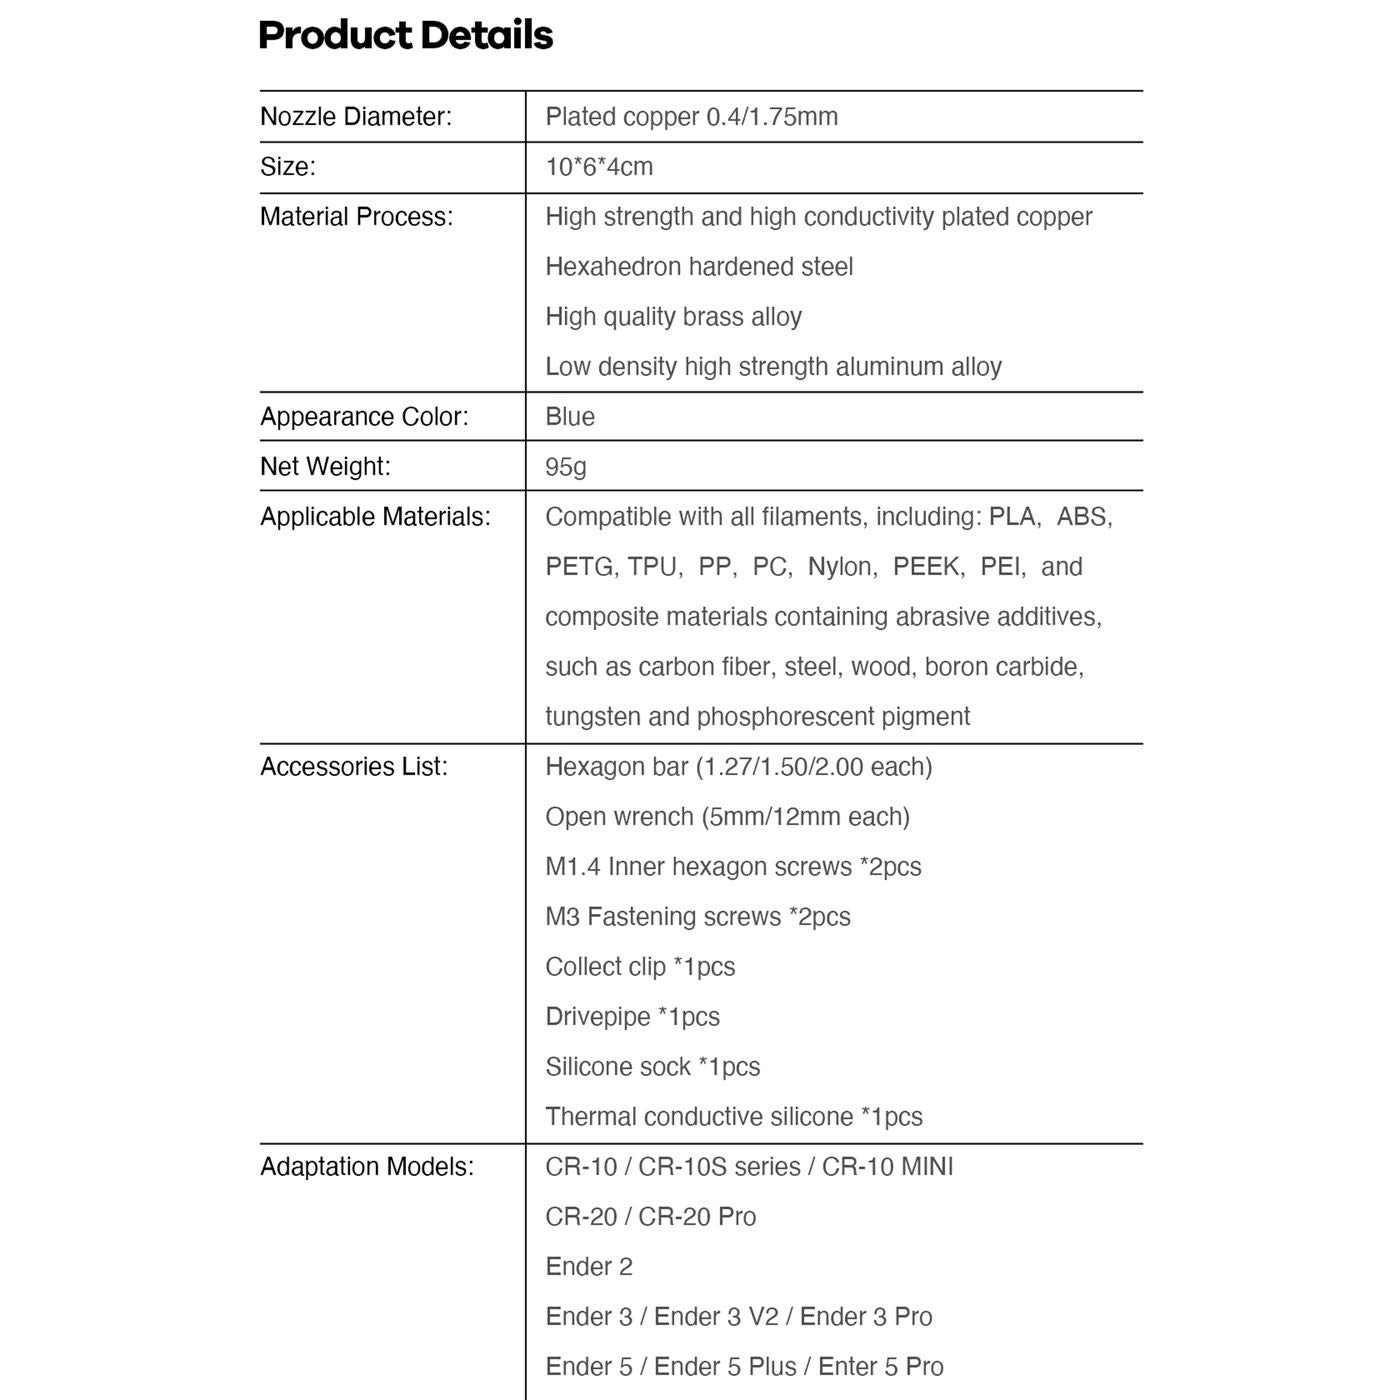
The All Metal Dragonfly HOTEND BMS features a plated copper nozzle and copper alloy heater block engineered for rapid heating and superior heat dissipation. Compatible with Creality CR10, Ender 3, and Ender 5 series printers, it supports filament temperatures up to 500°C and a wide range of materials including abrasive composites. Its Ra 0.3 heatbreak ensures smooth filament flow, making it a premium upgrade for professional-grade 3D printing.
H**B
Takes a small bit of modification to fit
Using this on my Aquila and it didn't fit super well at first but with a few washers to stand it off from the edge it fit perfectly. Using the FANG fan duct with this one and it's excellent. Prints well and has a good max temp.DO NOT USE THE THERMAL PASTE!!! IT CANNOT STAND UP TO THE MAXIMUM TEMPS!Other than this small thing assembly was fairly smooth. If you want a solid sealing thermal paste I HIGHLY recommend the SliceEngineering Boron Nitride paste. Works well and you get a lot in a tube for fairly cheap. If you're willing to work with this hotend and make it fit you'll have an excellent setup. (Make sure not to run it without a cooling fan on the heat sink. You'll jam it due to heat creep)
D**M
Drop in replacement for my ender 5 pro
I used this on my ender 5 pro after the ptfe tube burned up from the original hotend and the creality spider hotend also had issues with the temp probe and thermal run away.If you have and ender just get this. it's a drop in replacement works great and prints beautifully much better than the stock. I wish i had just gotten this to begin with.Just make sure you run a pid tune and if you get a new temp probe you may need to adjust the firmware aswell,
H**Z
Worth every penny
This hotend is amazing so far. Since installing, I've noticed a huge improvement in my prints even when using exactly the same settings as the stock hotend. It's really not hard to install at all, and if you own a printer you likely have the technical skill it takes to install it.For my Ender 3 v2 it is a direct drop in replacement unlike most people will have you think. It might stick VERY slightly lower than the blower fan, but feeling the airflow, it still hits the nozzle perfectly fine. *MAKE SURE YOU ADJUST Z-OFFSET, since as I just said, it sticks down a bit lower. Don't want to scratch your build plate or break the hotend/nozzle.I did reuse the heater cartridge from the stock hotend, but for the thermal probe, I bought a cartridge based one, however there is an included adapter in the box to covert the stock probe into a cartridge one. Though you can get a 5-pack of them for really cheap, so I'd just recommend doing that. I haven't tuned the PID yet as it appears I don't need to, but I might just for more accuracy.I also haven't used any thermal paste with the heater cartridge as the temps are pretty stable, but just to be safe, I ordered some boron nitride paste from slice engineering that will be here in a few days. Though so far it doesn't seem to be an issue.All in all 5/5 star product. Easily one of the best hotends on the market.
A**Y
No wrench included that can tighten the nozzle. It is not standard size.
No wrench included that can tighten the nozzle. With the heat break design if you don't have two wrenches for the job you will loosen the heat break and be on your way to a ruined hotend.
K**U
Ender 3v2 perfect hot end
For the thermistor you don't need thermal adhesive but it helps if u have some because it only comes with thermal paste.Works really well for me on ender 3v2 but this is a v6 nozzle not mk8 so please note that the nozzles that you currently have are mk8 and the thread is not long enough. It can cause oozing and these sort of issues. With the proper v6 nozzles it won't be an issue. It comes with a v6 0.4mm nozzle but I upgraded to 0.6mm and never looked back.I did this hot end upgrade the same time I did noctua fan mod and it prints absolutely beautifully. Much better and MUCH more consistent then the stock heat block. Quality is there.Will need a new fan shroud with this the stock won't fit with it. So I advise you do a fan upgrade at the same time. Just make sure you print all of your parts necessary before switching. Make sure your esteps are dialed in accurately.
O**R
High temp filaments on my Ender 3 Pro
So far I have been printing carbon fiber filled polycarbonate on my ender 3 pro with this hotend at 260c after upgrading the heater cartridge to 60w. It has performed flawlessly. No clogs with PLA, PETG, Nylon, or PC. My only regret is that it does not implement the support bolts like the original hotend which made it easy to change nozzles with one hand. This one requires you use a wrench to hold the heat coupling firm with one hand while you remove the nozzle with a wrench in the other hand. Not a deal breaker just not as convenient as the original design from Creality. That caveat aside it is a very nice all metal hotend upgrade for my Ender to be able to print high temp filaments.
S**V
Excellent upgrade for Ender 3 V2
Excellent upgrade for Ender 3 V2. Unlike other ppl, I did NOT have to print a custom hood or bracket. Mechanically the new hotend was a drop-in replacement, see pic.One thing they do not tell you is that you will need a new thermistor in order to go much higher in temperature. Stock thermistor is using teflon insulation. Instead I got 300C rated part from Slice Engineering. It is also of a sturdier design (cartridge vs. bead). Either cut and splice old harness or, better yet, crimp a new JST-XH connector. Note that you MUST compile and update firmware to work with the new thermistor. I recommend Jyers branch of Marlin. With this hotend and the new thermistor I was able to go to 300C and print PC and nylon. Other things you may want to do with this hotend:1. Tune hotend PID for better temperature stability.2. Use high-temp boron nitride paste (again from Slice Engineering) instead of supplied 200C rated junk.3. If you are technically inclined and feel adventurous: Calibrate your new thermistor. Original was spot on but replacement was 10-15C off. While you are at that, you may also replace stupid 4.7 kOhm pullup resistor with 1 kOhm to improve accuracy at high temperature. For calibration reference I got cheap brass nozzle, drilled a larger hole in it and potted thermocouple with the above paste. Obviously you will need something to read that thermocouple.4. Get a hardened nozzle if you want to print carbon fiber filled nylon and such.
Trustpilot
2 months ago
1 day ago
