✨ Refresh your tub, refresh your vibe 🛁
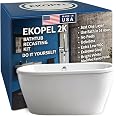
The Ekopel 2K Bathtub Refinishing Kit is a US-made, odorless, and non-toxic epoxy resin system designed for easy DIY restoration of bathtubs, sinks, and showers. It delivers a durable, high-gloss white finish with a single pour-on coat that fully cures in 24 hours, bonding strongly to multiple surfaces like porcelain and fiberglass. The kit includes all necessary tools and step-by-step video guides, making it ideal for professionals and millennials seeking a stylish, long-lasting bathroom upgrade without the hassle or fumes.
Brand | Refinished Bath Solutions |
Color | Pour On Standard Bathtub |
Finish Type | High-Gloss |
Size | 1 Count (Pack of 1) |
Item Volume | 96 Fluid Ounces |
Special Feature | Odor Blocking,Non Toxic |
Unit Count | 1.0 Count |
Paint Type | Permanant Casting Resin |
Specific Uses For Product | Apartment,Bathtub,Showers,Sinks |
Surface Recommendation | Sink, Tub, Shower, Casr Iron, Steel, Ceramic, Fiberglass |
Item Form | Epoxy Resin |
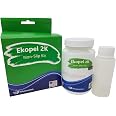
Included Components | Box With Built In Scooper Flap, Ekopel Part A 80.07 oz, Ekopel Part B 15.8 oz, Foam Roller |
Age Range (Description) | Adult |
Model Name | Parent |
Package Information | Can |
Color Code | White |
Full Cure Time | 24 Hours |
Coverage | 1 Standard Bathtub |
Water Resistance Level | Water Resistant |
UPC | 746729138968 |
Manufacturer | Pabrec Ekopel USA/RB Solutions Ekopel Refinished Bath Solutions |
Dry Time In Hours | 24 |
Part Number | Eko |
Item Weight | 5.72 pounds |
Product Dimensions | 10 x 8 x 8 inches |
Item model number | BathTub_Standard |
Is Discontinued By Manufacturer | No |
Style | Pour On Standard Bathtub |
Finish | High-Gloss |
Material | oil based |
Item Package Quantity | 1 |
Special Features | Odor Blocking,Non Toxic |
Batteries Included? | No |
Batteries Required? | No |
J**E
Surface prep is key, the material itself great.
Just redid my kitchen sink with the gloss white pour on.It was an older American Standard enameled "Americast" drop in sink (think of it as a weird lightweight cast iron). Can't buy these anymore, and I didn't want to build out bracing for an actual cast iron that would have weighed a lot more, nor put in a stainless steel.Sanding the old sink was the hardest part, had to start with 40 grit then 80 grit, would be much easier for plastic of fiberglass obviosuly.I had to patch the inside of the sink for a couple small chips, but also because the enamel was so thin on the bottom of one sink bowl you could see through it. I used short strand glass fiber bondo for this. Applied two layers.***You really want to feather this in and make sure it is entirely smooth.***I used denatured alcohol for my wipe down.Taped the drains closed from the underside, got my sink in the brace I built for it (1x3s) and got to work.Mixed it up by the instructions, used a couple small cups to drizzle over the surface. Used the provided 4 inch roller to then push the material around (have a second or third one ready just in case the first falls apart or anything)Hit it with the heat gun to get rid of any bubbles. This took 30-40 mins on the first pour.After 100% coverage i scooped out most of the excess, pushed the stuff up to the sides it one last time to make sure it was self-leveling in the bowl, and pulled the tape off the drains to let the excess drain out.***Again*** I was not hooked up to plumbing, I was just draining this into some aluminum pie tins.Came back 15 mins to hit with the heat gun. During these is where I saw the only spot that didn't look amazing was where I failed to prep the bondo as smooth as I should. I added a little more material to jus tthat spot and applied a little heat.***Be careful with the heat gun at this stage as it decreases the viscosity of the material and you'll be thinning it. So go light on any heat after first application.Came back every 30 mins for 2 hours just to monitor it.I let it cure for 72 hours before sanding any drips on the underside smooth. You probably could sand and polish imperfections if you let it fully cure (30 days?) but you are going to have to be very careful. It only sets up about 1mm thick on vertical surfaces and 2 mm thick on horizontal.After 72 hours I put it back in the counter.So what are the results, well it is beautiful.Bottom line: Surface prep is key and the hardest work, scuffing enameled surfaces is rough I had to start with 40 grit and then 80 grit pads and it took a while. Material is very easy to apply and works well. Self-leveling is great, is a very glossy finish, thickness is high compared to paint, is resistant to denting. I'll see again how it looks in a year but so far I really am impressed expect this was a great value.After 2 weeks I am seeing some surface scratches, you can see them, not feel them. Which is expected, it isn't going to be as hard as enamel.Very low odor, far less pungent than windex, and very faint. I still put it in a separate room that had it's own ventilation, just because I can't smell whatever (and I suspect in low amounts) it is off gassed doesn't mean i want to . I just put it in that room, and after it had set for four hours and had a bit of a surface I cracked a window, and applied a little negative pressure venting outside. My goal with waiting 4 hours is so any dust that landed on it wouldn't be embedded in the material and could be cleaned off with a wipe down.
K**N
All Day Job - self leveling, prep is key, came out great, the slower you go the better the result.
I followed the direction perfectly - take drain off, mask off borders, clean w toilet cleaner, sand, more cleaning w toilet cleaner, dry, mix and pour on. Comes with roller foam brush and brush arm. Mine finish results were awesome. I made errors, some not cover spots at the base and my prep started coming up (because I put the tape down while it was humid in the bathroom). When I do this again I'll put more energy into making off the edges. This tub had a deep small rust stain that this glaze covered. So I am happy with the results. This job really takes all day. I waited three days for it to dry. Don't run fans while doing it or while it is drying. I used rust oleum appliance paint to cover (paint over) the 1/4"-ish base area the glaze didn't get to. I paid $149.95 on 01/2025. The slower you can do this the better.
M**W
NOT AS ADVERTISED
The mixture is not as advertised. Maybe I got some old defective stock. I ordered the pour on so it would look better. I didn’t want the look of orange peel from a foam roller. After receiving the product it sat in my house for several days while I did the prep. I paint vehicles so am very familiar with preparation of the surface. I sanded the entire tub with electric sander first. Then wet sanded by hand with several different grit. Used the recommend toilet bowl cleaner. Used acetone to remove any oils left from my hands. Used a tack cloth just before using material for any dust or hair. The prep was perfect. Room temp was perfect. I opened the first container. There was a lot stuck to the bottom of the lid. That should have been my first sign. I did not receive the package upside down and didn’t store it here for several days upside down. I scraped all the material from the lid and went ahead and mixed the 2 parts. It was very hard to mix by hand. Like a very thick glue. When it was time for application I poured like all the videos show. Mine did not pour like in the videos. It didn’t run like in the videos. I had to use the roller to move it all around. I scooped up what I could but this product is BAD. I paid for pour on but received a thick glue that could hardly roll on. My tub is ruined. I did this while my wife is out of town. She’ll be coming home to this garbage and I have to figure out how to fix it.
Trustpilot
3 weeks ago
2 days ago