We remain fully operational. Our teams are working around the clock to ensure your deliveries continue safely.

DOWNLOAD THE APP


Customer Services
Copyright © 2025 Desertcart Holdings Limited
DOWNLOAD THE APP


🎨 See True Colors, Stay Ahead of the Curve
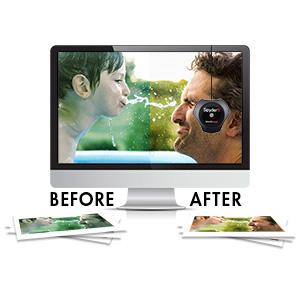
The Datacolor Spyder5PRO is a professional-grade color calibration tool designed for photographers and designers who demand precise color accuracy. It calibrates laptop and desktop monitors in about five minutes, using room light sensors to optimize brightness and ensure your on-screen images match prints perfectly. Its intuitive software guides users through calibration, supports multi-monitor setups, and helps reduce wasted time and materials by delivering consistent, true-to-life colors.


| ASIN | B00UBSL31Q |
| Batteries | 2 CR123A batteries required. |
| Best Sellers Rank | #111,603 in Electronics ( See Top 100 in Electronics ) #410 in Motion Detectors (Electronics) |
| Customer Reviews | 4.4 4.4 out of 5 stars (1,576) |
| Date First Available | March 24, 2015 |
| Is Discontinued By Manufacturer | No |
| Item Weight | 4.7 ounces |
| Item model number | S5P100 |
| Manufacturer | Datacolor |
| Product Dimensions | 2.73 x 2.93 x 1.71 inches |
N**T
The Spyder5PRO & it's Software vs. Argyll
I used the Spyder5PRO on a brand new Dell p2416D IPS display -- unless you have a type of IPS or VA panel you very well may not want to bother. IPS & VA LCD panels are slower, making them less popular with gamers, but they display more colors, particularly as you get closer to pure black & pure white. Monitor promo materials &/or specs usually cite however many millions of colors -- more meaningful is if they list the percentage of sRGB that they cover. The Dell is specced at 99% sRGB, covers 100% after calibration, but doesn't make it to 80% of wider gamut color ranges like Adobe RGB. That alone doesn't make it that unusual or worth the extra cost -- you can buy monitors with IPS panels having similar coverage much cheaper nowadays. You can also buy more expensive displays with a wider gamut or range, but in that case you'd want to research if & how well whatever calibration device worked with wide gamut displays beforehand. Many people like extra bass when they're listening to music -- it's not accurate, but accuracy isn't important to them. PC monitors & HDTVs tend to be the same way -- out of the box these panels are set up so that what you see is more vivid &/or striking, while PC monitors are also very often too bright. You can find charts online, as well as use free & paid software that will help you adjust your display for accuracy, using only the display's built-in adjustments. When you use the Spyder5PRO's software &/or Argyll, you create a profile that software [including Windows] uses to alter the colors it displays on your screen. If your monitor adds a green tint for example, the profile will tell software to subtract so much green from what's sent to the display. The monitor will still display everything with that green tint -- the profile just tells software how to compensate. The only manual adjustment you do with the Spyder5PRO software is brightness -- with dispcalGUI & Argyll you can also adjust the individual RGB controls -- in both cases to get close [closer] to the target White Point. That means that it's to your advantage to at least set the contrast [& brightness] for your monitor beforehand, & it doesn't hurt to adjust the RGB levels [& maybe gamma if available] as needed. Not all software will use [or use well] the profile you create, plus if the display is too far off, that profile may not be able to adequately compensate to bring a color or colors back into range. Now before you can use the Spyder5 [any version] you have to download & install software. That's pretty much quick & easy with the software for the Spyder5, and it adds the necessary drivers. I downloaded dispcalGUI & Argyll as .zip files -- the Argyle software took a while -- and the only real installation needed was installing Argyle's drivers for the Spyder5. They're unsigned drivers that install in an unusual way in 64 bit Windows. dispcalGUI can install them for you, but it means restarting 64 bit Windows in a special mode. You also can't use the Argyll & Spyder5 drivers at the same time -- if both are installed you have to switch between the 2 in Windows Device Mgr. I took the easy way out, installing the Spyder5PRO software in win7 64, using dispcalGUI & Argyll in win7 32 since I've got both on this rig. Later I copied the profile they created to win7 64. The 1st time I ran dispcalGUI it asked me what folder Argyll was in, & after I installed the Spyder5 drivers it downloaded a file it needed. Using the Spyder5PRO software was painless. You hang the puck over the top of your display by its USB cord -- it has a felt-like ring to keep from scratching the surface. That USB cord passes through the *lens cap* that protects the sensor when you're not using it, & acts like a counterweight when you are. I've read reports that it was hard to slide the USB cord through the cap to give you enough distance between the puck & the cap to drape them over your display, but the one I got was pretty easy. Where I had problems is the cable is too stiff, having bends in it from being tied up -- I spent some time straightening it so the puck would lay flat on the monitor. The Spyder5PRO software is wizard based... It tells you when to hang the puck over the screen, & shows you an outline of the puck so you know where to place it -- during calibration the entire screen changes colors, so you don't have to worry about getting the placement exact. You can select whether to have the Spyder5PRO measure the room lighting or not. When you do it suggests a target White Point based on that measurement, or you can set a target from a drop-down box. It'll then measure a white screen, & ask you to adjust the brightness control -- after you adjust it you click a button to measure again, & it shows you how close you are. Once that's set you hit continue, & can now go off for a very quick cup of coffee or tea, as it doesn't take long at all. When the software's done you're asked to save the new profile, & the app gives you options to view test images with that profile on/off. Installing the software adds a utility app to the Startup folder in the Start Menu -- I'm not leaving the Spyder plugged in so I removed that start Menu Shortcut. It also adds a ProfileChooser app, that lets you switch the profile that Windows & your software uses. It'll complain that the profile you create with Argyll is too big, but it will use it just the same. As for the results of the calibration, it makes the screen a bit darker/warmer, especially if you accept a suggested lower White Point target after measuring room light. It didn't seem to alter image colors in Photoshop in a negative way, but my son & I [who prefer daylight bulbs] both thought it gave everything else in Windows a slightly unnatural look that wasn't there using the profile Argyll created. This is a big *Your Mileage May Vary* sort of thing -- I'm sure many people will prefer the warmer vs. colder look, the same way they prefer warmer vs. cooler lighting. Now on to dispcalGUI & Argyll... The dispcalGUI app isn't difficult, but neither did I find it intuitive. The developer goes to great lengths to explain what the settings mean on his web page, but then I had to spend some time figuring out where & how you change those settings. It wasn't immediately clear to me that you have to click the "Calibration" & Profiling" buttons -- it wasn't immediately clear to me that those were buttons. Other than that, my only complaint is that it's SLOW, taking 2 hours+ at default settings. Yes, it makes a lot of measurements, but the majority of the time it seems like nothing's going on at all, with no hard drive reads/writes & intermittent 1-2% CPU use -- the 1st time I ran it I kept checking Task Mgr. to see if it was still alive. One thing I like is that dispcalGUI will also do a verification run, where it will use the Spyder5 to measure what's displayed & compare that to the known values of color swatches. Assuming that when you read the report afterward everything passed, it's no longer a matter of faith that what you see matches what you're supposed to or should see on your screen. All that said, I personally can't say that the Argyll profile is more or less accurate than the one produced by the Spyder5PRO software, though it certainly contains a lot more data based on more measurements. The dispcalGUI web site explains the adjustments it does so that you can see more shades approaching pure black -- your screen most likely can't display pure black, so it can compensate by lightening the shades closest to black. You see more dark shades that way, but what you see is lighter than it's supposed to be. And comparing the Spyder5PRO & Argyll profiles with images in Photoshop, the main difference *I see* is increased shadow detail with Argyll's profile, I assume because of that. Bottom line, I bought the Pro version of the Spyder5 for the software, in no small part because I couldn't find out what I wanted/needed to know about using dispcalGUI & Argyll instead. I'd make the same choice today, because while I can [& likely will] use dispcalGUI & Argyll on this PC, I'm sure there will be times when I don't have time, plus I'll be using the Spyder5 on displays where I don't feel that the extra time & hassle are worth it.
M**K
Great device! Strongly recommend it!
I've been using every Datacolor monitor calibration device for years since the original ColorPlus. Spyder5PRO is yet another upgrade and I'm very happy with it. I'm not a photographer and I don't do much image editing, though I like to see pictures, video, etc. with the correct colors (who doesn't?). I've used the Spyder devices primarily to get the full value of my computers' monitors for two reasons: 1. A decent monitor is expensive. As such, the color calibration should be correct. Over time, the original factory calibration gradually degrades and the Spyder calibration tools fix that very well. 2. Regardless of how powerful your computer is (or isn't), except for sound, virtually all of the computer's output comes to the user through the monitor. In my opinion, a correctly calibrated monitor is much easier on the eyes, even with B&W text documents. I've always been very happy with the Spyder devices' calibration results. Both the hardware and the software are easy to install and use. The hardware uses a powered USB 2.0 port with no additional power needed (no electrical outlet). Once it's registered, it can be installed on as many computers (desktop or laptop) as you have. I use the software's wizard, so it guides me and does all of the work for me - almost no thought required :-) . For professionals, or anyone who wants to do it, the settings can also be adjusted manually to the user's ultimate requirements. I'm very impressed with Datacolor's Customer Service, too. I haven't had problems - just questions. For example, I had the Spyder4PRO and was happy with it. When I received the upgrade announcement, I compared the two and really didn't see much difference. So I emailed customer service and asked why I should upgrade to Spyder5PRO. I received a reply the next day with a refreshingly straightforward, honest answer: The rep told me of a few real improvements, but also told me that if I was happy with my Spyder4PRO, then I should probably keep it and not upgrade. I upgraded to Spyder5PRO anyway, just to stay current. The customer service rep was probably right. I don't really see any difference in the software or the results, but that's just me. Regardless, I like it and I don't regret upgrading at all. Note that for professionals or anyone who does a lot of photography or image editing, Datacolor also offers the Spyder5ELITE and Spyder5STUDIO. More expensive, for sure, but many more features to suit your needs. After years of experience with Spyder display calibration tools, I strongly recommend the Spyder5PRO to anyone who wants their display to look the way it should.
R**R
Must needed for post processing, and having your mobile as Super Alomd or 4k panel it will match 90%. Easy to use. Too costly
P**R
The reason I bought the Spyder 5 Pro, it was a Black Friday deal at £87.75 and was cheaper than the basic unit on the day. So what is it like..... The puck itself is very solid and I like how the sensor cap acts as a counter weight. Construction wise I can't fault it at all. As a calibration tool it's brilliant. After using this on 3 different monitor I can say with all honesty this is a brilliant calibration puck, It does exactly what its supposed to and I recommend this to anyone looking. Buy the basic model only as they are all the same. its the extra bits in software your paying for.. More on this aspect further on.... I loaded the software which you have to download from the website and enter serial number which is inside the box. Once downloaded you click install and away you go. pretty simple really. Then it stays simple.. I use a BenQ PD2700Q monitor in Srgb mode powered by a Quadro P400 10bit card. So I set up for calibration, Did room ambient light test and then hung it on the monitor. You will need to tilt monitor back as far as you can go to get the puck to lay flat on the screen. So after a bit of settings changes ie Colour temp. I hit calibrate. Screen flashes a while then does a few tests of colour swatches then told me to reduce my Brightness to match a figure on a bar that pops up on screen. So I dropped to 28% brightness and to all intense and purposes and 20 minutes later that was it. Calibrated. Now I have the Pro version of the software and to be honest I was not impressed. I wonder what the basic software is like. So maybe I won the monitor lottery and my BenQ was almost perfect with factory calibration. maybe, but I had this feeling so I went online and did a search for calibrate my monitor etc. Pretty much every search I looked at said the same, Software is adequate but not ideal, Puck is brilliant. Which matches what reviews on Amazon say. So I downloaded Display Cal as this is recommended both on Amazon reviews and the internet reviews as The calibration software to use. So I did and what a difference its made. My gamma level was changed to 2 from 2.2 It then proceeded to run a huge amount of tests of colour swatches. Recalibrated profile on the fly as it made more tests and improved whatever it was improving. ( Im not a techie ) So after 57 minutes.. You read right 57 minutes of calibration I was done. The difference is huge and I'm looking at a screen that feels reborn. Screen shots are from display cal My monitor displays 105% of Srgb 80% of Adobe as factory spec. In conclusion. Buy the basic Spyder 5 it is brilliant, Get Display Cal and use that, Also give them 20 euros donation its worth every cent.
C**N
Je regrette de ne pas avoir acquis cette sonde d'étalonnage plus tôt depuis 8 ans que je développe mes photos numériques , je pensais que mon écran était fidèle dans la restitution des couleurs , hélas ce n'était pas le cas , toutes mes photos étaient trop jaunes avant étalonnage . La sonde est facile à utiliser , il existe de nombreux tutos bien faits , le rapport qualité/prix est bon et le délai de livraison correct . Après étalonnage le comparatif Avant / Après est édifiant , je pense que lorsque l'on a un écran de plus de 8 ans et fortement sollicité il est conseillé de refaire un étalonnage par mois . Je recommande cette sonde de qualité .
E**P
Found out about this product through my professor who swears by it and he has the Spyder 4 Pro. So I did my research and gave this version a go. What a monumental difference! This is the real deal and if you want to print your pictures or send them to a lab you should be editing with calibrated monitors. I have calibrated all my monitors for consistency and all my images across all my programs LightroomCC , PhotoshopCC, View NX-i and Capture NX-D look beautiful!!! Quick, simple and well worth it.
M**A
El Spyder5PRO me ha sorprendido la sencillez y la eficacia a la hora de calibrar los monitores. Ahora tengo los monitores calibrados y puedo trabajar los colores de las fotografias real y sin sorpresas. Incluso la vista la tengo mas relajada y sin fatigas.
Trustpilot
1 month ago
1 month ago