We remain fully operational. Our teams are working around the clock to ensure your deliveries continue safely.

DOWNLOAD THE APP


Customer Services
Copyright © 2025 Desertcart Holdings Limited
DOWNLOAD THE APP

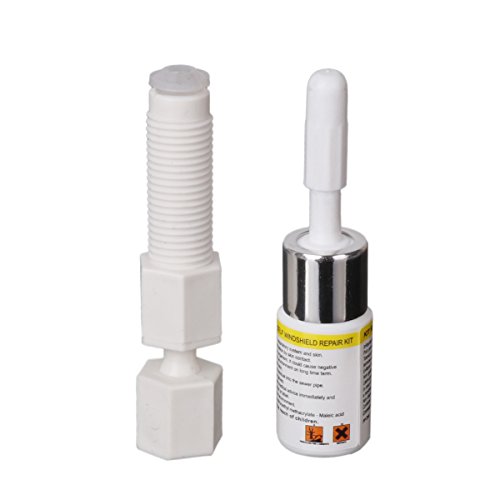
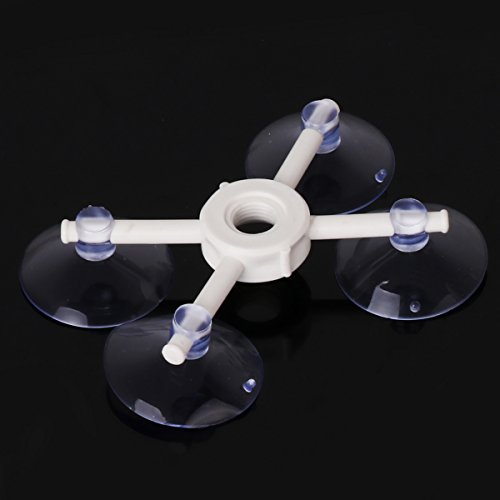
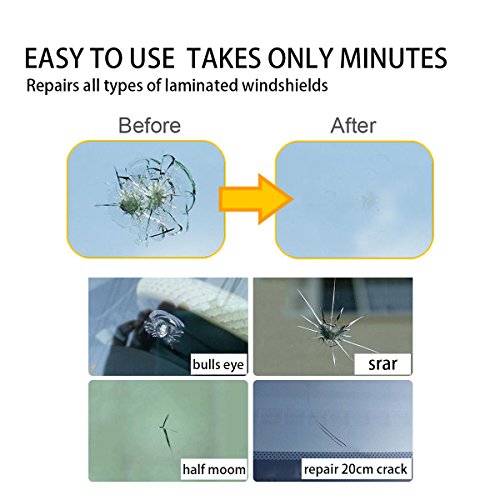


Set Include: 1x Repair Resin, 1x Repair Device, 5x Curing Strips, 1x Sleeved Razor Blade, 1 x Instruction Manual Condition: New without tag Material: ABS Note: 1. Avoid using in direct sunlight-work in shaded area. 2. Do not work on a hot windshield, park vehicle in shaded area and open windows to cool glass surface. 3. A safety razor is required to remove components and finsh repair. Caution: Do not let resin come in contact with painted surfaces. Windshield repair instructions: 1. Clean damaged area. 2. Mount seal to windshield, then remove backing from seal, peel backing from top side of adhesive seal. 3. Mount pedestal to adhesive seal. Line up pedestal with adhesive seal making sure tabs match up. Press pedestal to glass. 4. Place resin into pedestal, then connect injector to pedestal. 5. Lock plunger in vacuum position. Hold injector with one hand, pull plunger upward with the other hand. Lock plunger by engaging lower notch in plunger with spring clip. Release hands and allow device to remain in locked postion. 6. Fill injector with air. 7. Move plunger to pressure. Hold injector with one hand and rotate plunger releasing spring clip from lower notch. Depress plunger downward engage upper notch with spring clip. 8. Remove pedestal from glass. Loose outer edges of pedestal with a safety razor. 9. Pit Filling procedure. 10. Curing & finishing. Run safty razor lightly over clear film to vent out any air bubbles. Note: Ultra violet sun rays cure the resin. Park vehicle in direct sunlight for 15 minutes.
Trustpilot
2 days ago
2 weeks ago