


✨ Upgrade your kitchen vibes with Bombay Black brilliance! ✨
The Giani Countertop Paint Kit in Bombay Black offers a budget-friendly, eco-conscious way to transform outdated countertops into sleek, granite-look surfaces. This water-based acrylic kit covers up to 35 sq ft, dries to a durable high gloss finish in just one weekend, and works on a variety of countertop materials. Ideal for DIY enthusiasts seeking a stylish, washable, and low-odor solution to elevate their kitchen or bath space.
| Brand | Giani |
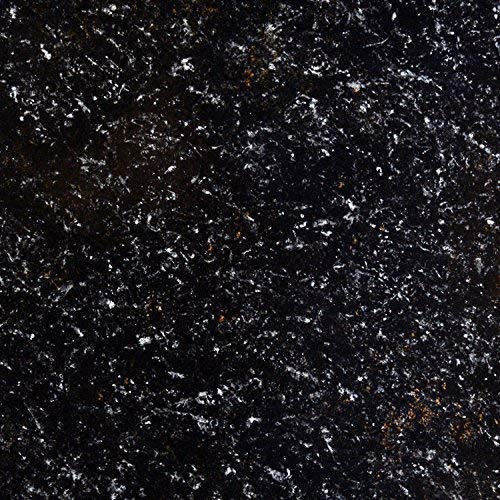
| Color | Bombay Black |
| Finish Type | Gloss |
| Size | 1 Count (Pack of 1) |
| Item Volume | 16 Fluid Ounces |
| Special Feature | Washable |
| Unit Count | 1.0 Count |
| Paint Type | Acrylic |
| Specific Uses For Product | Countertop |
| Surface Recommendation | Tile |
| Indoor/Outdoor Usage | Indoor |
| Item Form | Aerosol |
| Included Components | 16 oz. Glitter Topcoat, 4" Giani Paint Sponge, 6 oz. Black Onyx Mineral, 12 oz. IronCore Primer-Base Coat, 6 oz. Pearl Mica Mineral, 4 oz. Bronze Mineral, 6" Giani Roller Arm and 2 Roller Pads, Brush, Practice Board |
| Age Range (Description) | Adult |
| Is Waterproof | False |
| Model Name | Paint |
| Package Information | Can |
| Color Code | '#000000' |
| Full Cure Time | 16 Hours |
| Coverage | 35 square feet |
| Water Resistance Level | Water Resistant |
| UPC | 891056001338 |
| Global Trade Identification Number | 00891056001338 |
| Manufacturer | Giani, Inc. |
| Dry Time In Hours | 12 |
| Part Number | FG-GI BOMBAY |
| Item Weight | 5.2 pounds |
| Product Dimensions | 11.22 x 4 x 11.5 inches |
| Item model number | Countertop |
| Is Discontinued By Manufacturer | No |
| Finish | Gloss |
| Material | Water Based |
| Item Package Quantity | 1 |
| Number Of Pieces | 5 |
| Special Features | Washable |
| Batteries Included? | No |
| Batteries Required? | No |
B**Y
Brightened up my black formica!!!!
First off, this was by far the scariest DIY I have ever done, because let's be honest, its quite permanent! So, I will include the black formica picture I had originally in the kitchen, and then the Sicilian Sand transformation. I really wish I would have found this paint a long time ago. Now that I have lighter counter tops, the whole kitchen/dining is getting a face lift! I built my house in 2010 and dark trim and accents were really "in". Well, at least I thought dark was in. I started this process on a Thursday evening and did not use my counter tops again, until Sunday evening. So PLAN AHEAD! This is definitely a process, but totally worth it. I started with my island and have yet to the do the L-shape around the back of the kitchen by the stove and sink. I figured if I completely messed it up, I could just replace that island piece (because if I had money for new counter tops I would have bought them). So Thursday night around 8pm, I used an SOS pad and scrubbed the countertop really well. I wiped it down with a wet paper towel twice, then a dry one after that. I put the black primer on with the roll brush provided, and wa'laa. Let that dry until Friday night, then I started with the colors. So nervous. HINT: if you want more a tan countertop use the tan and gold colors more concentrated and then accent with the white. I was a tad nervous so I didn't really apply the tan/gold like I should have. Therefore my counter tops look whiter than I would have liked them to be, but I can really focus on the tan for the L-shape I have yet to do ( I don't think the different shade will look all that bad). Some people's islands are a completely different color on purpose! Ha, the "in" thing. I will say that it is hard to go back in steps. Meaning, if you have more black showing than you would like at the end, it looks weird to go back over the white color with the tan. Cut the sponge like it says and use the rough side! The sponge was really hard to cut, maybe my scissors weren't sharp enough, but I struggled to get 3 even pieces. Anyways, I twisted my hand and wrist as I dabbed the paint on, so there wasn't a pattern. All the colors can go on one after the other. Then you let that dry (I let mine overnight). HINT: I put NOTES all over the kitchen, because I would be the first person to put something on the counter!! The next morning, I got 600 sand paper and sanded it about 3 times! I would sand and then vacuum the counter top, and repeat. There will be places a tad higher in paint and you really want those to be level with the rest of the paint. I think the sanding made the paint look more natural too. I applied the poly. It was so easy to apply with the roller. Like when you paint a wall, make sure the roller evenly spreads the poly so you don't get more gloss in an area. I did 3 coats (which they say is MAX), 2 is recommended. I can see in one spot on my counter where the poly wasn't even and the shine is more dull there, but I can live with it. (in the 4th picture you can see the horizontal less shiny part). The surface after the last poly has dried, is not completely smooth/flat (tried to include that texture in the 5th picture) It has a bit of a texture, but doesn't bother me a bit. Then we went out of town for the weekend, through Monday night. 3 days to cure!!!!! Got back that evening, and I have been using the counters the last 2 weeks, and I still walk in the kitchen forgetting how much I love them. I have set all of my appliances, pots and pans, cutting boards, etc down on the counter, and they are solid and no scratches! I can't wait to do the L-shape!My best piece of advice, give yourself time. I am not a DIY expert but I do enjoy projects. Don't rush this one and you won't regret it. The instruction booklet is an easy step by step---simple. The sponges and rollers clean up really easily with warm water. Note: I do not have a formica backsplash, I took it out a few years ago when we got a tile back splash, so I cannot comment at all on how easy/hard it is to do the 3 inch back splash. GOOD LUCK, I don't think you will regret buying this product. Also, I found this product at Home Depot, and it was $1 more, so if you have Amazon Prime, buy it here!!!!
E**8
Awesome, low-cost solution
This is SO EASY to use! Our old house had solid off-white, low-quality laminate counters that were original to the house (1988) and they were just ugly. I wanted to make the kitchen look better, but I didn't have a lot of money. After hearing about this product and reading tons of online reviews, I gave it a shot. It's amazing how well this worked! I had more than enough in one kit to do our bathroom counter as well as the kitchen (granted, neither had much counter space). We also painted the cabinets (with Nuvo paint in the kitchen) and the walls in both rooms for thorough makeovers, and the results were amazing! The bathroom was the nicest room in the house - the counters looked fantastic. This product is time-consuming, but extremely easy to use. When we sold the house a couple of years after updating the kitchen and bath, the realtor couldn't believe the countertops had been painted and not replaced entirely. The bathroom counter came out nicer than the kitchen, but that's all on me. I wanted a counter with more brown in it in the bathroom, and more white in the kitchen. I had a hard time getting the effect I wanted in the kitchen, but I also didn't take as much time with it as I should have. I always cleaned it with a mixture of vinegar and water using a paper towel or a washcloth, and I didn't have any issues with it.These aren't complaints about the product itself, but rather a couple of observations/notes --. Be patient. This will take a very long time, especially if you have a lot of counter to paint. It took me a whole weekend to do each room, but most of that is drying/curing time. Obviously sponging the colors on is the most hands-on part of it - don't rush through it, or it'll look bad. And follow the instructions for drying/curing times to make sure everything sets.. Note that you're not really supposed to use the counters for a while (two weeks maybe? It's been a while, so I forget) after finishing the project, to allow the paint time to cure. I wasn't concerned about the bathroom because we don't put anything heavy on it, but for the kitchen, I did it the weekend before we left for vacation, so the house was empty and the counters weren't used for 10 days or so.. Test out the technique before you commit to anything. I practiced for the bathroom, and it came out great, but for the kitchen, I just figured i already knew what I was doing after having done the bathroom. I wish I'd practiced more before diving in. Really, I wish I'd painted over the whole black primer coat with white acrylic before sponging on the other colors, because I ended up having a lot more black showing than I'd wanted.. It's paint -- it WILL scratch/peel. You need to use a cutting board all the time, because even a slight nick in the paint can start peeling. We had some scratches and small places that began to peel, mostly from the cats jumping on/off of the counters. I used several more coats of the clear coat (and when I ran out, I just used clear acrylic paint, which didn't work nearly as well) to "fix" it.. Do not set hot pans on the finished product.
Trustpilot
2 days ago
4 days ago
