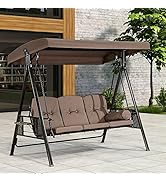


PURPLE LEAF 3-Seat Deluxe Outdoor Patio Porch Swing with Weather Resistant Steel Frame, Adjustable Tilt Canopy, Cushions and Pillow Included, Beige
Product ID: 168922621
Details
- BrandPURPLE LEAF
- ColorBeige
- Product Dimensions50.3"D x x
- Frame MaterialAlloy Steel
- Finish TypePowder Coated
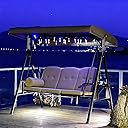
💡Extra solar lights
🪑3-person capacity
☀️UV resistant