🔥 Iron like a pro, untethered and unstoppable!
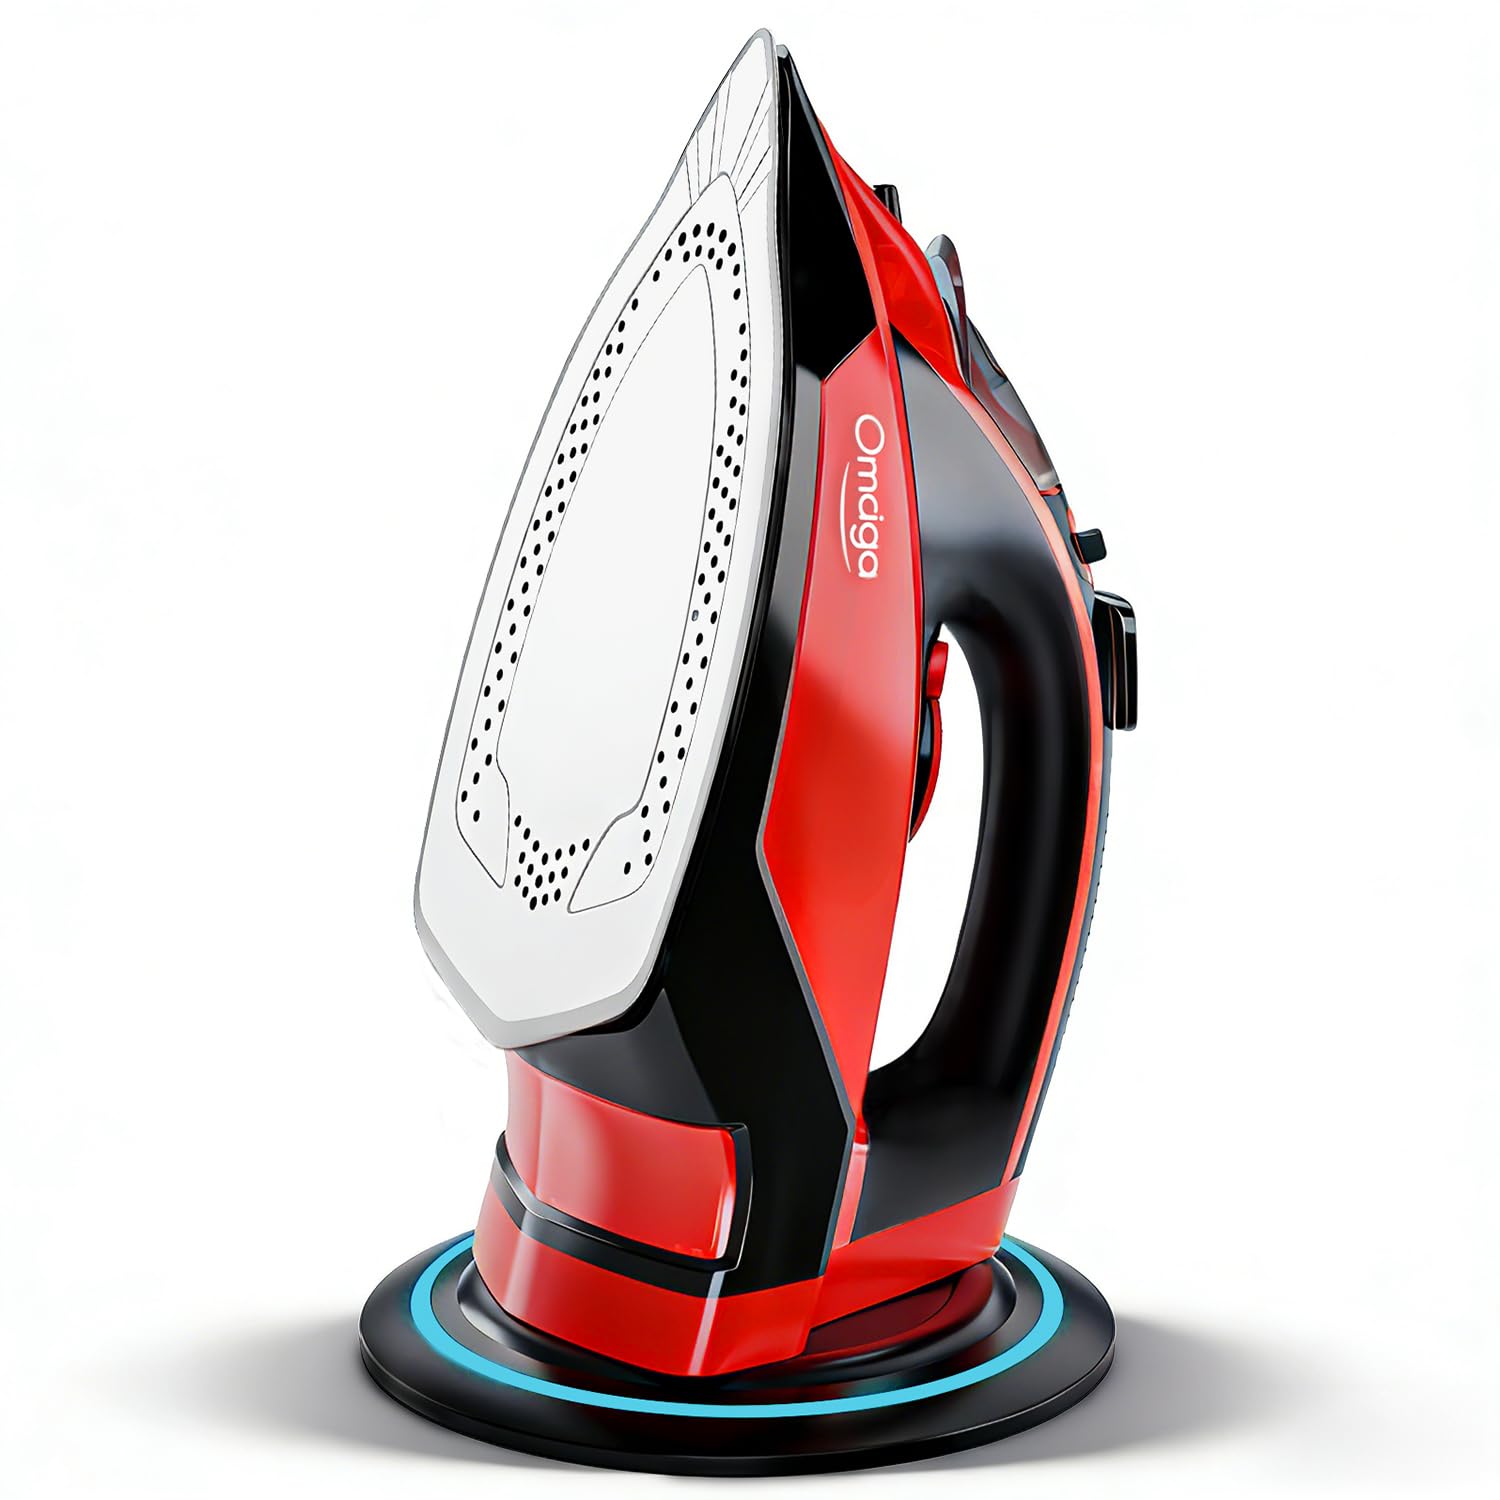
The OMAIGA Cordless Iron combines 1500W of powerful steam with a non-stick ceramic soleplate and a 350ml water tank, offering cordless convenience with rapid 25-second reheating. Its 360° docking base, auto shut-off, and anti-calc features ensure safety and durability, while three temperature settings and steam controls provide professional results on all fabrics.


| Best Sellers Rank | #28,842 in Home & Kitchen ( See Top 100 in Home & Kitchen ) #36 in Irons |
| Brand | OMAIGA |
| Color | Red |
| Customer Reviews | 4.0 out of 5 stars 2,886 Reviews |
| Product Dimensions | 11.4"L x 5.6"W |
| Recommended Uses For Product | 1) Filling the tank Before first use, remove all packaging, including the protective cover on the soleplate. Make sure the iron is not plugged in. Set the steam switch to off. Fill the water tank via the filling hole. To fill the tank with the maximum amount of water, we recommend the iron is tilted vertically whilst being filled. Do not overfill the iron otherwise it will cause leaking from around the filler cap and may run down the iron. WE RECOMMEND THE USE OF DEIONISED, DISTILLED OR DEMINERALISED WATER., 2) Charging base Plug in the charging base and switch on at the mains. The charging base power light will illuminate. Rest the iron on its heel on the charging base, ensuring that the heel connector meets the charging base connector. Connection is made when the power indicator light on the handle illuminates. Wait until the iron reaches the desired temperature, then commence ironing. Throughout your ironing session, the iron must be replaced onto the charging base every few seconds or whenever you adjust your garments, to keep the heat topped up., 3) Temperature Selection Set the temperature dial to the temperature required (see 'Temperature Guide'). The temperature indicator light will illuminate red until the required temperature is reached, then it will turn green. NOTE: It is normal for the temperature indicator light to flicker between red and green whilst the temperature cycles up and down during charging. Tip: We recommend the temperature indicator light is allowed to cycle red and green twice before you begin ironing. The temperature indicator light and the power indicator light will switch on and off whilst you are ironing and replacing the iron on the base., 4) Switching on the steam If required, switch on the steam using the steam switch. The amount of steam is automatically adjusted to suit the temperature selected., 5) Using the water spray For stubborn creases, use the water spray button. If using for the first time, you may need to press this a few times to pull the water through., 6) Steam boost Press the steam boost button for an extra steam burst for stubborn creases / heavy fabrics. NOTE: For optimum steam quality, do not operate the shot more than three times in succession. Recommended Uses For Product 1) Filling the tank Before first use, remove all packaging, including the protective cover on the soleplate. Make sure the iron is not plugged in. Set the steam switch to off. Fill the water tank via the filling hole. To fill the tank with the maximum amount of water, we recommend the iron is tilted vertically whilst being filled. Do not overfill the iron otherwise it will cause leaking from around the filler cap and may run down the iron. WE RECOMMEND THE USE OF DEIONISED, DISTILLED OR DEMINERALISED WATER., 2) Charging base Plug in the charging base and switch on at the mains. The charging base power light will illuminate. Rest the iron on its heel on the charging base, ensuring that the heel connector meets the charging base connector. Connection is made when the power indicator light on the handle illuminates. Wait until the iron reaches the desired temperature, then commence ironing. Throughout your ironing session, the iron must be replaced onto the charging base every few seconds or whenever you adjust your garments, to keep the heat topped up., 3) Temperature Selection Set the temperature dial to the temperature required (see 'Temperature Guide'). The temperature indicator light will illuminate red until the required temperature is reached, then it will turn green. NOTE: It is normal for the temperature indicator light to flicker between red and green whilst the temperature cycles up and down during charging. Tip: We recommend the temperature indicator light is allowed to cycle red and green twice before you begin ironing. The temperature indicator light and the power indicator light will switch on and off whilst you are ironing and replacing the iron on the base., 4) Switching on the steam If required, switch on the steam using the steam switch. The amount of steam is automatically adjusted to suit the temperature selected., 5) Using the water spray For stubborn creases, use the water spray button. If using for the first time, you may need to press this a few times to pull the water through., 6) Steam boost Press the steam boost button for an extra steam burst for stubborn creases / heavy fabrics. NOTE: For optimum steam quality, do not operate the shot more than three times in succession. See more |
| Special Feature | Cordless Iron, Self-Cleaning, Anti-Calc Function, Ceramic Soleplate, Scientific Steam Hole Distribution Special Feature Cordless Iron, Self-Cleaning, Anti-Calc Function, Ceramic Soleplate, Scientific Steam Hole Distribution See more |
| Wattage | 1500 watts |
S**T
great buy
so far i am happy with this buy. it's a dream having a cordless iron and its beautiful. the dial feels a bit cheap but overlooking that. two thumbs up!!!
L**R
Omaiga Iron
After several irons I purchased an Omaiga. It has adequate steam holes. There are several adjustments for steam you really don’t have to press the steam button that often it’s teams as you go; unless you get a wrinkle along the way. Doesn’t look like a fancy iron but it’s a hard working iron and ironing seems faster with its constant steam button. This iron heats up quickly. It recommend you start out with the lightest fabrics and increase the heat as you go. In other words start with silks and delicates, then go up to wool, then cotton. It’s best to gradually increase the heat rather than increase then decrease then increase, etc. so many times. A very good price for me on an iron. No problems yet with steam button or any leaking. I think I have finally found a good iron.
A**Y
No Good
I saw this and thought what a great idea. Sadly there isn't a battery in the iron apparently because as soon as you take it off the base to use it, it gets cold! Couldn't even iron a t-shirt....
A**E
Iron ot Out
I ordered this product because of the sleek design and size. The quality of the iron is wonderful yet the reason it has 4 stars is because it leaks water from time to time. The iron outperforms itself because it has great stream pressure and gets the wrinkles out of clothes and curtains. Product worth a try just watch for the water leak.
Y**A
Calidad precio excelente 👌
Esta plancha Me encantó relación precio me pareció espectacular la recomiendo 100% y la volvería a comprar no te vas a arrepentir
I**L
Disappointed
I was really excited to get this iron it’s really nice but what I liked most was that it’s wireless unfortunately for ironing it’s not that great it cools down fast so I have to keep putting it back on the holder so it could reheat making it time consuming to iron a piece of clothing other than that it isn’t too heavy which is great it holds a good amount of water and produces good steam when it’s hot but not for long
F**S
Planchadora para planchar tu ropa
Excelente producto, no necesitas el cable para planchar se calienta y luego lo puedes conectar otra vez, es fácil de usar.
S**.
An awesome product
Excellent 😎
Trustpilot
1 month ago
2 weeks ago


