
Desert Online General Trading LLC
Dubai, United Arab Emirates
Desert Online General Trading LLC
Dubai, United Arab Emirates


⚡ Elevate your DIY scale game with precision that commands attention!
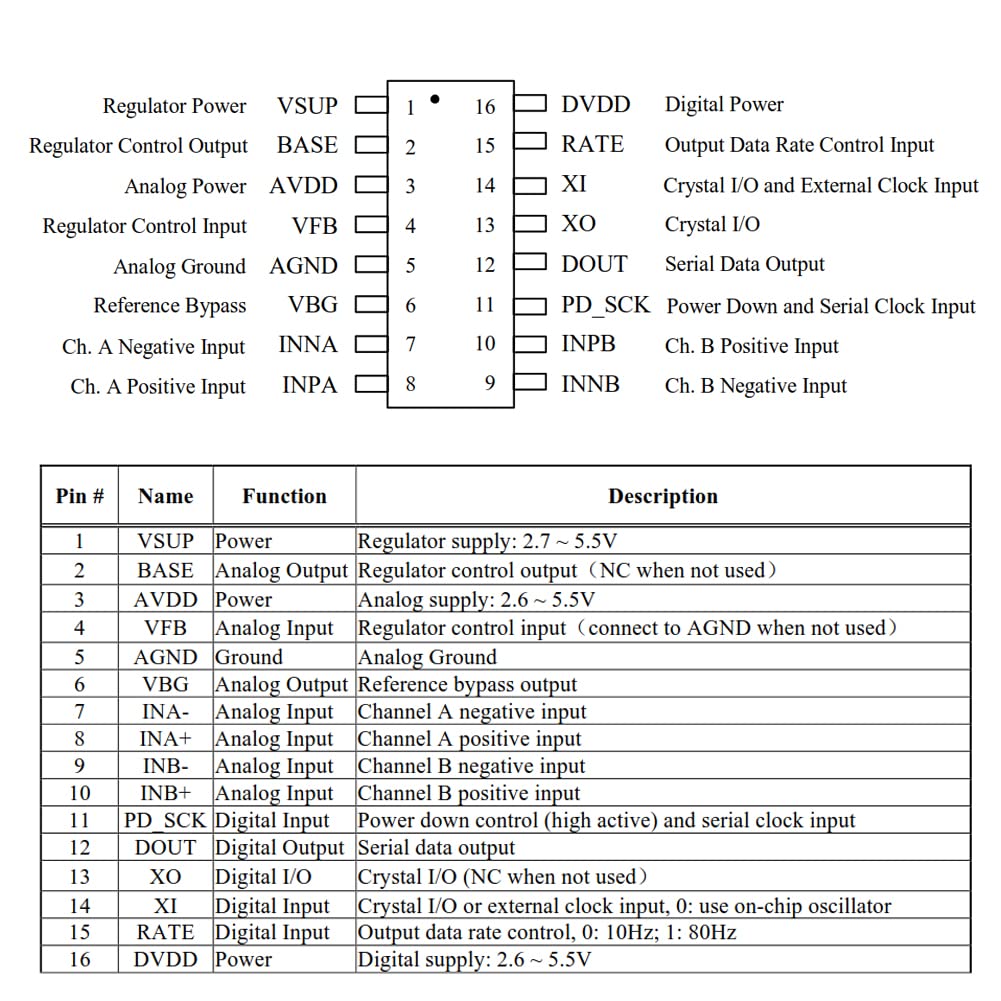
The ShangHJ 2 Sets Digital Load Cell Weight Sensor kit includes two 10kg capacity load cells paired with HX711 24-bit ADC modules, designed for high-precision weight measurement. Compatible with Arduino and Raspberry Pi, it features low-noise amplification, selectable gain settings, and easy wiring for seamless integration into portable electronic scales or custom weighing projects.
Trustpilot
2 months ago
1 month ago
5 days ago
1 month ago