Customer Services
Copyright © 2025 Desertcart Holdings Limited
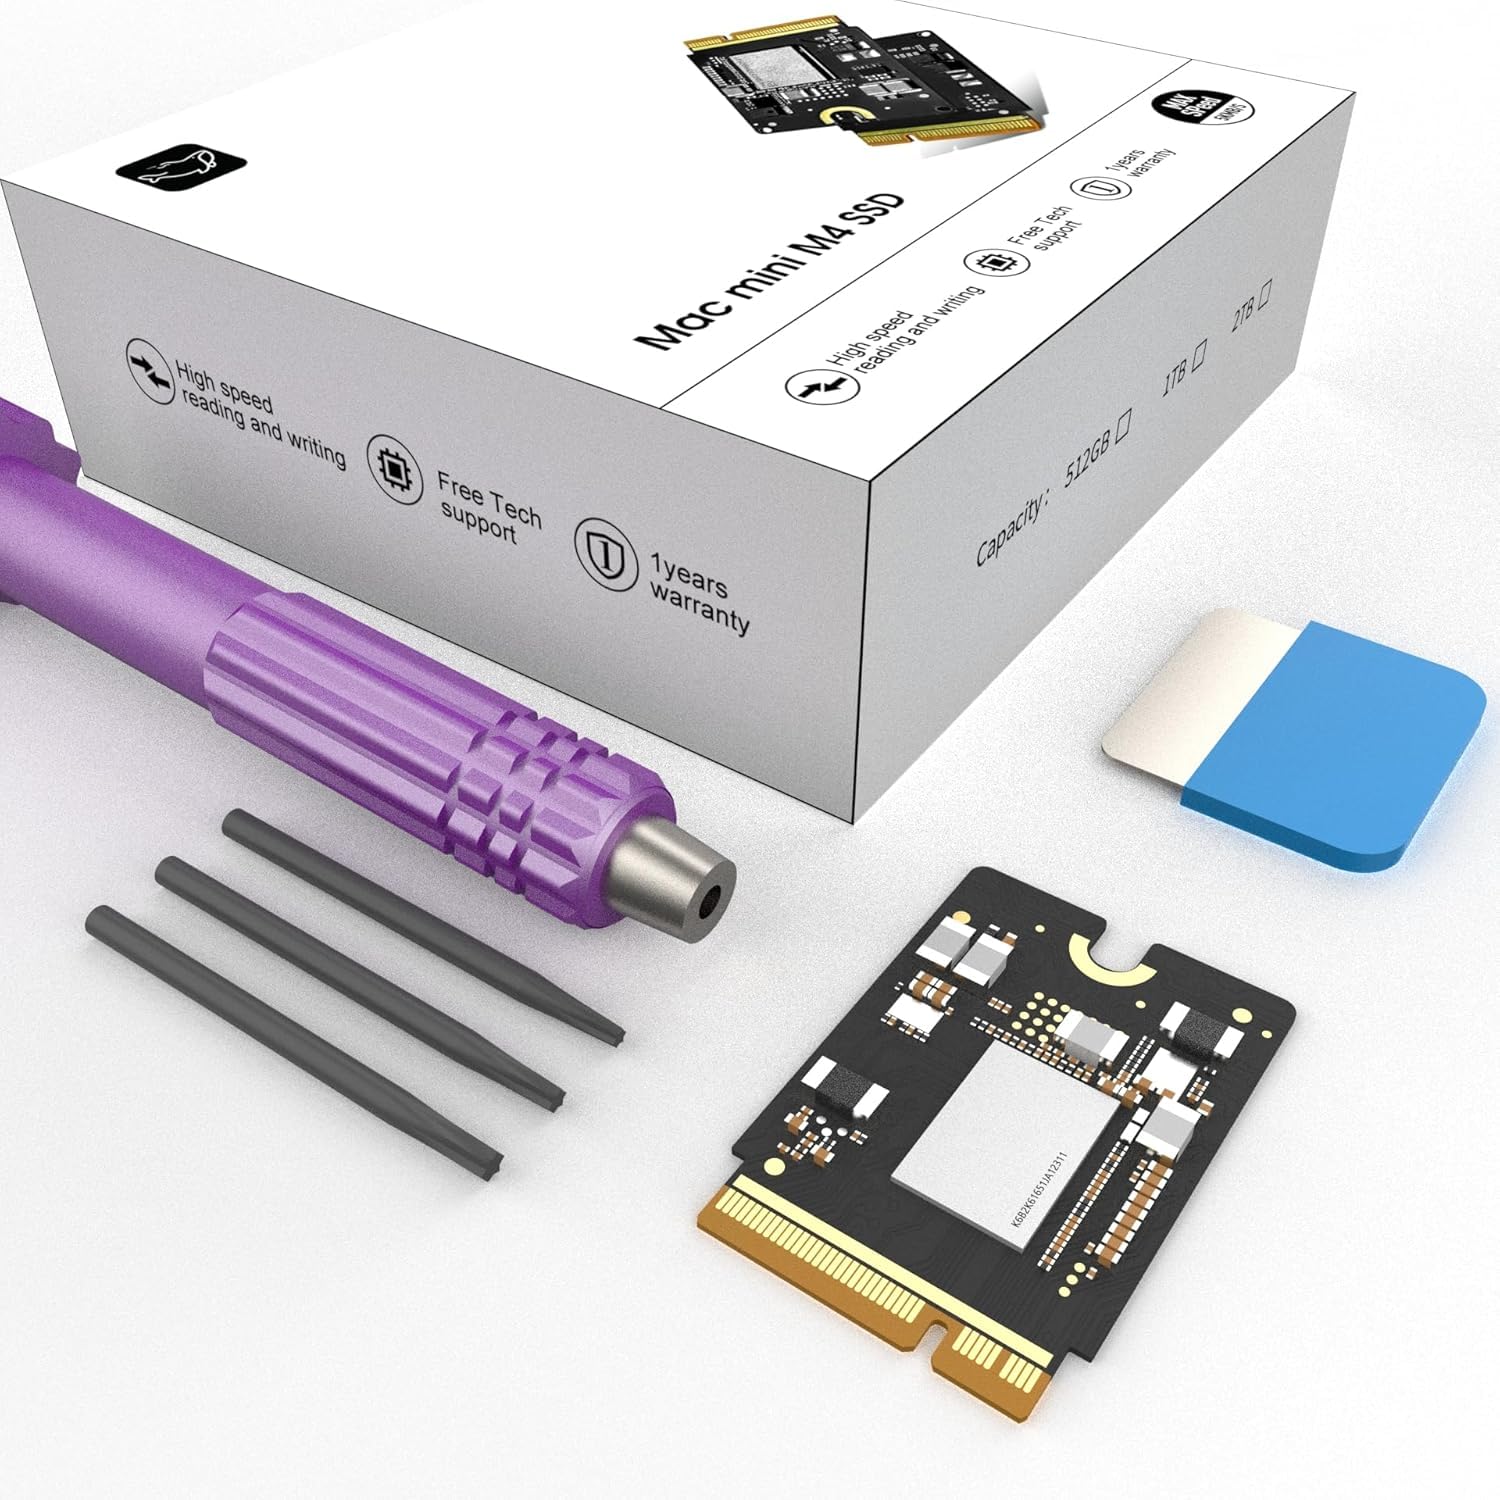

🚀 Upgrade your Mac Mini M4 to pro-level speed and storage—don’t get left behind!
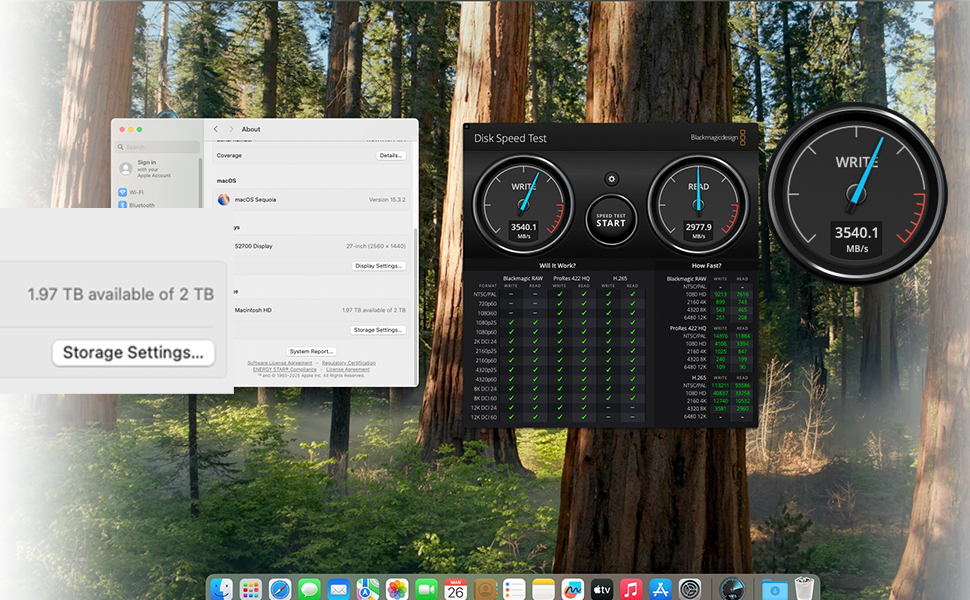
The sbaceflay Mac mini M4 SSD 1TB Hard Disk Upgrade DIY Kit is a precision-engineered storage expansion solution that quadruples your Mac Mini M4’s capacity. With blazing read/write speeds up to 3300 MB/s and a proprietary M4 NVMe form factor, it offers seamless plug-and-play installation and proven reliability through rigorous testing—perfect for creative professionals and power users seeking a fast, durable upgrade.

| ASIN | B0F2LQN5XF |
| Best Sellers Rank | #280 in Internal Hard Drives |
| Brand | sbaceflay |
| Built-In Media | macmini m4 ssd |
| Color | Black |
| Compatible Devices | Mac Mini M4 |
| Customer Reviews | 4.0 out of 5 stars 50 Reviews |
| Data Transfer Rate | 3300 Megabytes Per Second |
| Enclosure Material | Plastic |
| Hardware Interface | eSATA |
| Hardware Platform | ARM |
| Manufacturer | sbaceflay |
| Material | Plastic |
| Memory Storage Capacity | 1 TB |
| Supported Devices Quantity | 1 |
| UPC | 726899873425 |
| Unit Count | 1.0 Count |
| Warranty Description | 1 |
R**Y
Money saver
Installed really easy into the Mac mini. M4 works great nice and quick love it.
W**T
Works great, faster than the original Apple SSD
October 2025 update: Still very happy with my choice. It's been working fine for months now with no issues. I would definitely buy from this company again. Works great, and still going strong after a month. Following iFixit and other YouTubers' instructions worked well for me. No problems getting into the case, but I did have the help of an iFixit kit that includes spudgers and guitar picks to pop the bottom shell open. Once you get past that (without any scrape marks!), it's pretty easy. I did not need to pull away any of the connectors, like some people do with the power switch. That little connector is very fragile, and does not pull away laterally the way most people would think it works. It needs a gentle upward tug. When you put it back on again, press down from above, and don't try to slide it in. I watched one YT'er break his on camera because he pulled in the wrong direction, so be very careful if you decide to remove yours. I'm extremely pleased with the extra speeds I'm getting, and very, very pleased with my new 2TB Mini!
K**N
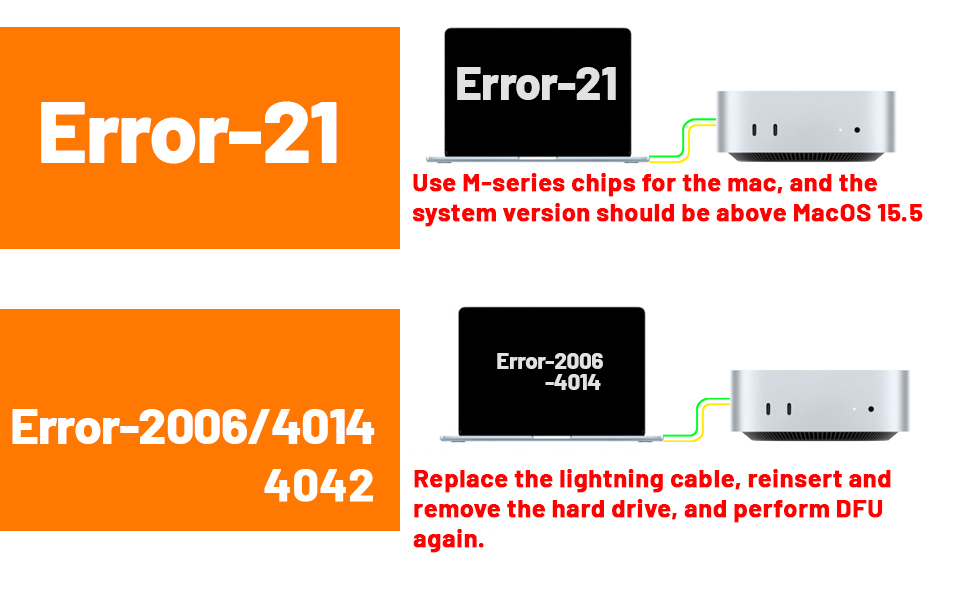
Error -21 despite multiple recovery attempts on multiple machines using multiple cables…
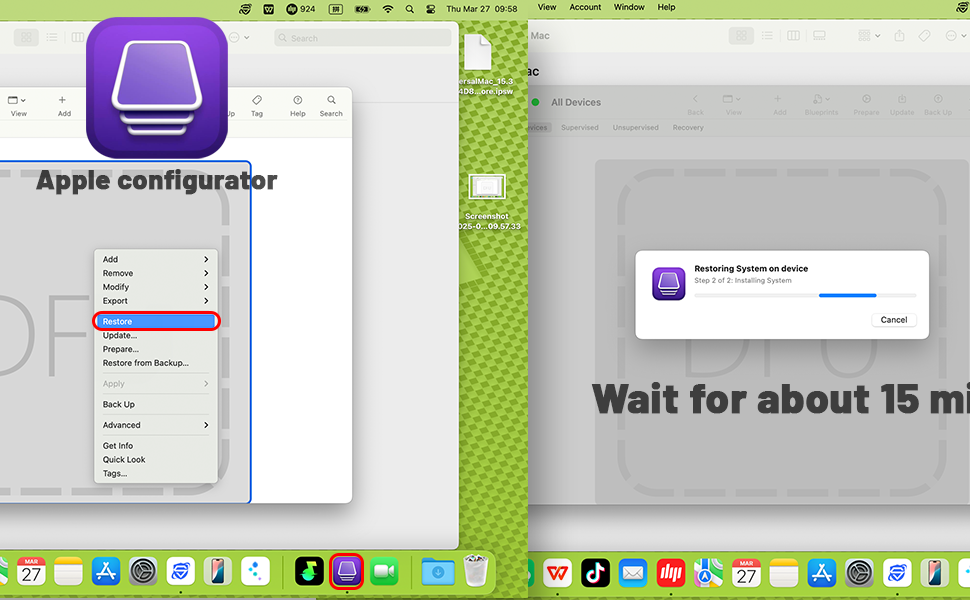
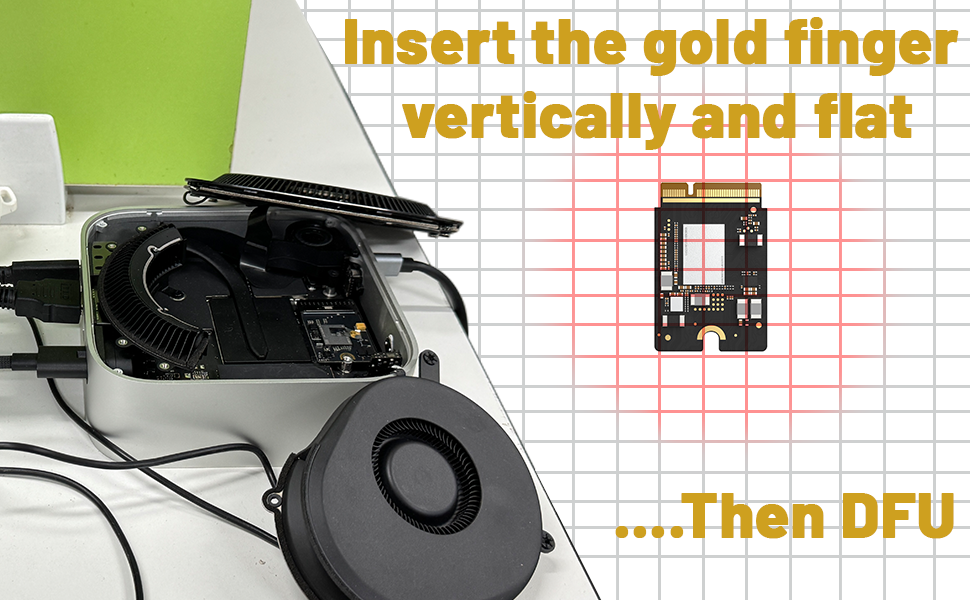
I would love to avoid paying Apple’s egregious storage tax on the M4 Mini (400 USD to upgrade a 500 dollar base machine to 2TB of storage?!), but unfortunately this wasn’t it. Looked up the procedure on iFixit, got the Jimmy, the guitar pick to pry the chassis open (and work around that fragile looking power button cable), the Torx T5 screwdriver to take the the bottom panel and the 2 bottom fan screws out, then the T3 to take the 2 top screws for the fan unit, slowly pried it open while leaving all the cables dangled, then the T8 to get the storage unit off. Swapped the original storage unit off, popped the new one on, put everything back together, plugged the rear middle USB-C port in, plugged the other end into my M4 MBA13, powered up MacMini, it went into DFU mode, and…nope. Error -21 (hardware error) despite multiple attempts. Tried an M1 Pro MBP14 or a 2019 Macbook Pro 16 i7 Touchbar. Also didn’t work. Tried an Apple USB-C cable…also nope. Tried a Thunderbolt 3 cable off a Belkin dock. Same Error -21. Even tried Apple Configurator for a restore and ran into the same results. Error -21 despite reseating the drive multiple times. Swapped the original Apple 256GB storage module back in, worked immediately and booted back into MacOS after a “select boot device” prompt. So it doesn’t look like it’s the Mini. Had to return the original to a Whole Foods location and get a refund since a product exchange was not an option here. Not sure if the device failed QA, or it’s a unit that failed and was returned previously, and not sure if I can trust purchasing another one…
D**6
Saved me so much
Works perfectly and save me so much money over the apple upgrade!
G**T
Will buy again
Working solid for 5+ months. Planning to buy another soon. Initial installation appeared faulty, however, all was fine after verifying electrical contact between main circuit board and disk circuit board. I suspect the contacts may be compromised if the disk circuit board mounting screw is too tight or too loose. We invested in a torque driver to set the Torx Plus 8IP screw to 0.65 Nm per Apple instructions.
J**E
EXCELLENT value and performances in general.
This is a good value and high performance SSD replacement for my Mac MINI M4. For some reason, the first SSD I receive did not work after running DFU. It kept showing an error and even if I tried to re-run the DFU process, it failed for at least 5 attempts. I've done this process a few times before so I'm pretty sure it was not user error. It appeared the first SSD I received was a lemon. However, once I contacted Amazon, the agent was able to ship me the replacement overnight (again), and the 2nd SSD I got worked instantaneously. In summary, this purchase was a a sound investment to upgrade your M4's storage. However, be sure that you follow the installation steps (from You Tube) carefully. Also, there is NO need to remove the power ribbon cable nor the fan cable at all. You just need to be cautious when you lift up the lid. I highly recommend this SSD for anyone who owns a Mac Mini M4. I got a lemon (DOA) initially, and had to wait for the replacement. Hence I remove 1 star but the replacement worked flawlessly. This is something to keep in mind.
S**E
Maybe not for the faint of heart, but this is an incredible value compared to buying from Apple!
Why did you pick this product vs others?: I was nervous about installing this, and there were some issues during the install. It took me a few tries before I found a thunderbolt 4 cable to update the firmware from my other Mac. Failed 3 times before I made the switch. But once I had the right cable it updated flawlessly. My New 2TB SSD is faster than the original and has more storage space than I need. Maybe not for the faint of heart, but this is an incredible value! Watch several of the YouTube videos and make sure you follow the instructions carefully!
J**D
Failed to initialize
Was excited to beat the egregious Apple storage upgrade tax. Tried several times with multiple Macs, USB-C cables, even different firmware versions. DFU failed every time. Error code 21 is a hardware failure. The Mac works fine with the stock SSD. I'll try again, because I am an expert at taking apart the Mac Mini M4 at this point. I wanted to request an exchange but the automated system only let me do a return. UPDATE: I did buy another SSD upgrade from another vendor on Amazon, and it’s working fine. Fired up on the first attempt. I think these just might have a high failure rate and minimal testing/QC by the vendors, so if you don’t have the patience to try a couple times, this project could be frustrating.
Trustpilot
2 weeks ago
5 days ago